Creating Pallets with Rules By Clients
In this example, we will work with product and shipment data to show how to use the improved standard pallet features in Quick Pallet Maker. QPM now allows the user to save full pallets in the way they will be shipped to customers, who may want configurations not available in the default box shipment calculation.
We start with an unordered specification in a spreadsheet, that includes the following information:
- SKU (product in a box) name
- SKU description
- Amount in an example shipment
- Product length
- Product width
- Product height
- Total products per pallet
- Product layers per pallet (Hi)
- Height of the full pallet
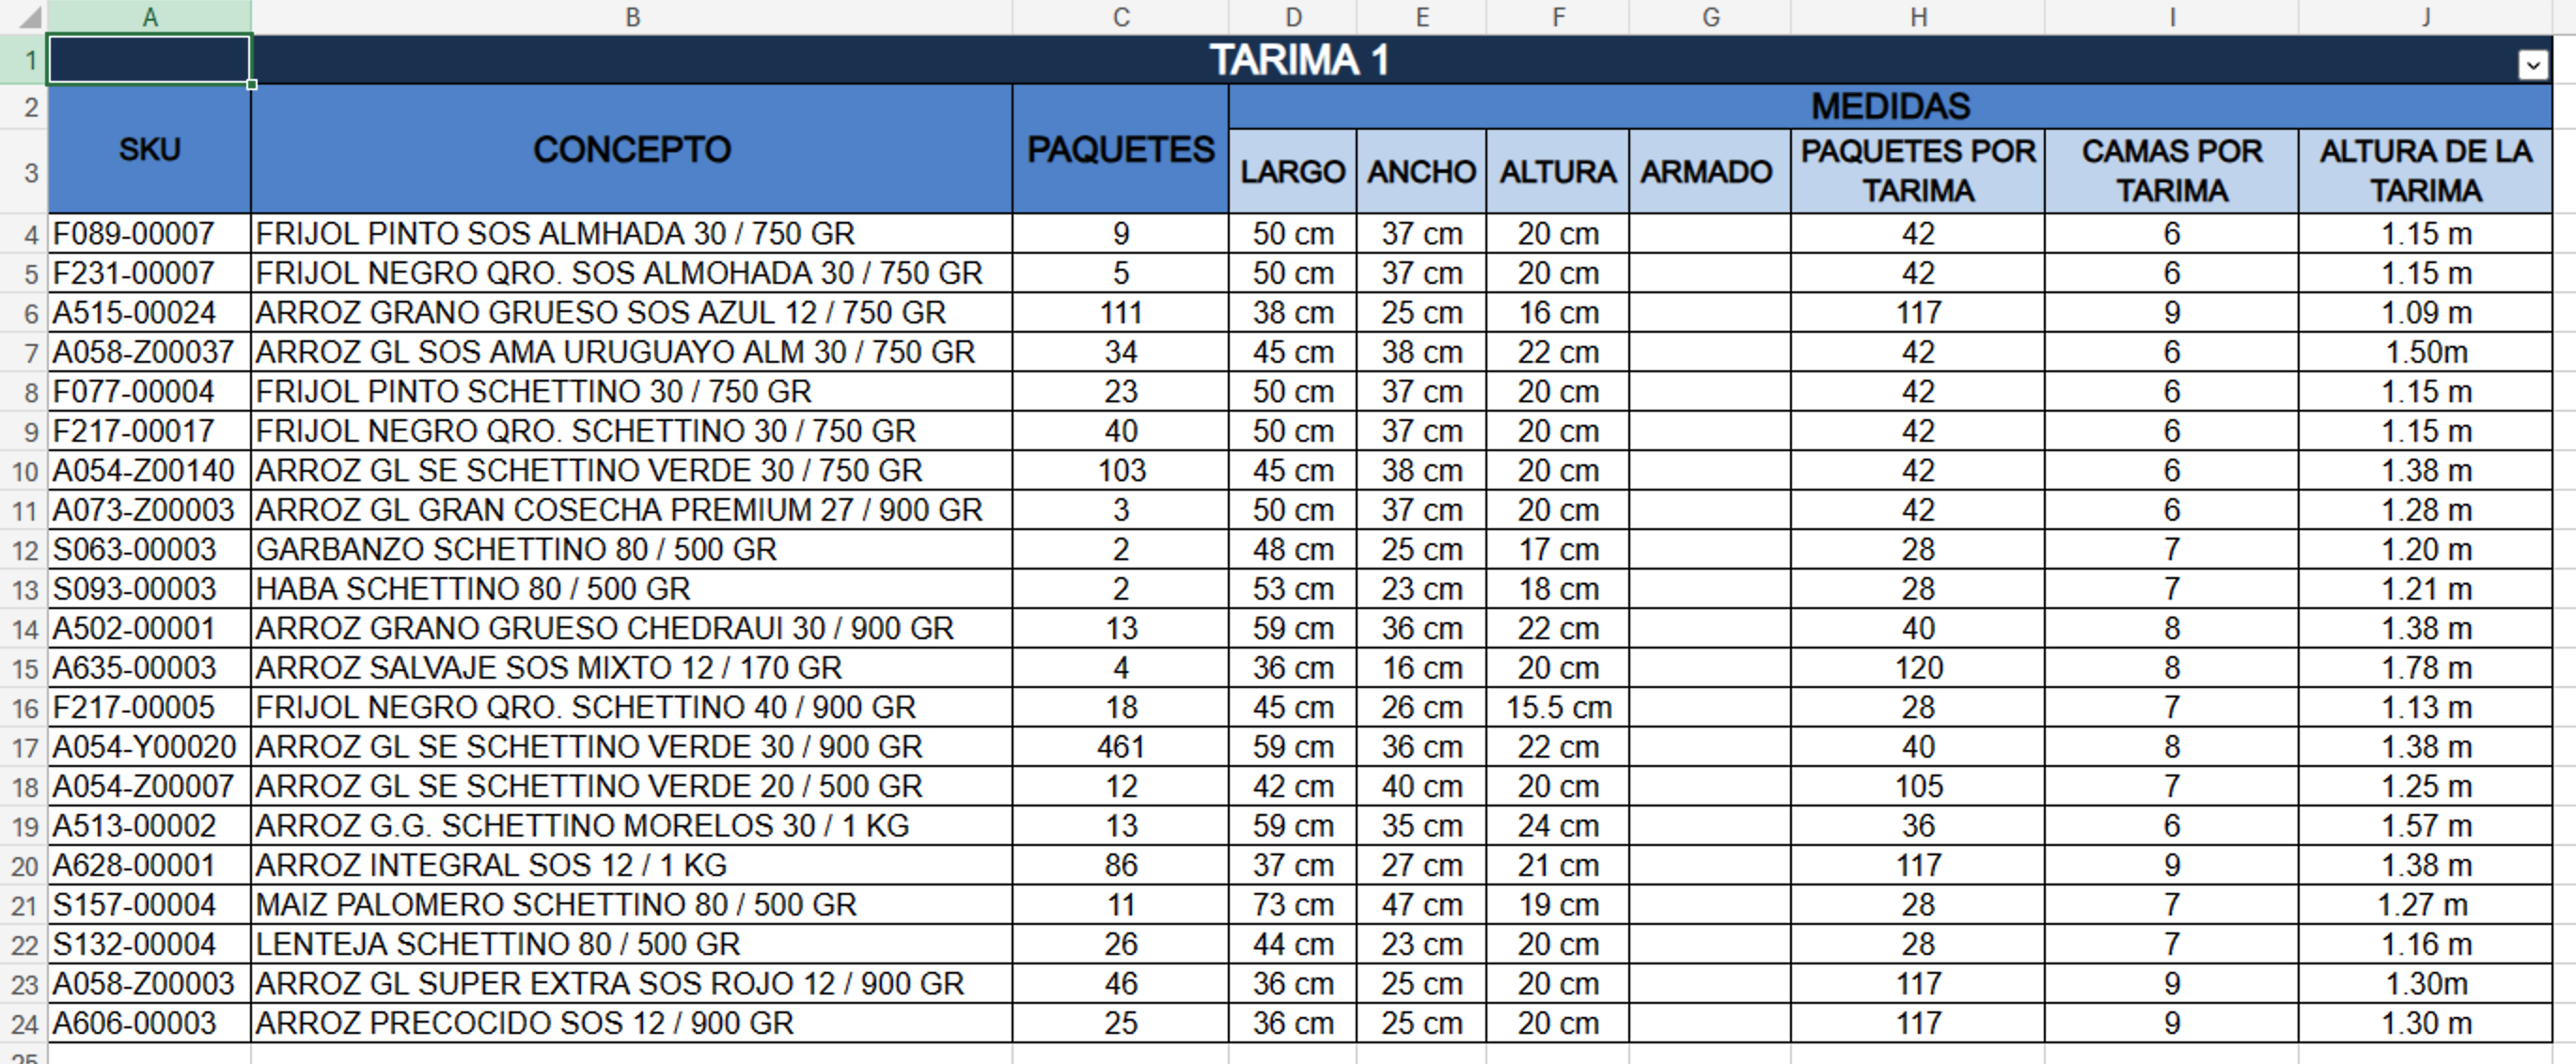
Raw customer data
First, we will take the data and create a table for copying and pasting the SKUs onto Quick Pallet Maker. The columns (below) are the usual ones for pasting boxes, except that we will add two columns for primary (Package) and secondary (Class) classifications.
- Unit (write 0 for mm/kg, 1 for cm/kg or 2 for inches/pounds).
- Type (fill this column with the value 1 assigned to boxes).
- Length.
- Width.
- Height.
- Weight.
- Color (hexadecimal web format)
- Amount: use any value here
- Code: the product identifier
- Description: longer product text
- Primary Class
- Secondary Class
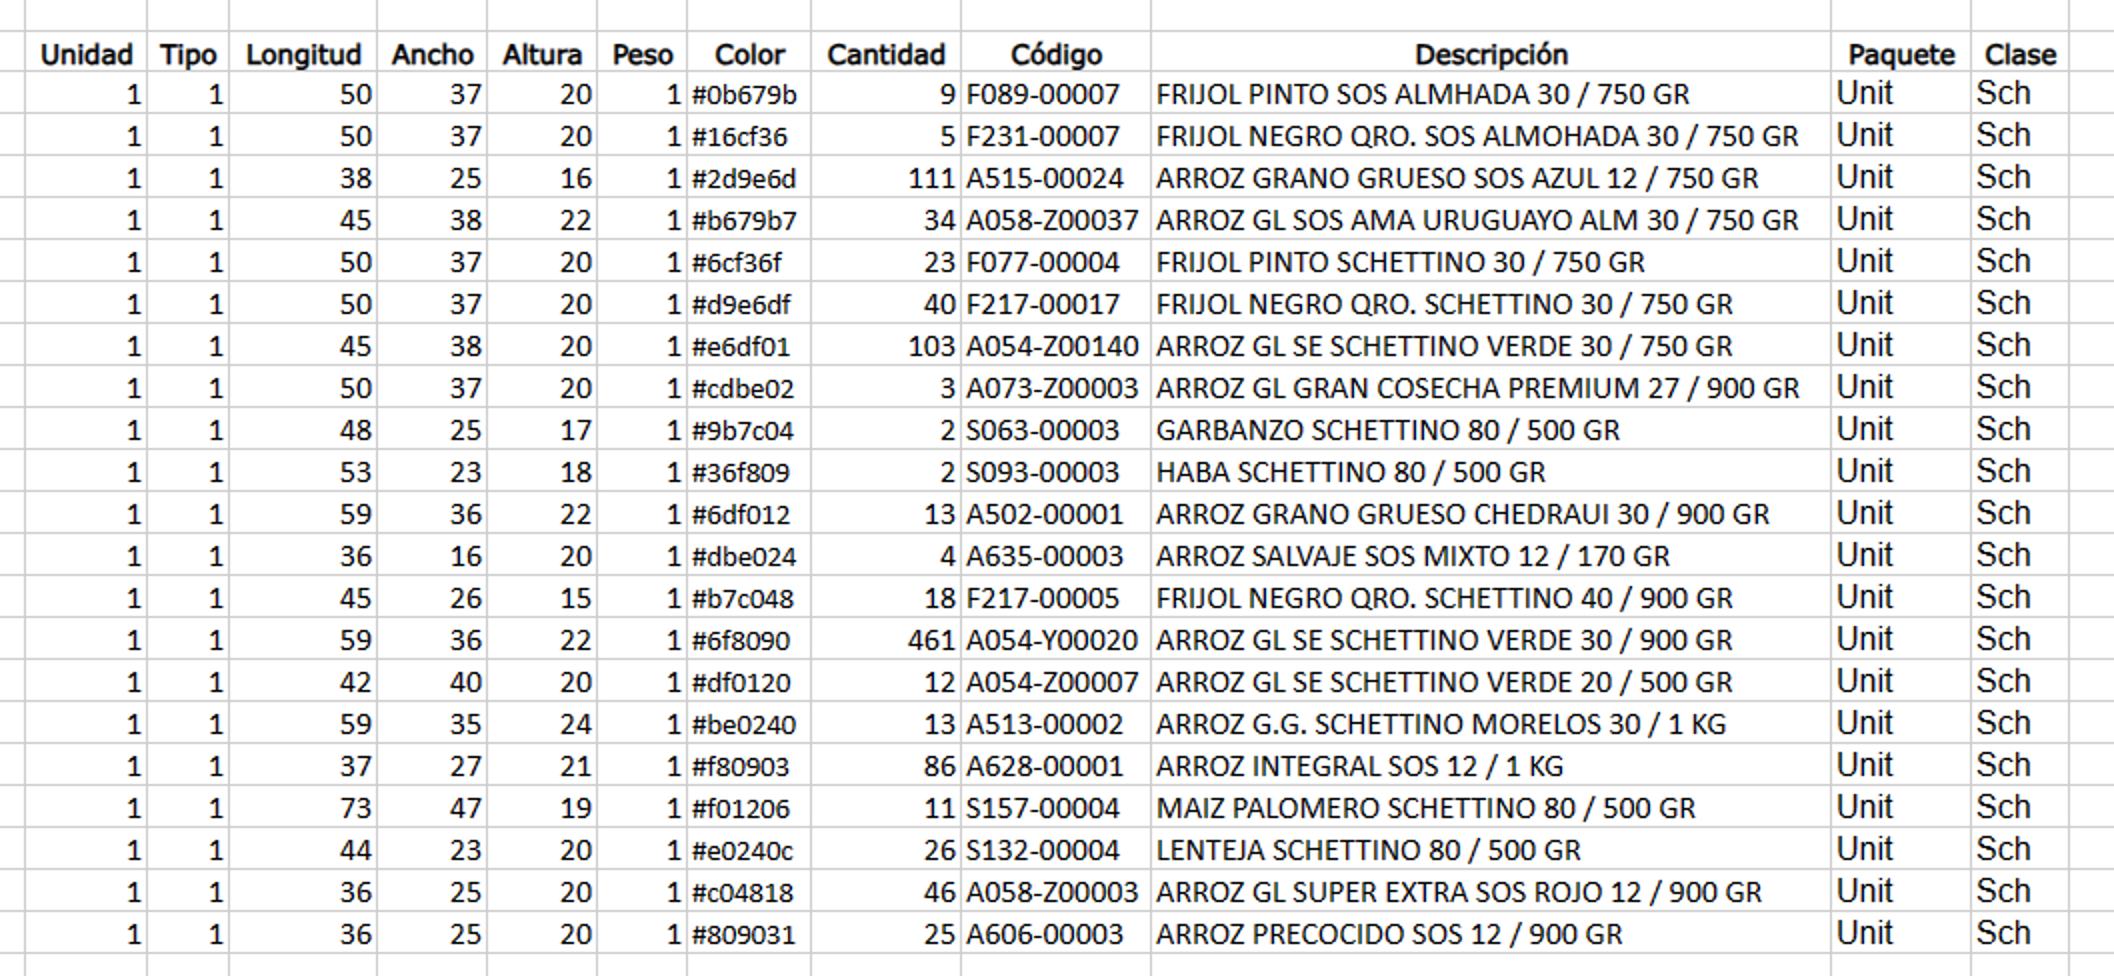
Data processed for Quick Pallet Maker
We run Quick Pallet Maker, select Window -> Standard Cases and Pallets and then click on the SKUs (last) tab. If there is data already there, we delete it by first removing the pallet data and then the box data.
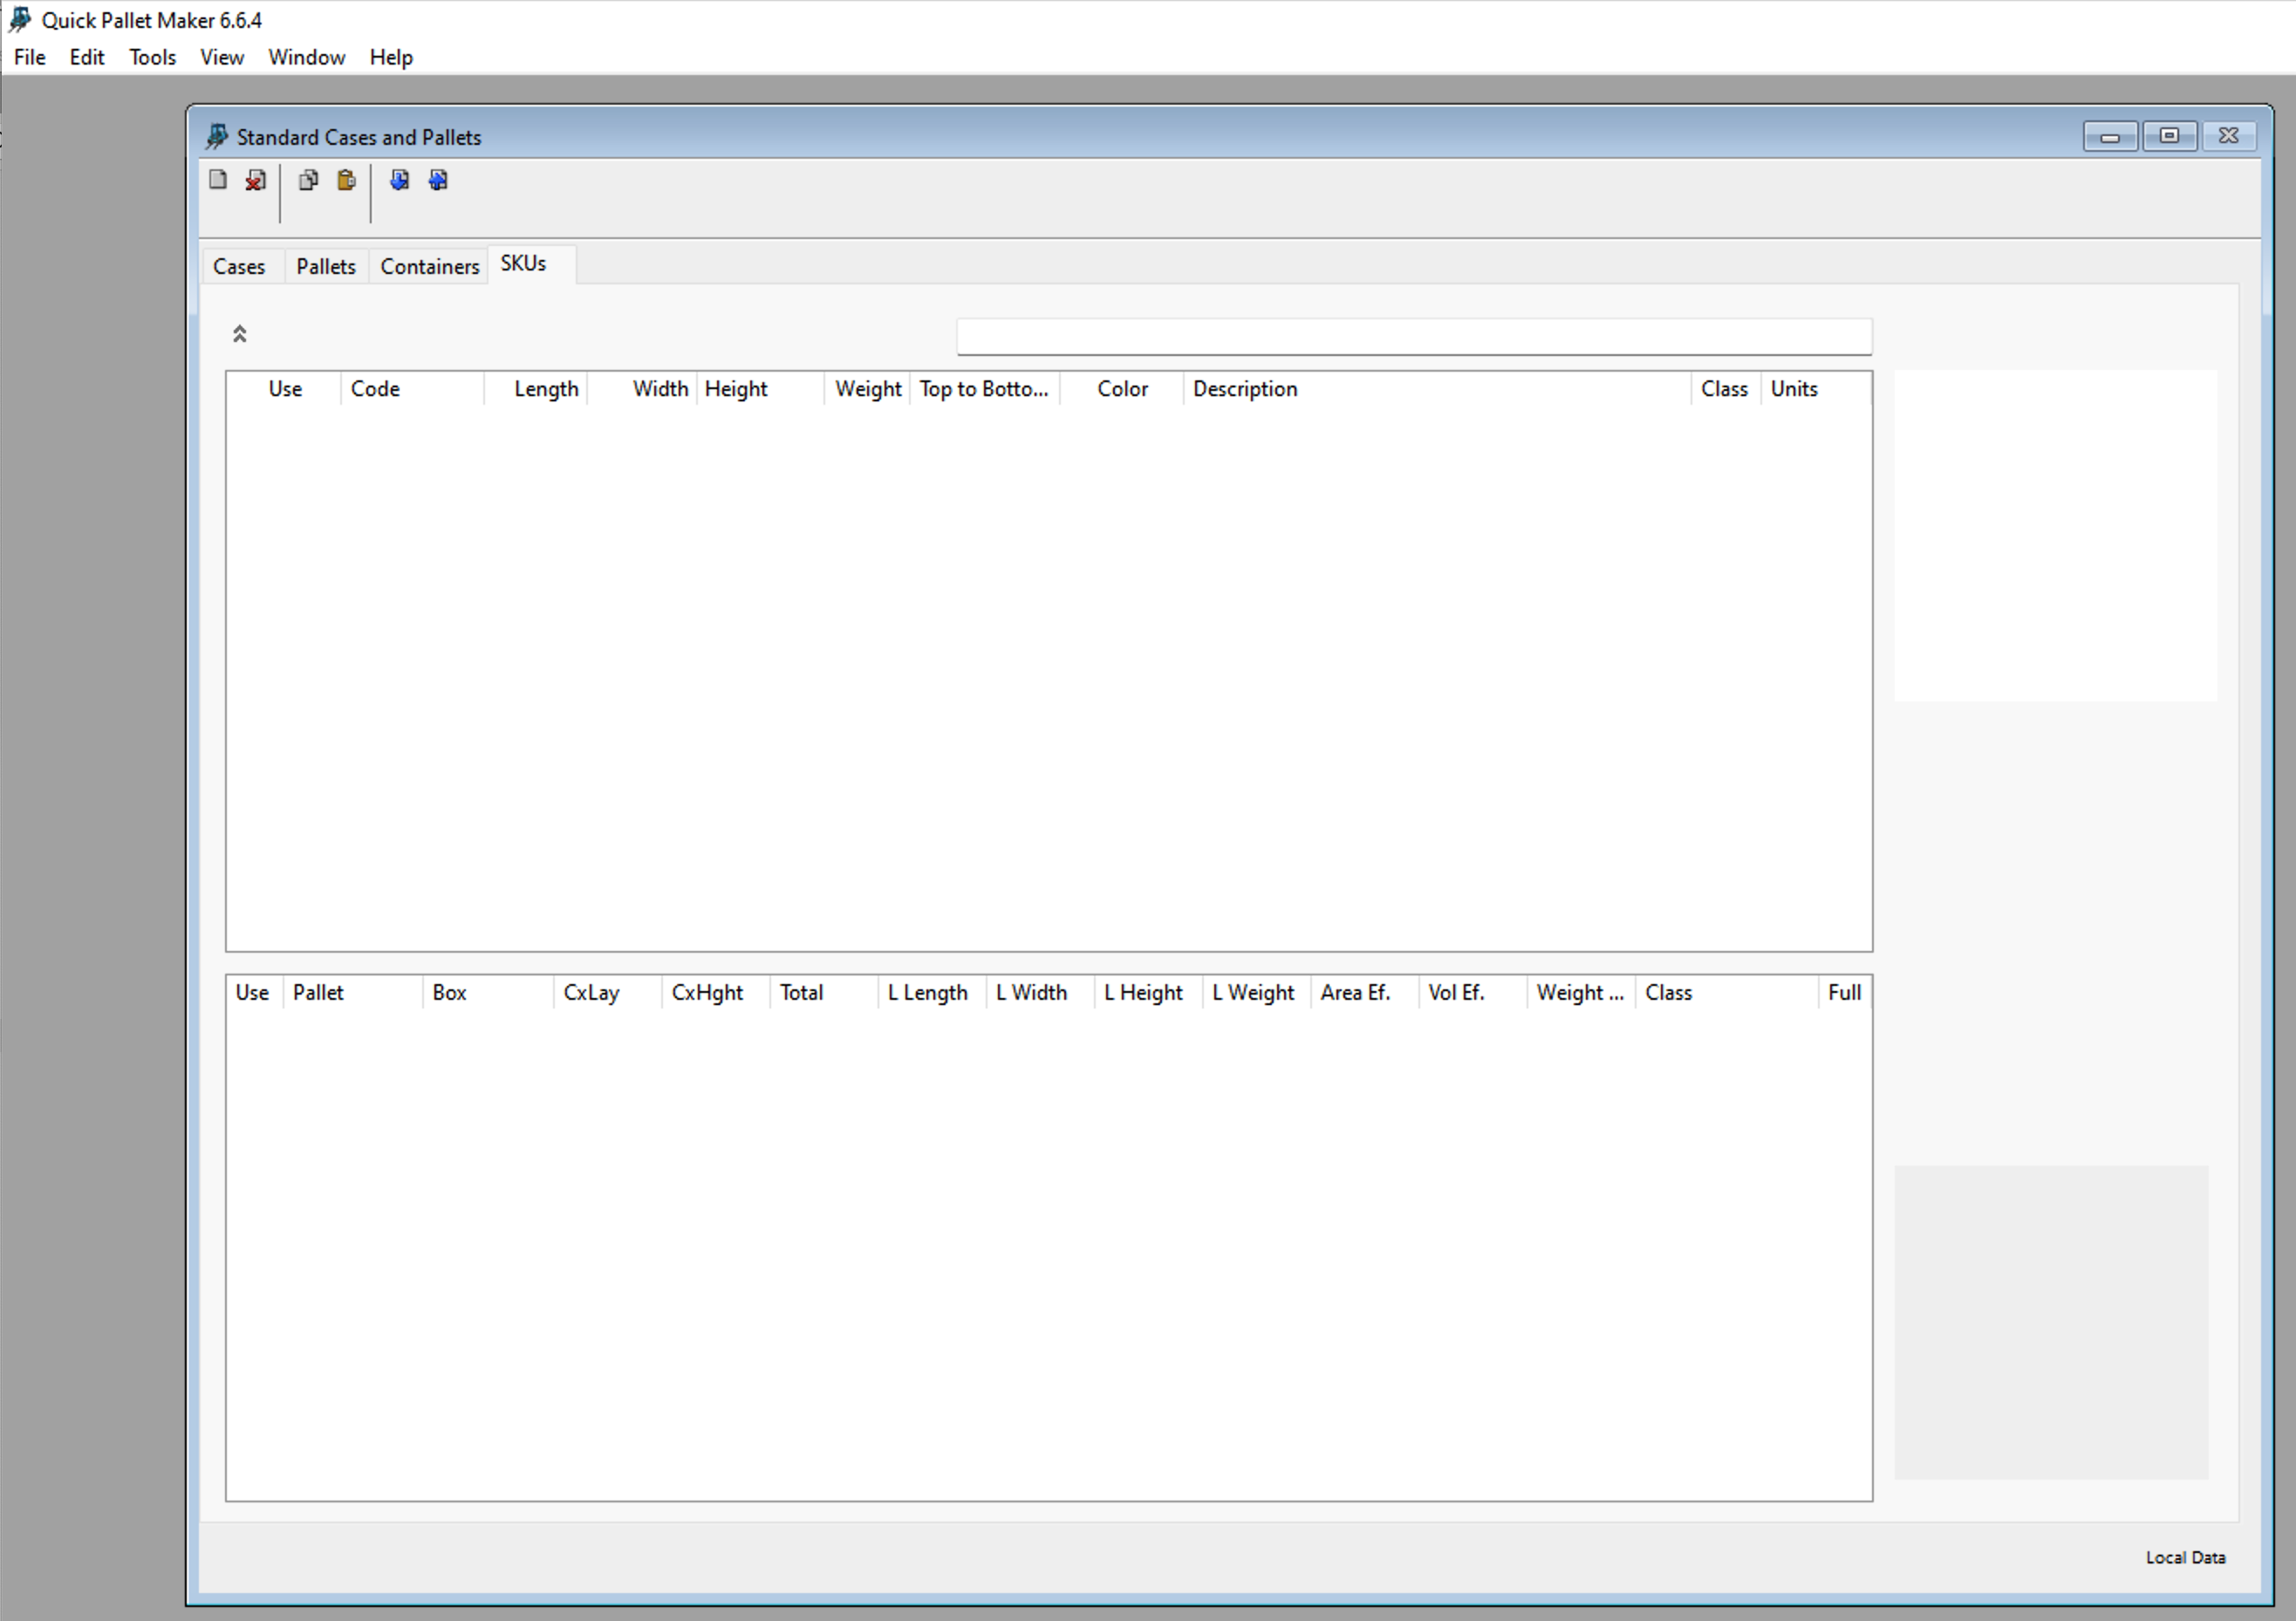
SKUs tab in Standard Cases and Pallets window
We select the box data from the spreadsheet and we copy it. Then we right-click on the SKU table to paste the data. The information should appear as in the image below.
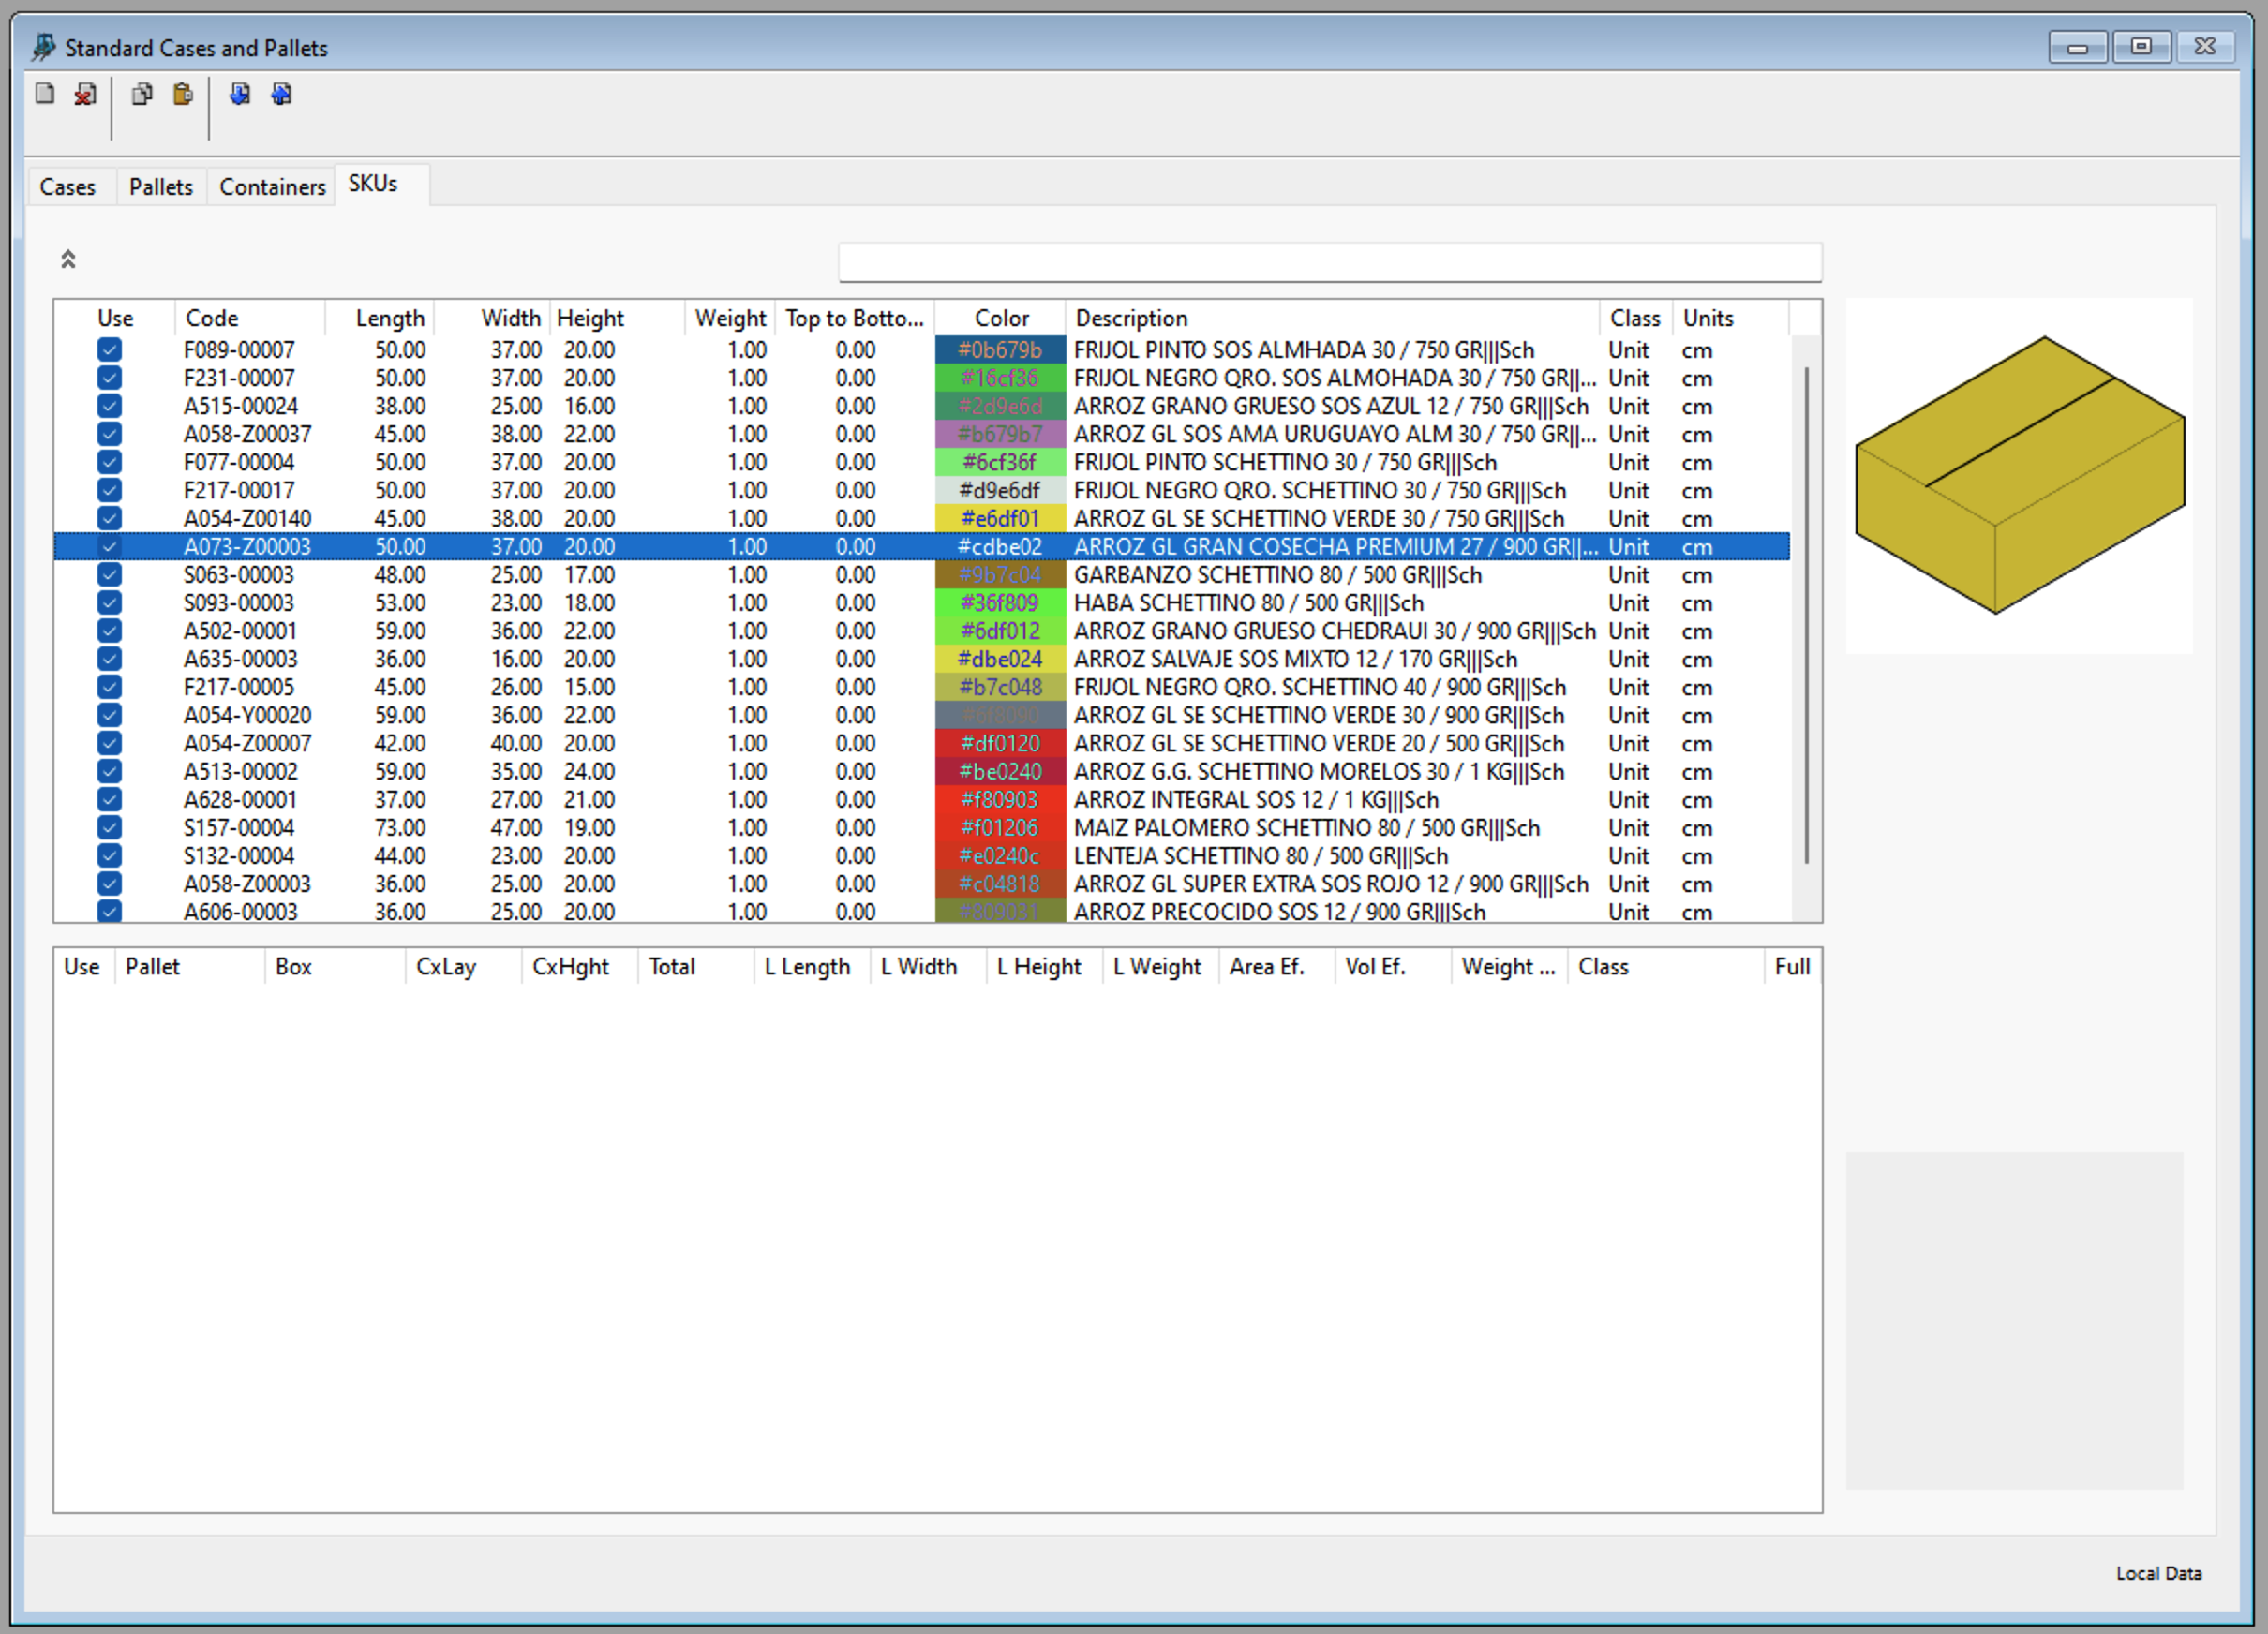
List of SKUs
Now we will set up the pallet for creating the standard pallets. For this, we will duplicate the original pallet and add overhang. The final allowable dimensions for a 1200x1000 pallet will be 1600x1400x1600 mm. CHEP120x100T is the name we will give the pallet.
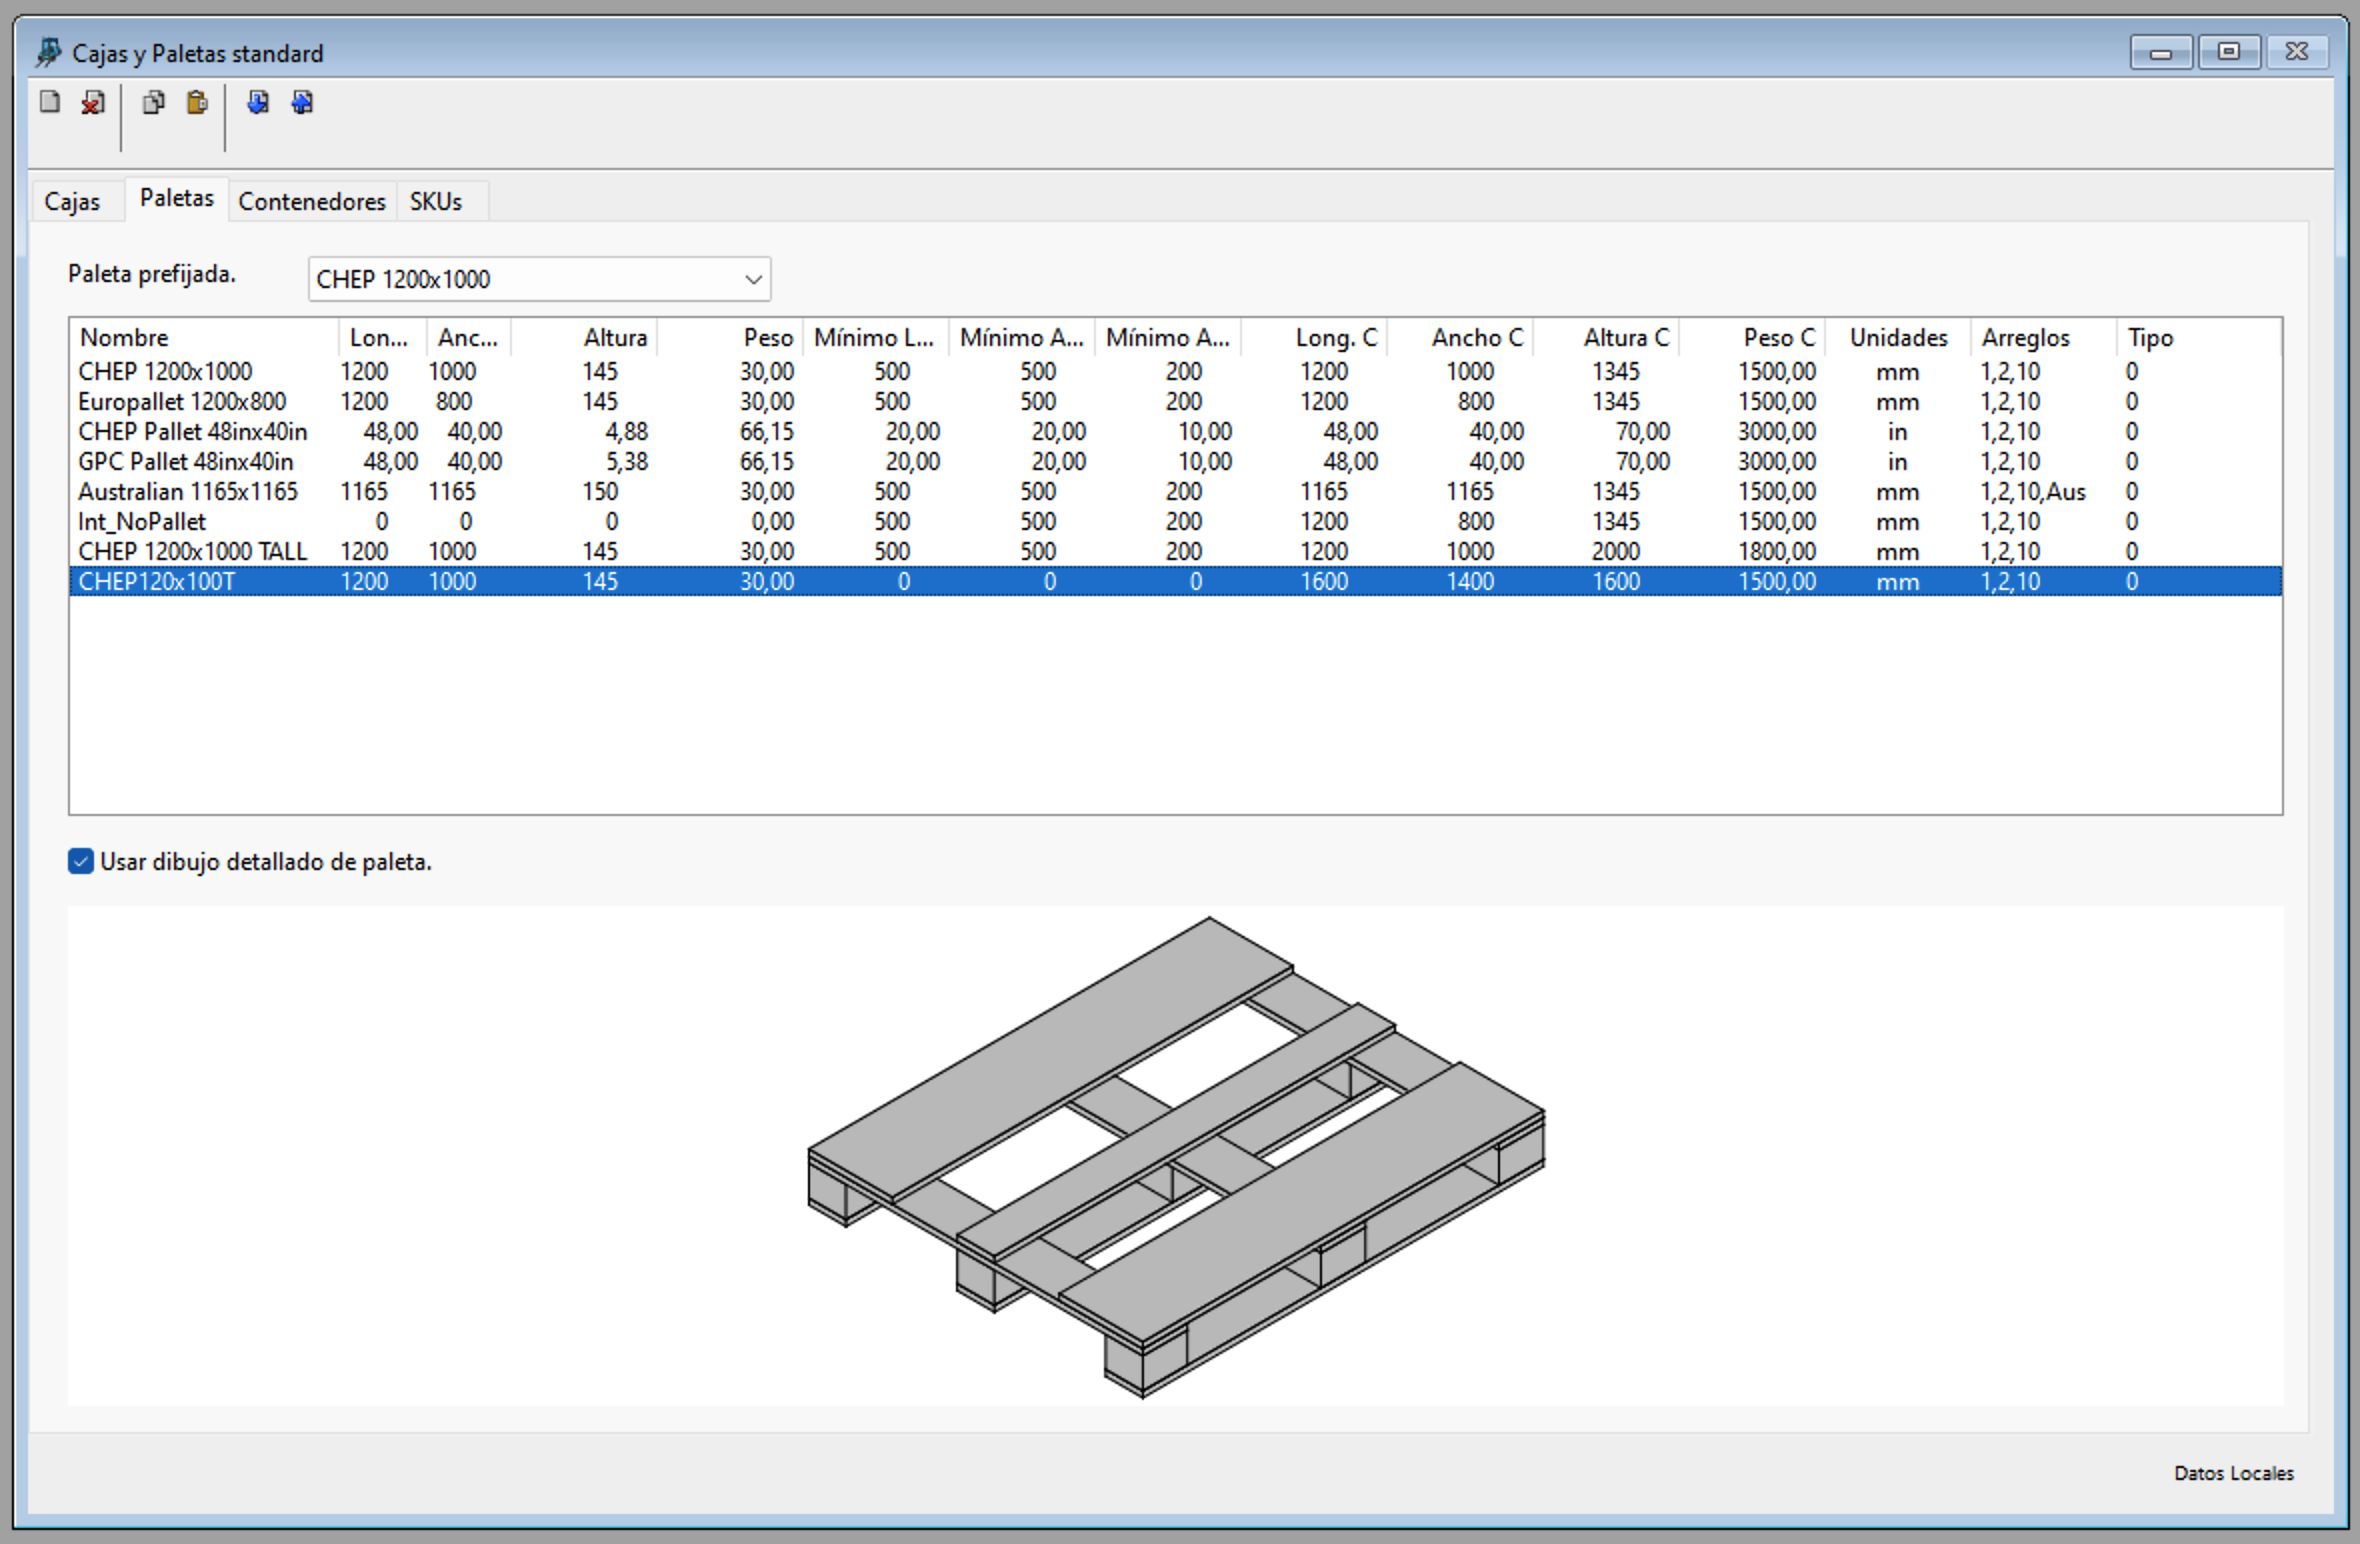
New pallet constraints
The next step is to organize the data for standard pallets. These are full single-product pallets that are expected by a given customer. We will create one for each product, based on a 120x100 pallet with plenty of overhang. The columns are the following:
- Pallet Name
- SKU code
- Products per Layer (Ti)
- Layers per Pallet (Hi)
- Total products per pallet
- Use (1 = yes, 0 = no)
- Full (1 = yes, 0 = no). A full pallet will not accept additional products even if there's space available.
- Client ID
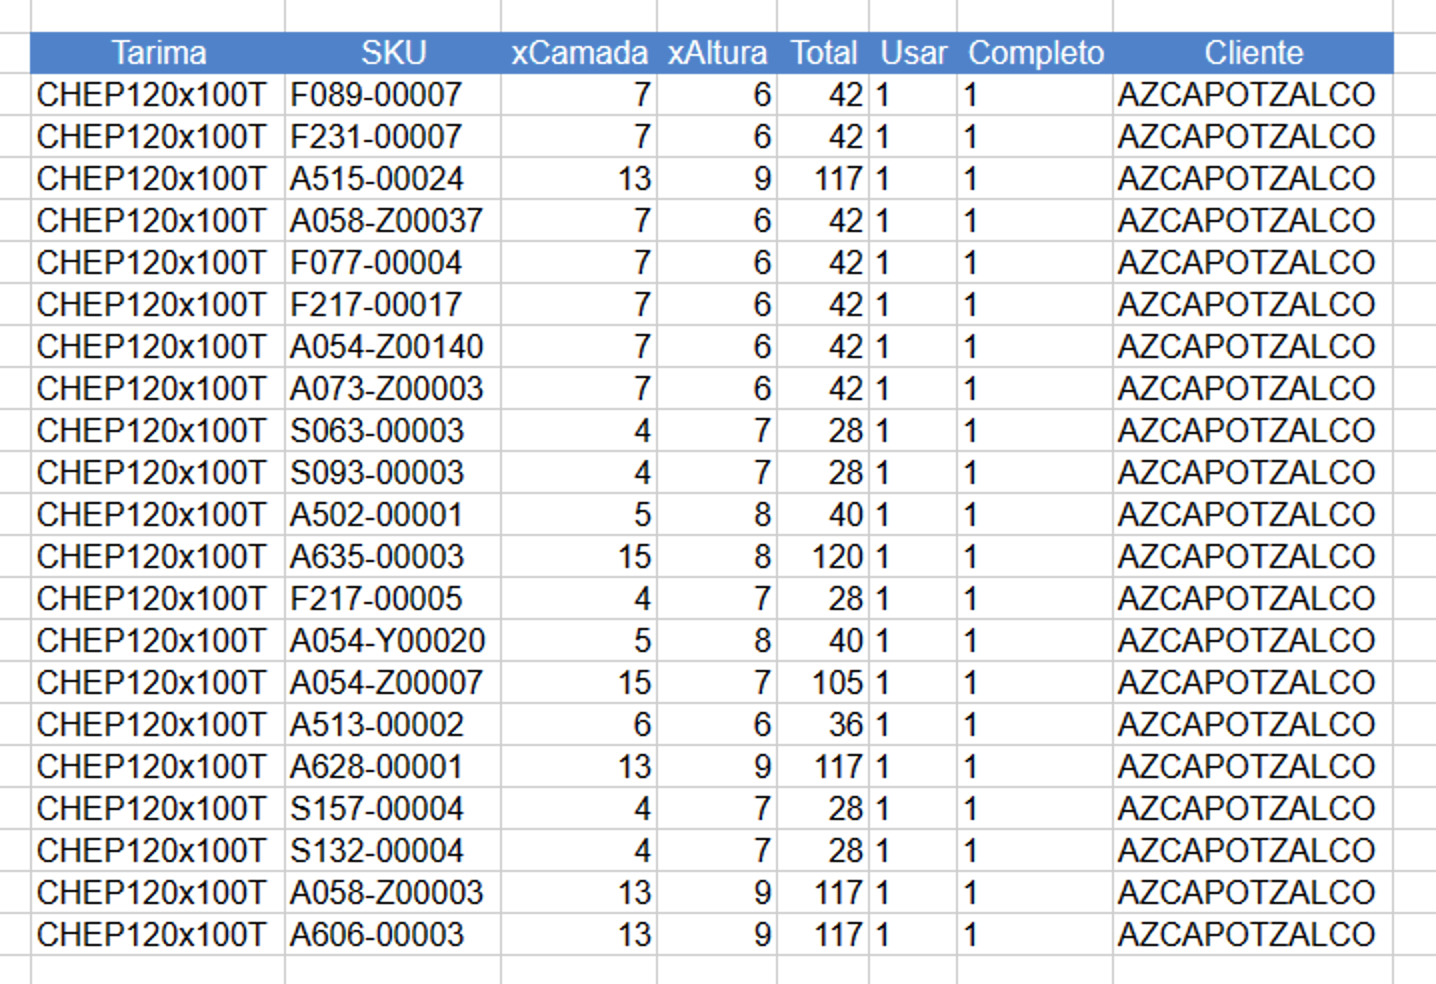
Spreadsheet with list of pallets
The standard pallet list is converted to a comma-delimited text file with the header removed. We then right-click on the pallet table and select the Import option.
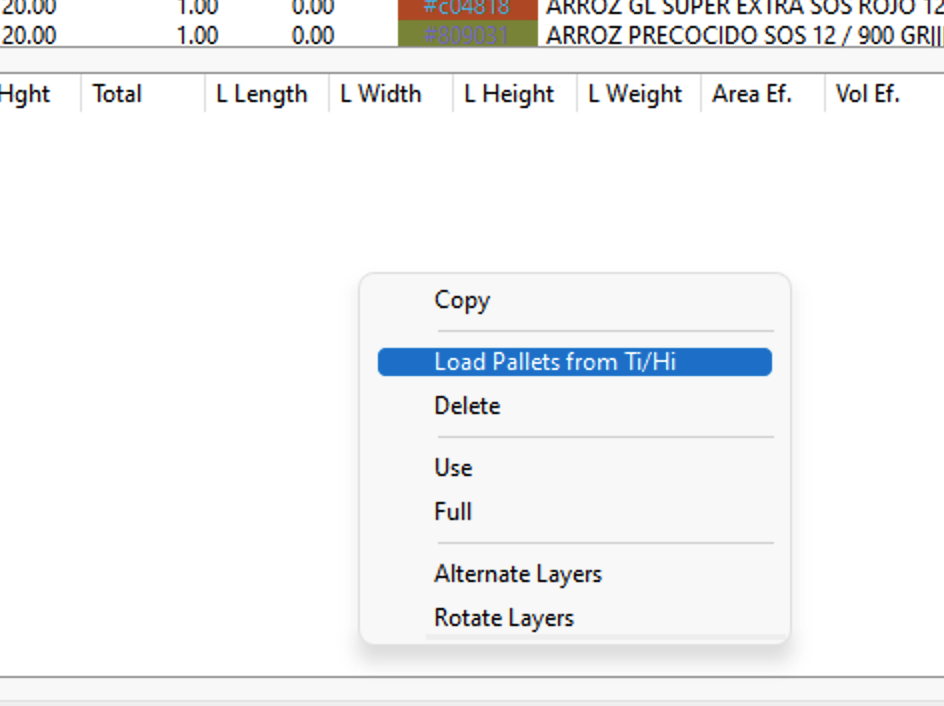
Load Pallets from Ti/Hi
Once that has finished, we can click through the different SKUs and see the results.
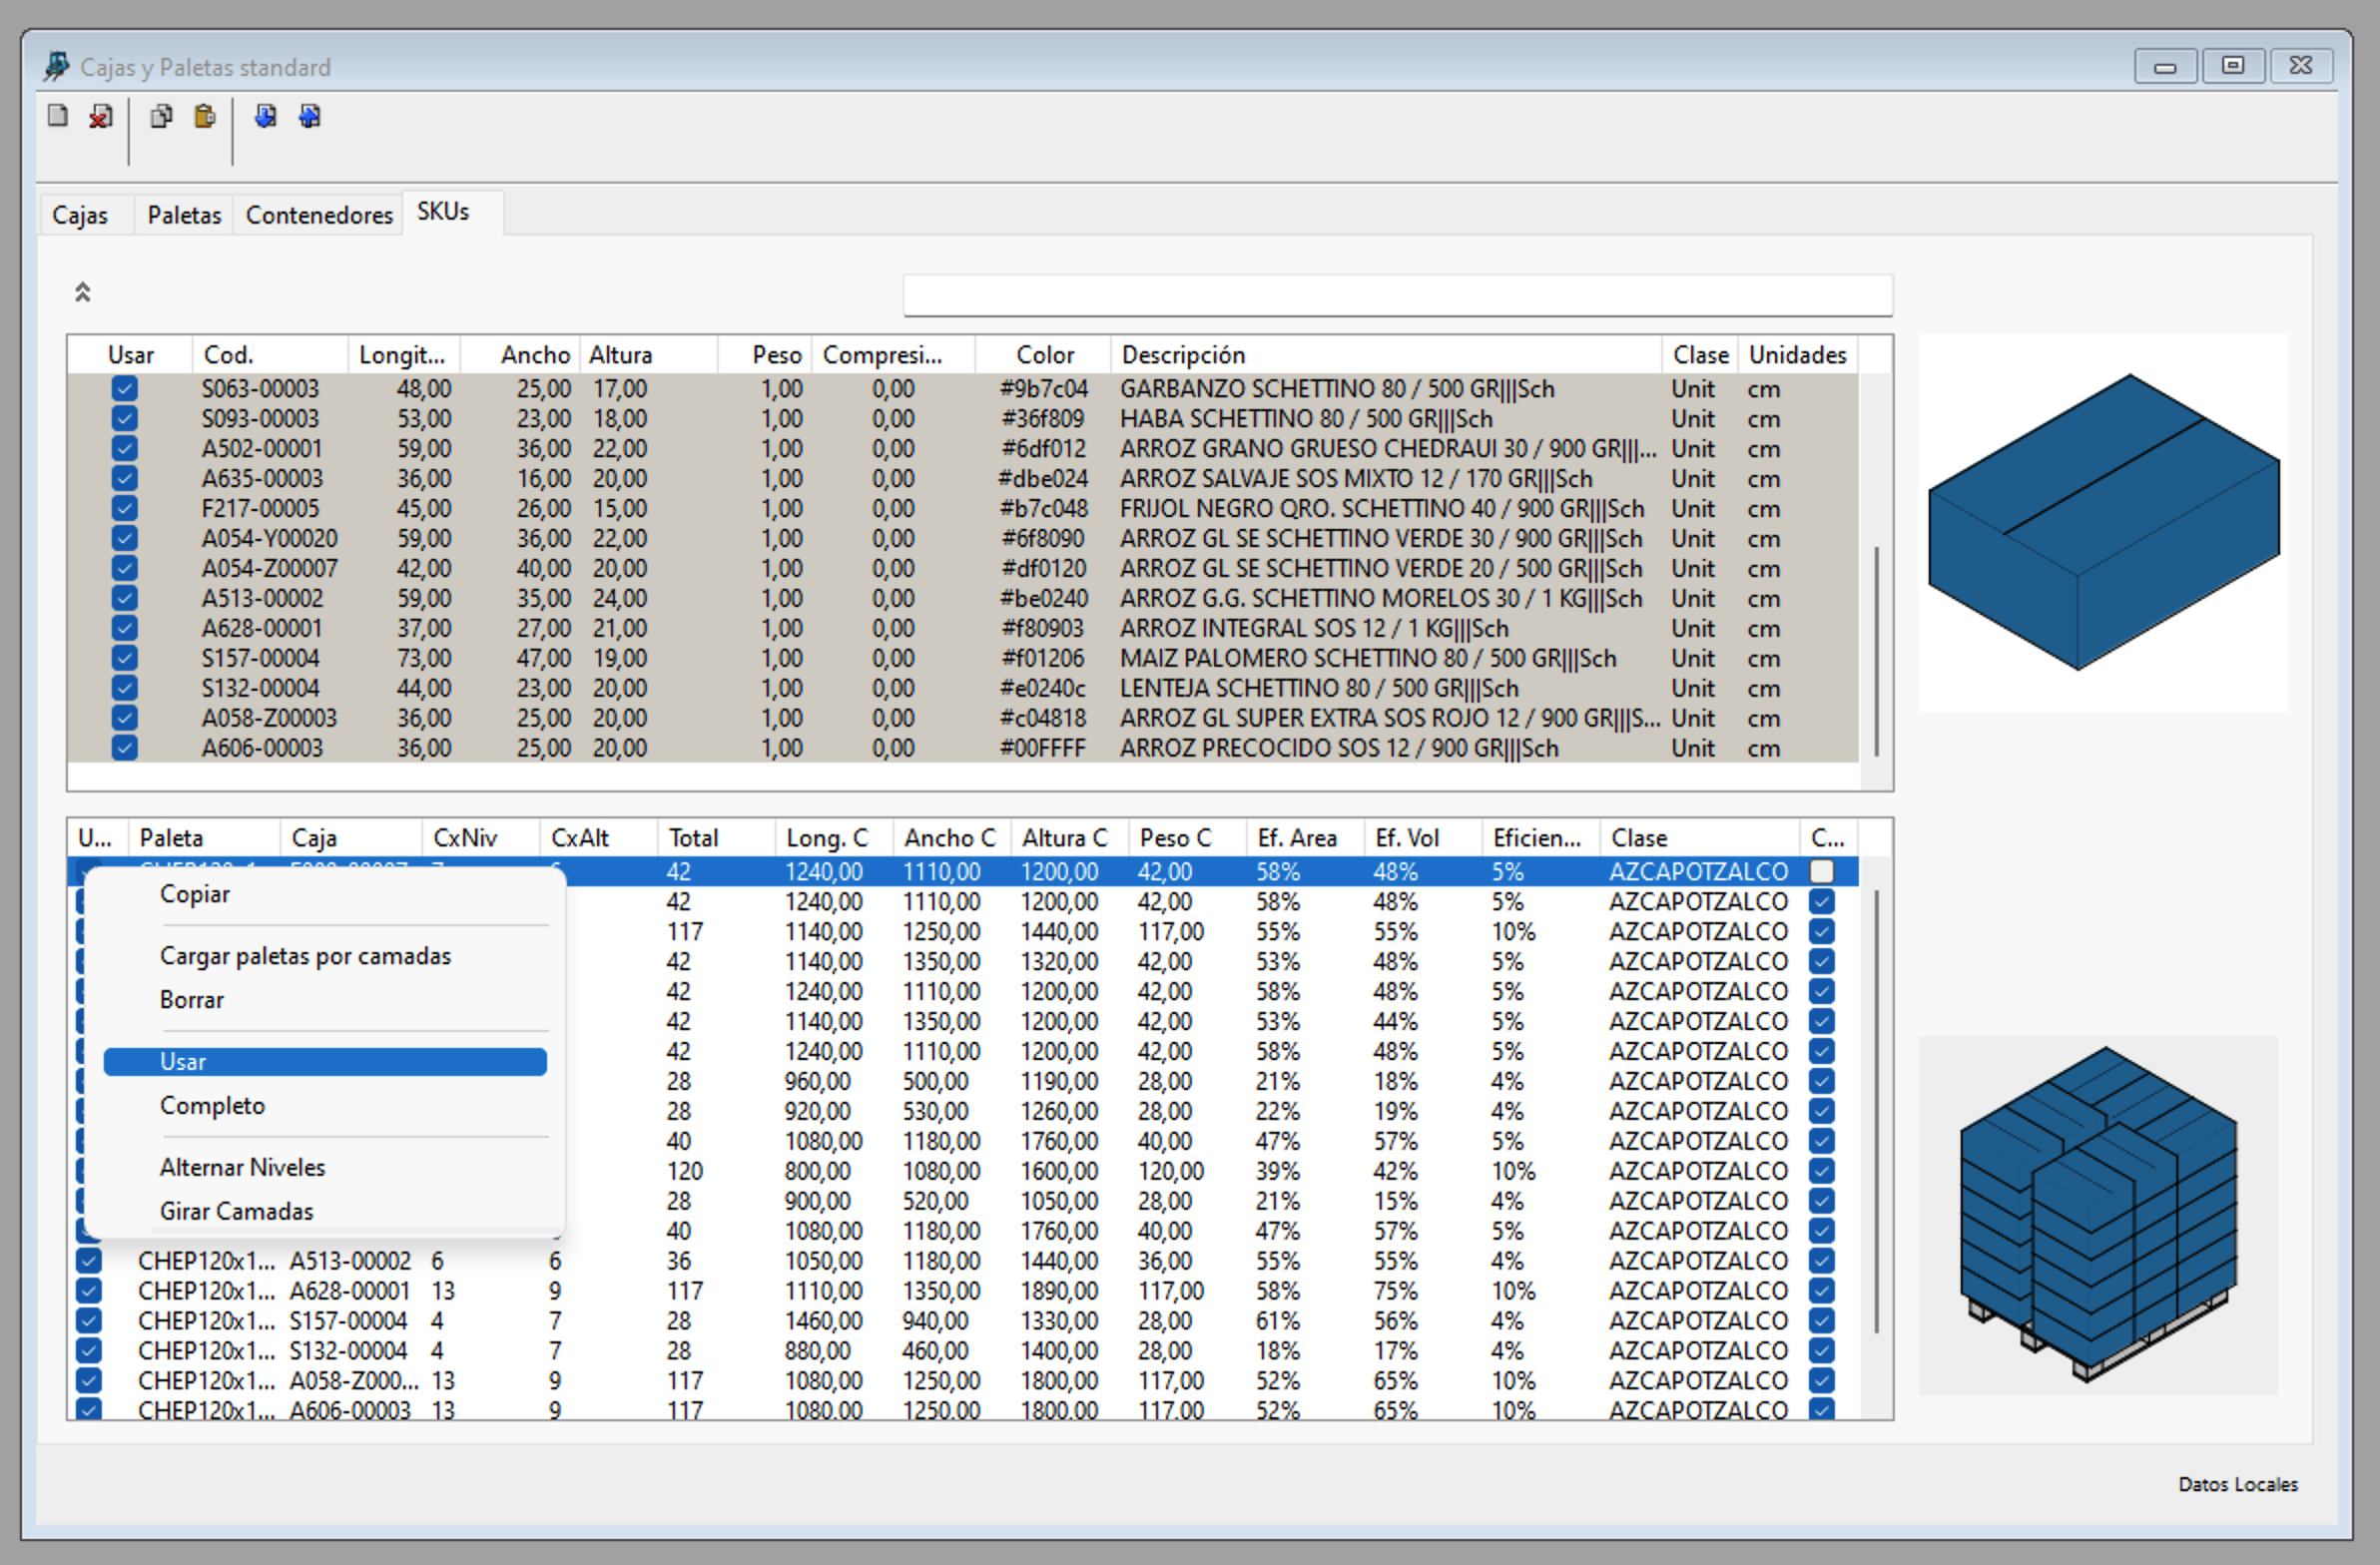
Standard pallets per box
Now we can create a shipment, based on the original information. We will include a set of currently unused columns and then modify the ones for the client name, the product code and the amount in the shipment. The columns are the following:
- Warehouse (unused)
- Driver Id (unused)
- Driver Name (unused)
- Pallet Name (unused)
- Comment (unused)
- Route Date (unused)
- Route Name (unused)
- Purchase Order (unused)
- Client ID (unused)
- Client Name: enter the name as stored in the standard pallets
- Product ID: the SKU code or identifier
- Product Sequence (unused)
- Product Quantity: the amount of items that will be shipped
- Trip (unused)
- Site (unused)
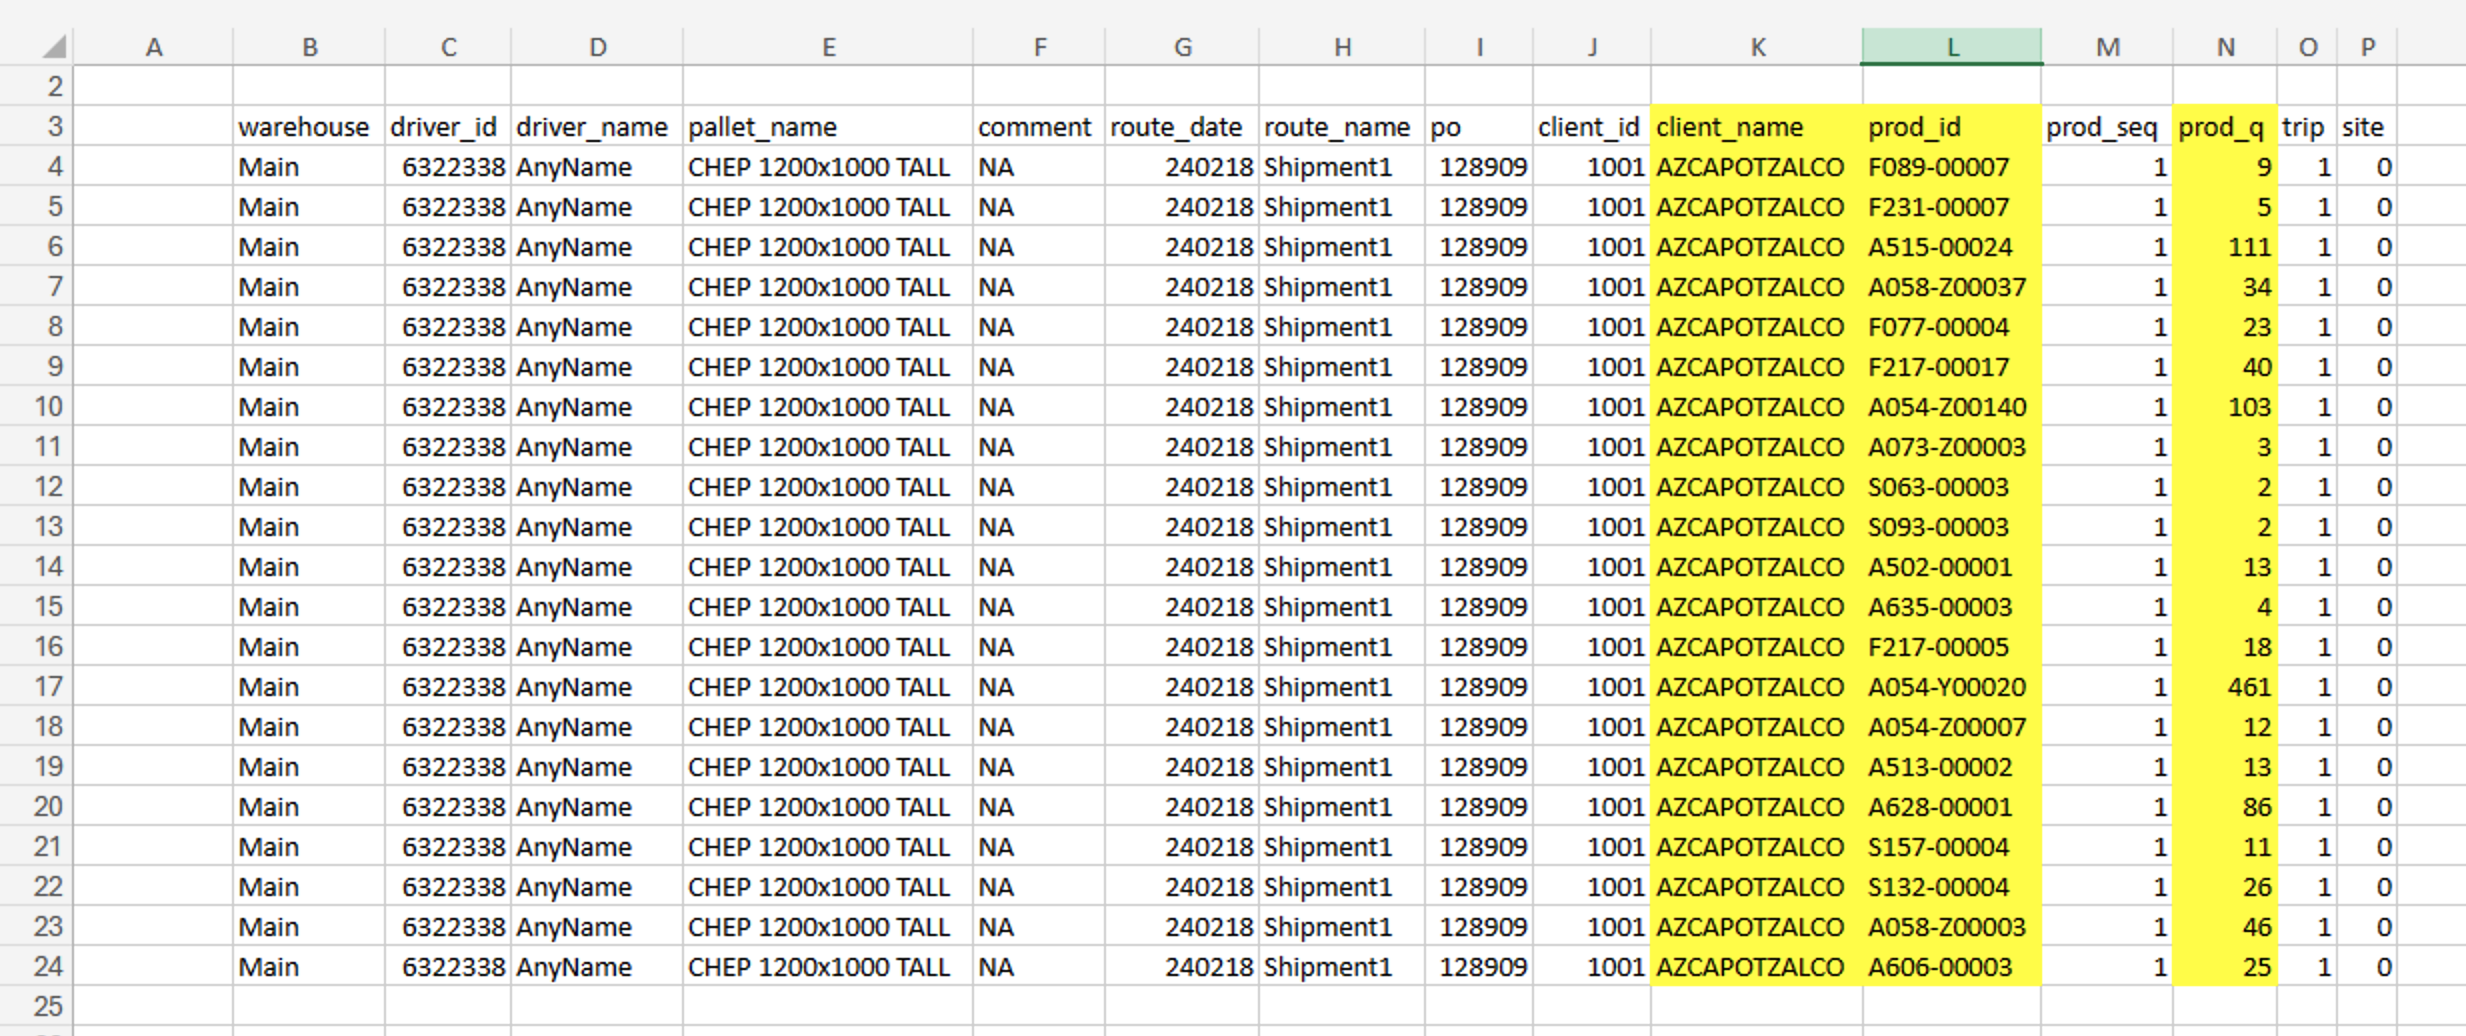
Shipment table
This table is converted into a comma-delimited text file and the header is included. We open a new document window starting from box dimensions in Quick Pallet Maker and then add additional height to the default pallet. We use the File -> Insert -> Shipment command to import the box shipment as it was specified. The boxes will appear in the list as shown below.
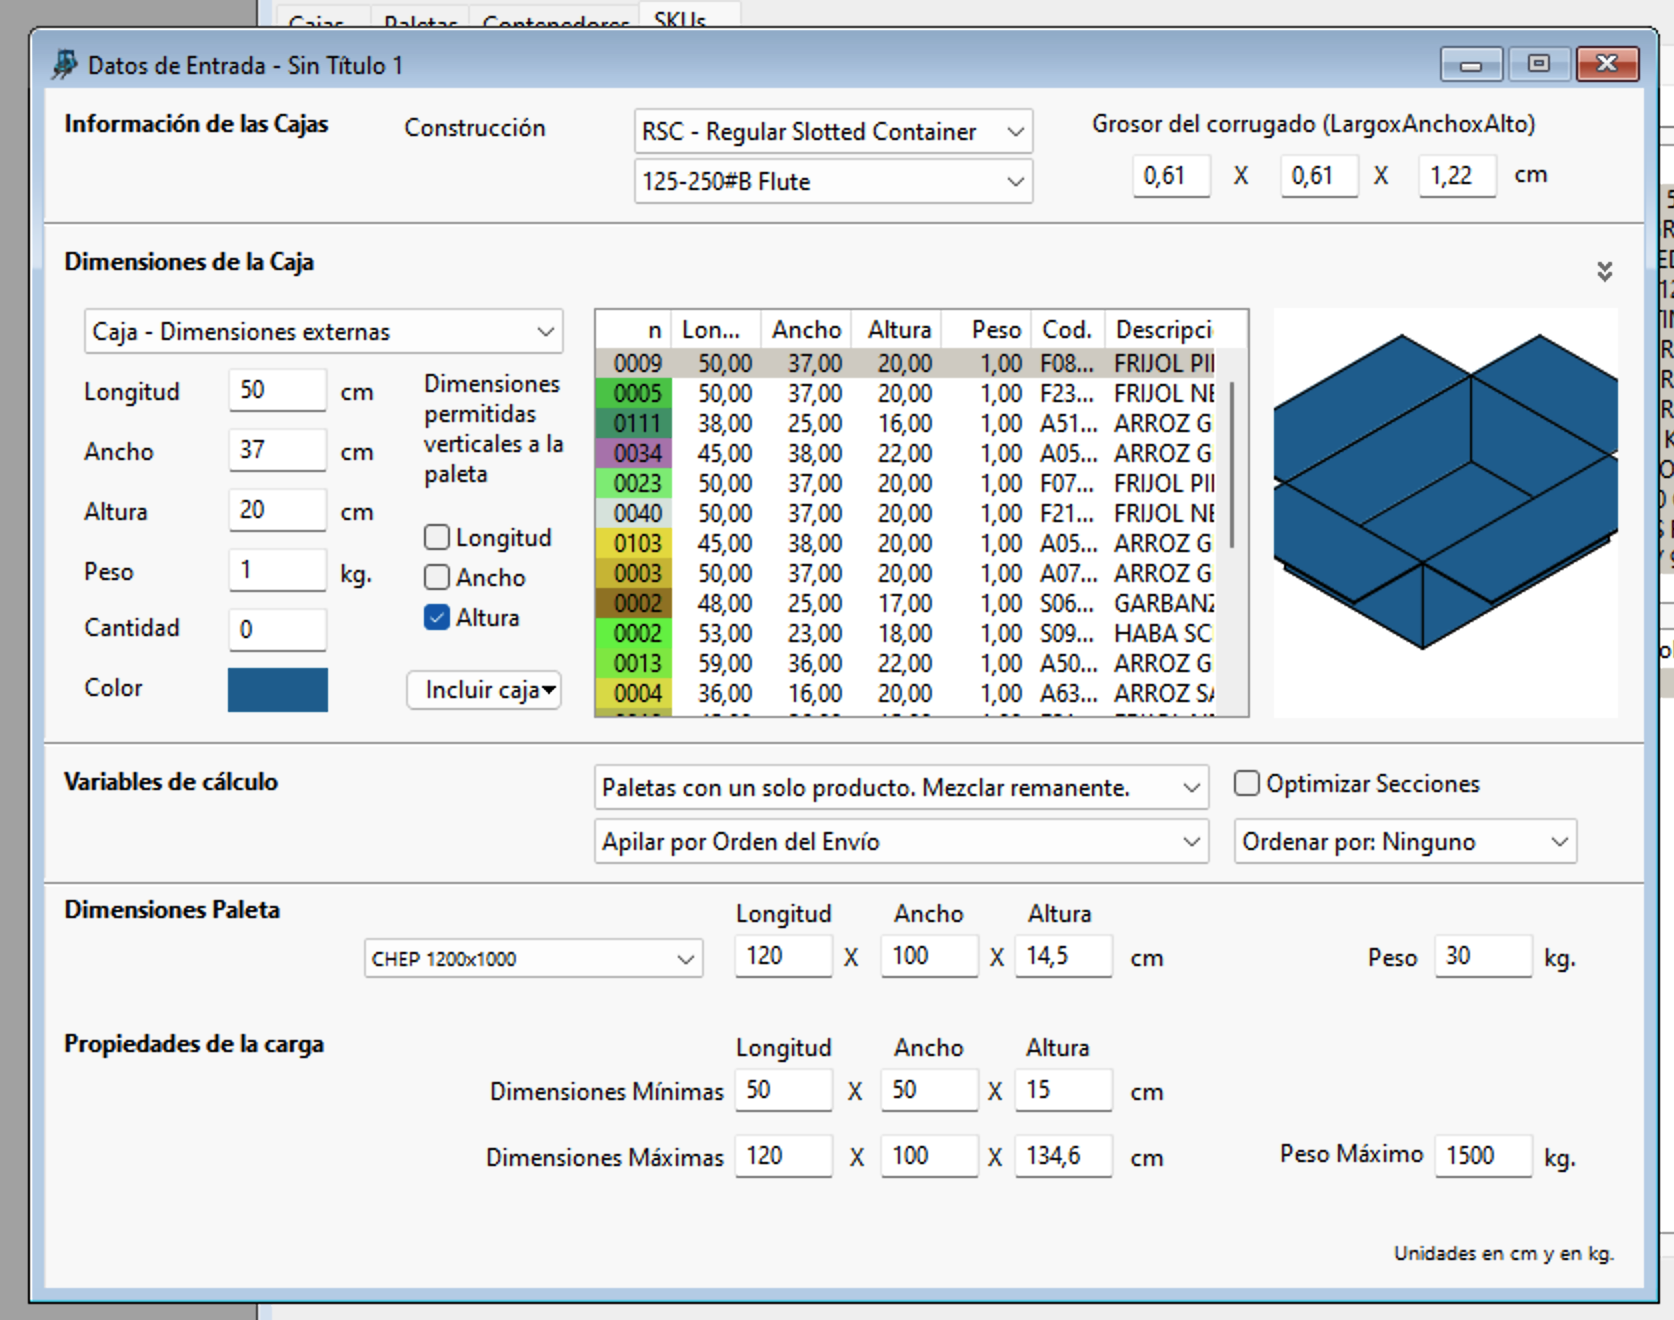
Box to pallet window
Now we can use Tools -> Calculate Box Shipment to produce the pallet shipment. Note that in this case, we will have a list of pallets marked "saved". These are the pallets that have been matched to a standard pallet per client.
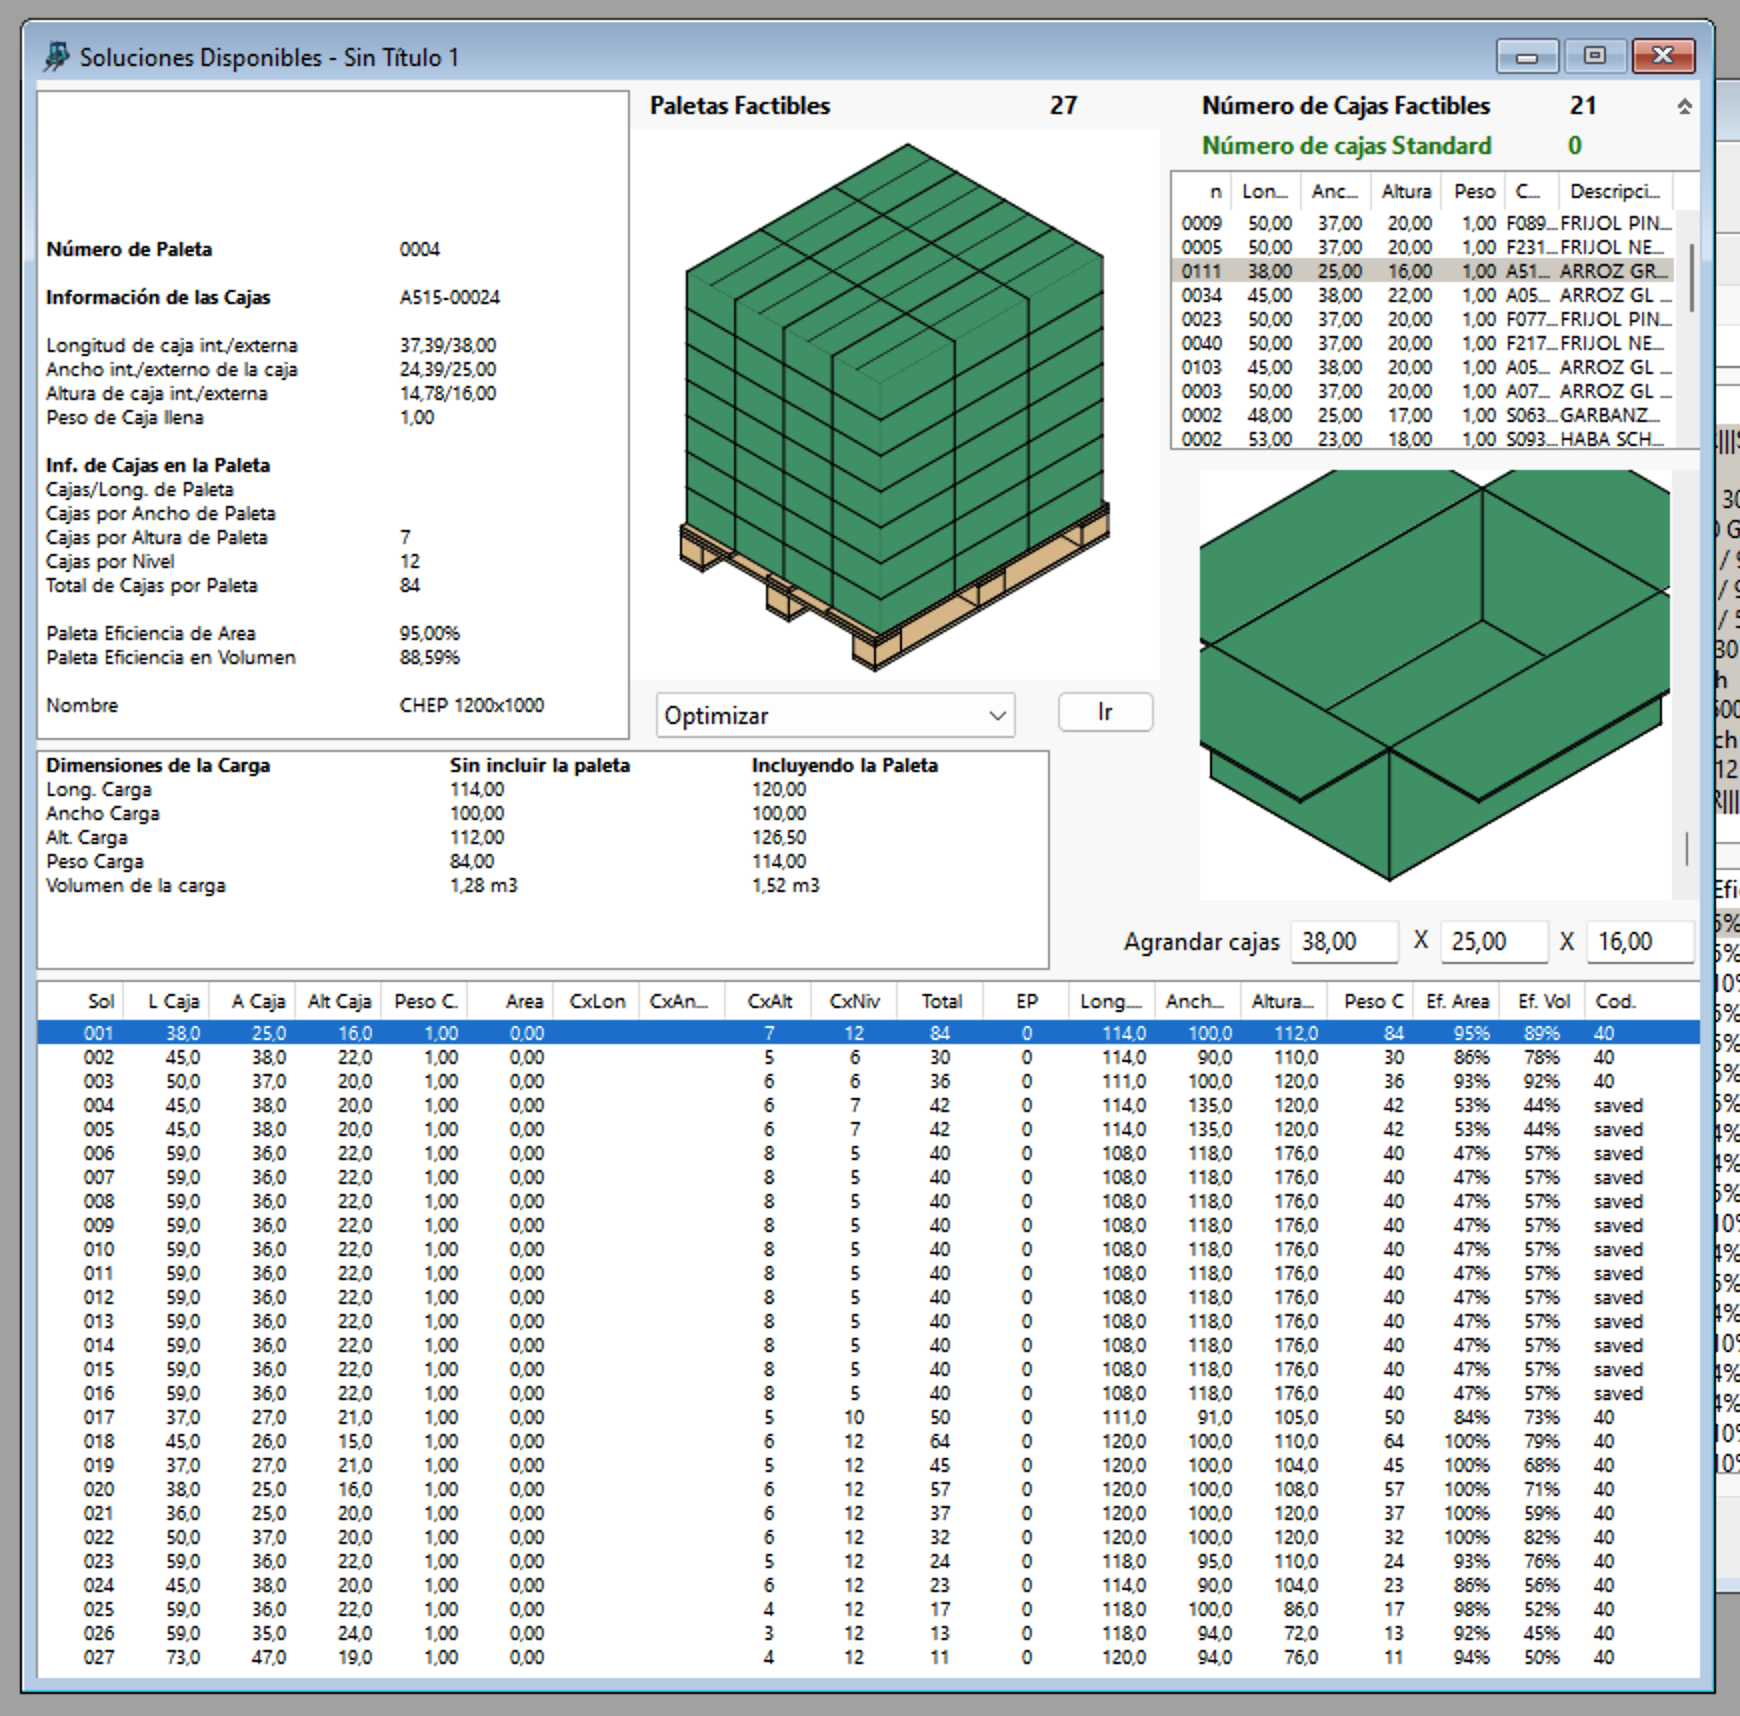
Available Solutions window
These pallets can be selected and then presented in a report that can be edited and saved.
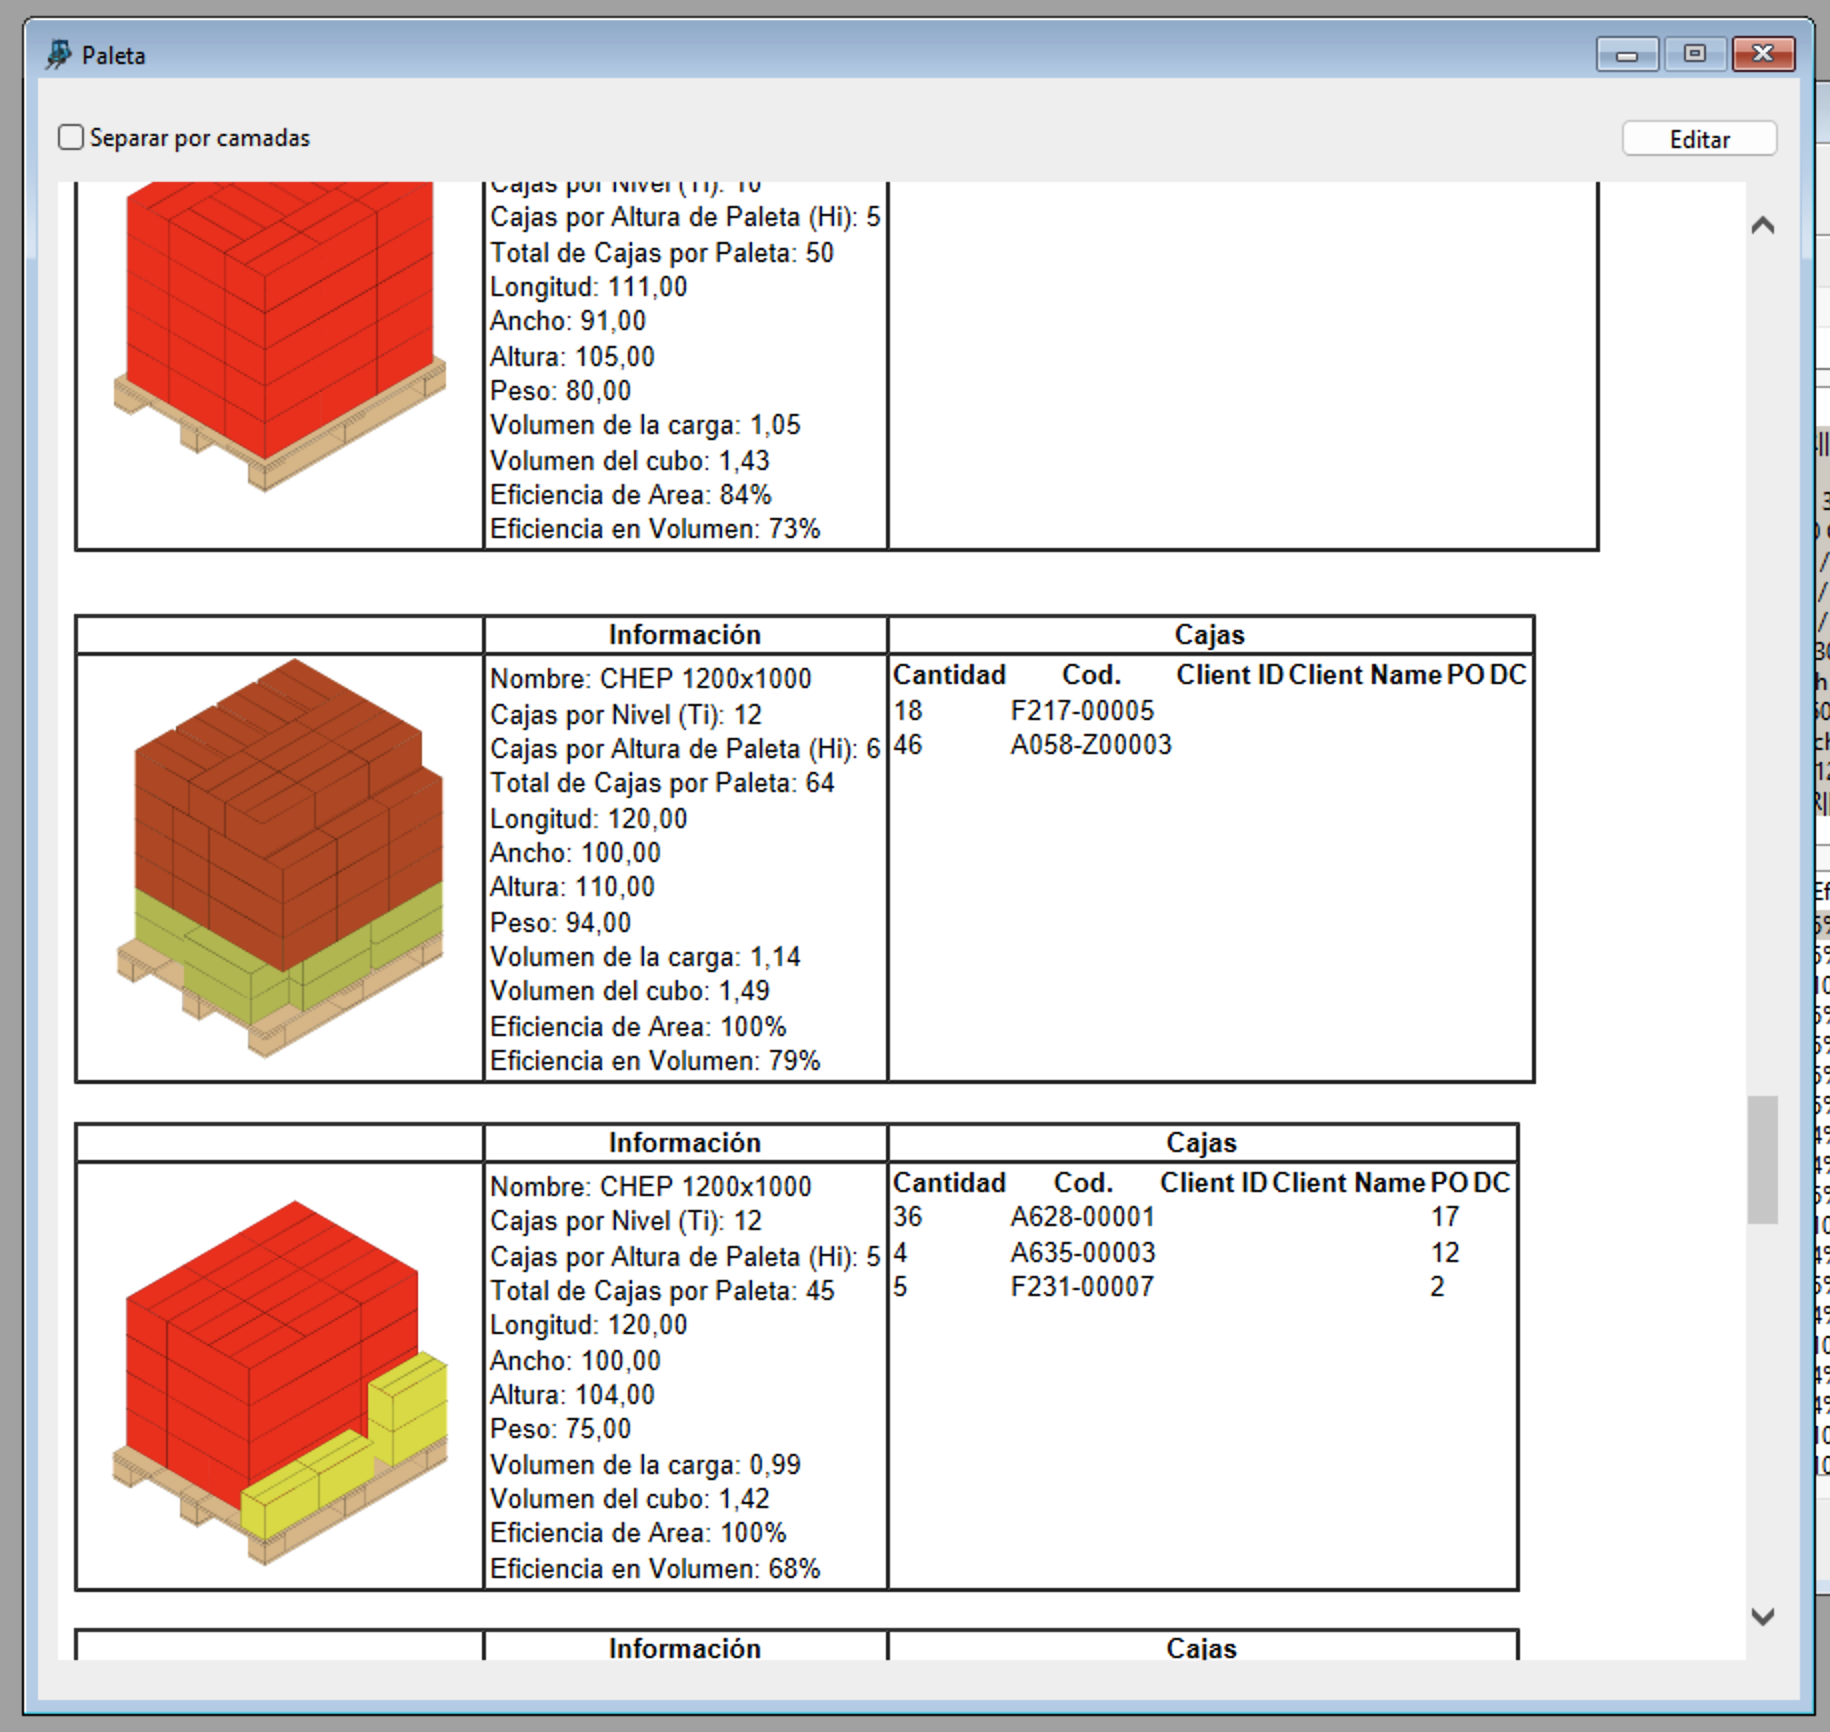
Pallet HTML report
Watch the video
This example is also available as a YouTube video.YouTube Video