Working With FBA Guidelines
If you or your company sells products using the Amazon Seller program and want to use FBA (Fulfillment by Amazon), you will need to comply with their Pallet requirements. Quick Pallet Maker helps you achieve greater efficiency and clarity shipping your products to Amazon warehouses. This example explains how it's done.
The guidelines focus on the following aspects for larger shipments that require pallets:
The guidelines focus on the following aspects for larger shipments that require pallets:
- The pallet type and dimensions: use a 48x40" GMA wooden pallet
- Maximum load weight (including pallet): 1500 lb (680.27 kg)
- Double-stacked pallets cannot exceed 100 inches total.
- Single-stacked (individual) pallets cannot exceed 72 inches
- Flush pallet loads are preferred. This is when all the layers are complete.
The first step is to create a list of cartons or standard cases that fit very well (with high efficiency) in 48x40" pallets. Boxes with lengths and widths that are divisors of 48 and 40 inches, will work just fine. As for the height, these boxes can be 11" and 22" tall and fit appropriately in either 50" or 72" maximum height pallets, when including the height of the pallet itself. Using that information, we come up with a list of boxes as seen in the attached spreadsheet.
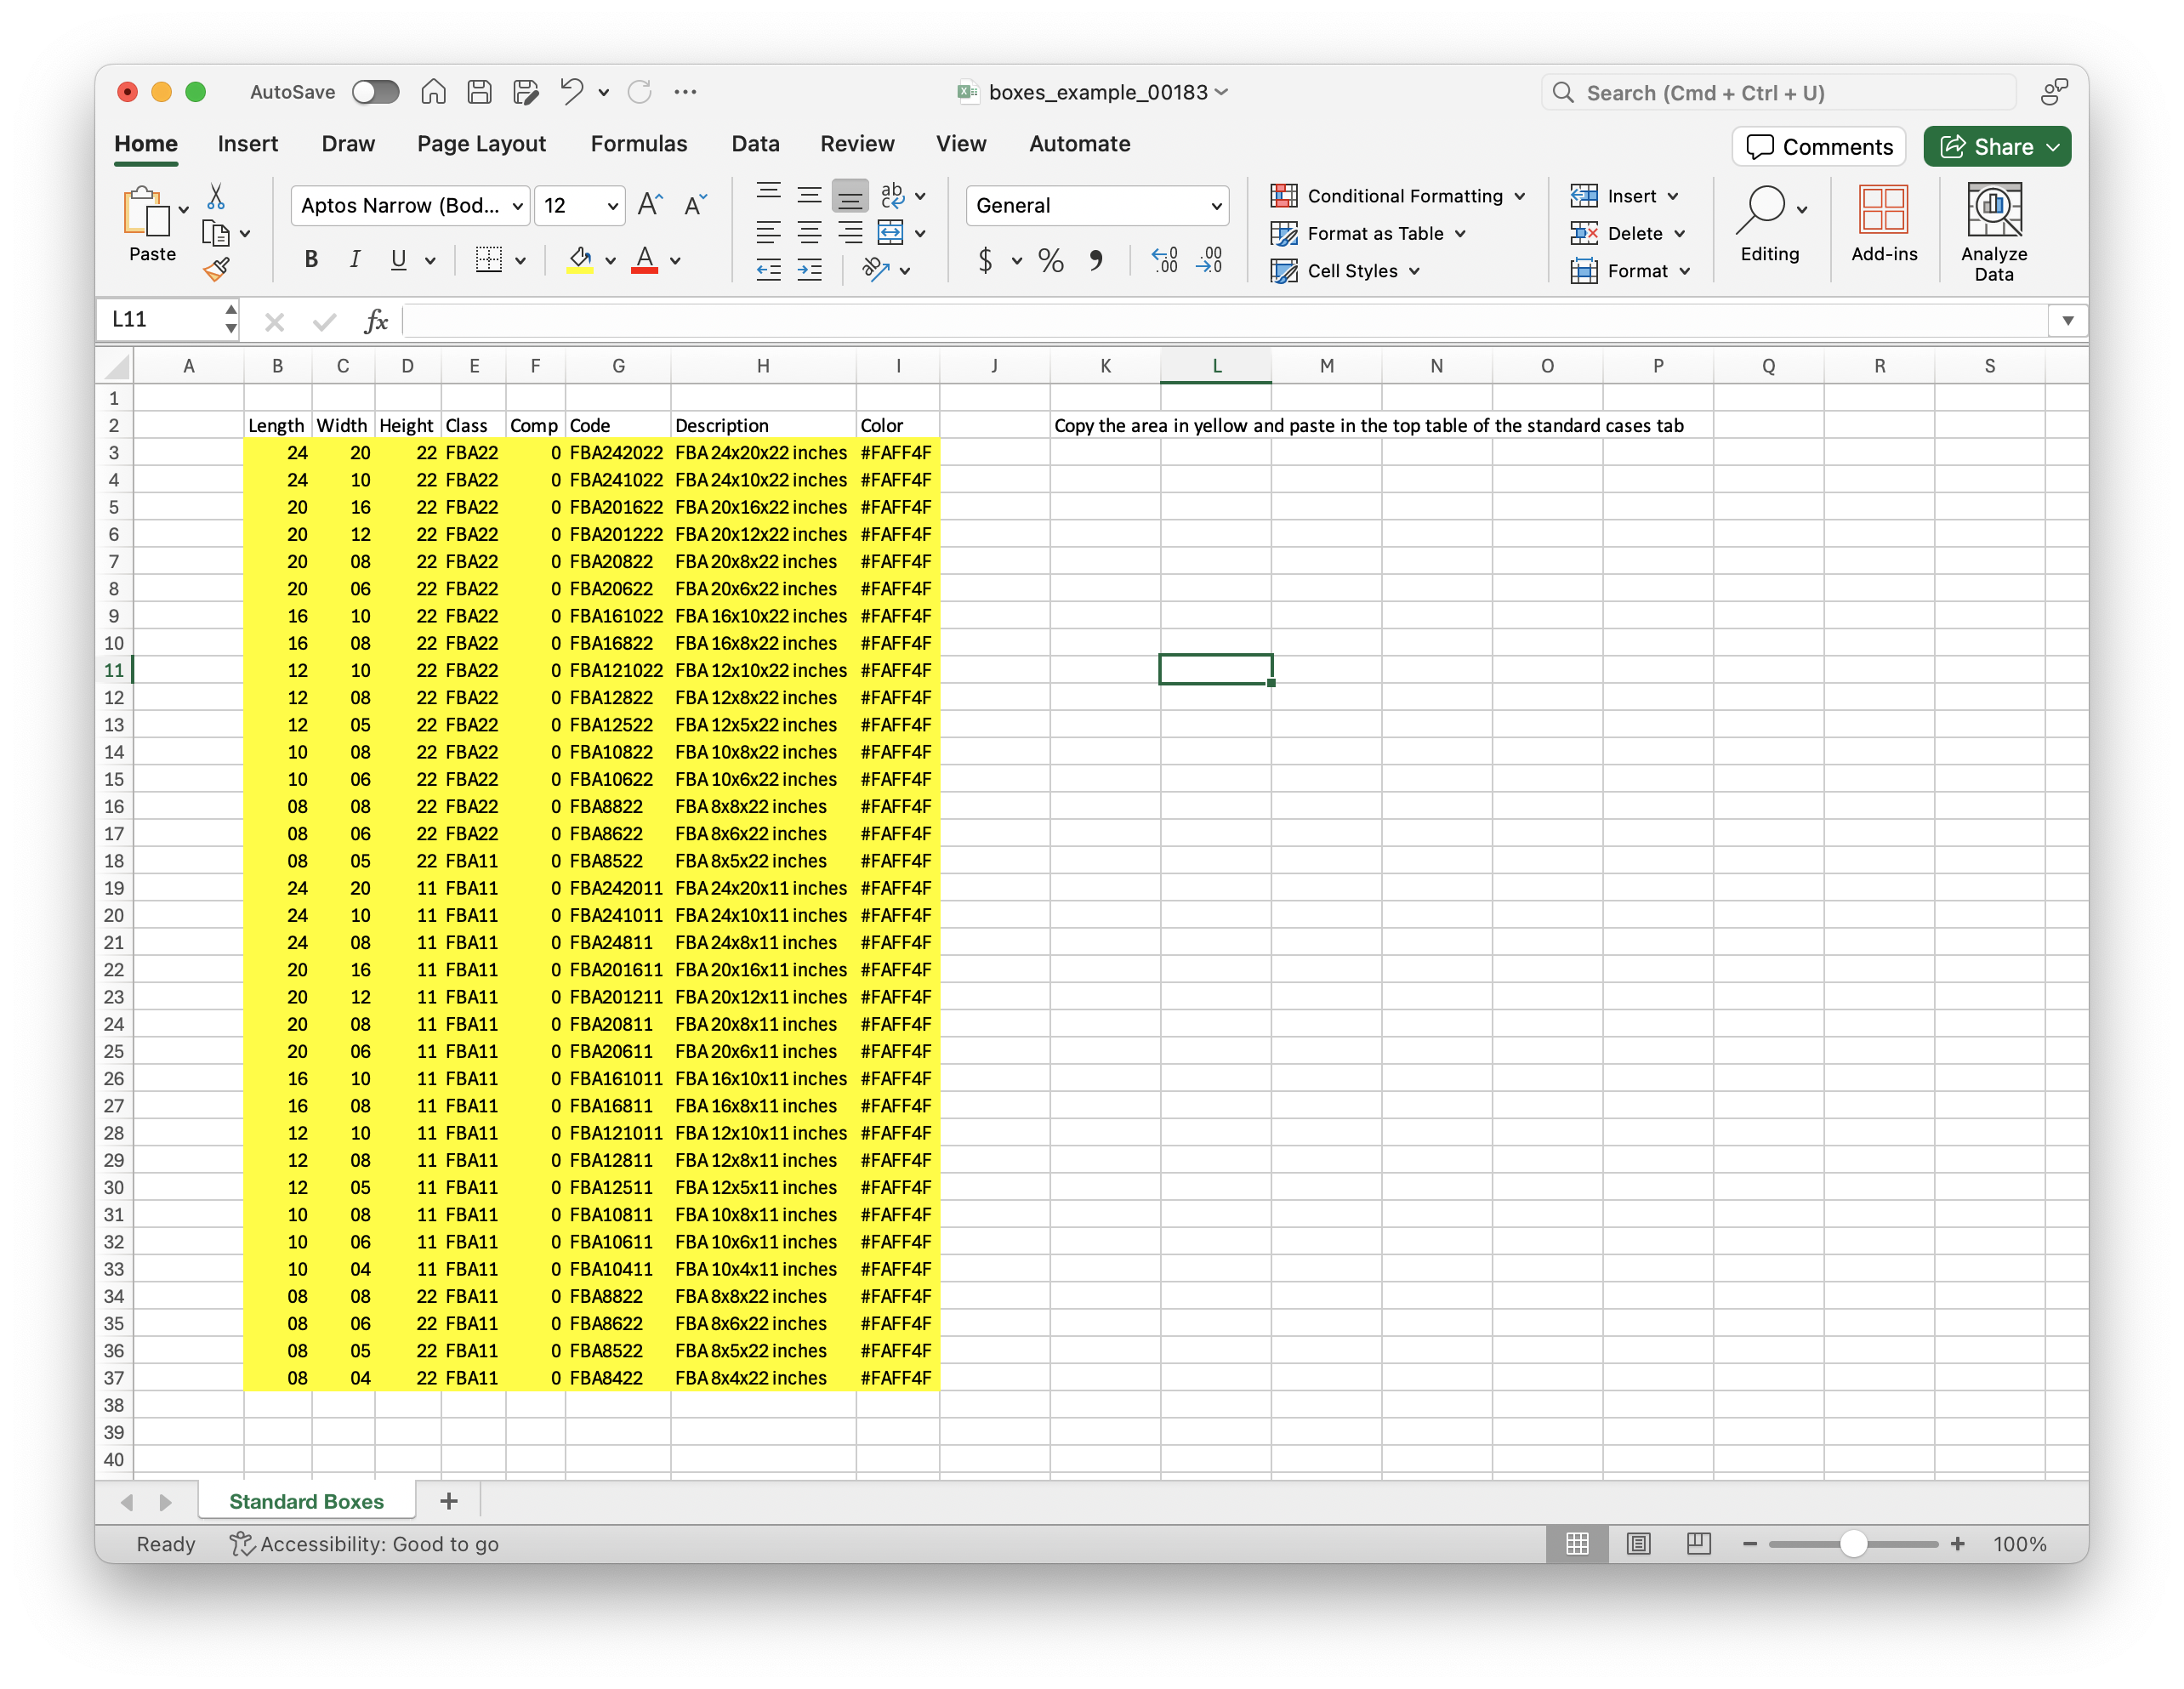
Empty carton data
The next part of the example will be to set up Quick Pallet Maker. You can download the demo through this web page. The installation instructions can be found here. Once you run Quick Pallet Maker, the first step is to change the units to inches and lb. To do this, open the Settings window by using Tools - Settings on Windows or Quick Pallet Maker - Settings on macOS.
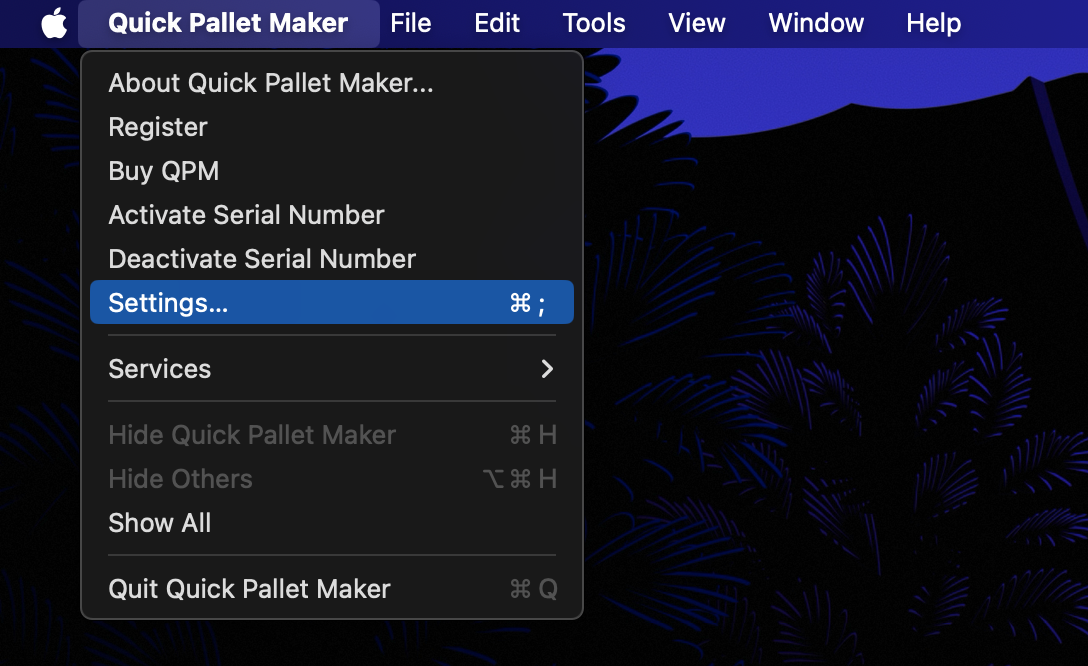
Opening the Settings window
The first panel of the Settings window contains the default unit selector. We will change them to inches/lbs to work the rest of the examples in this way. Then, we click on OK.
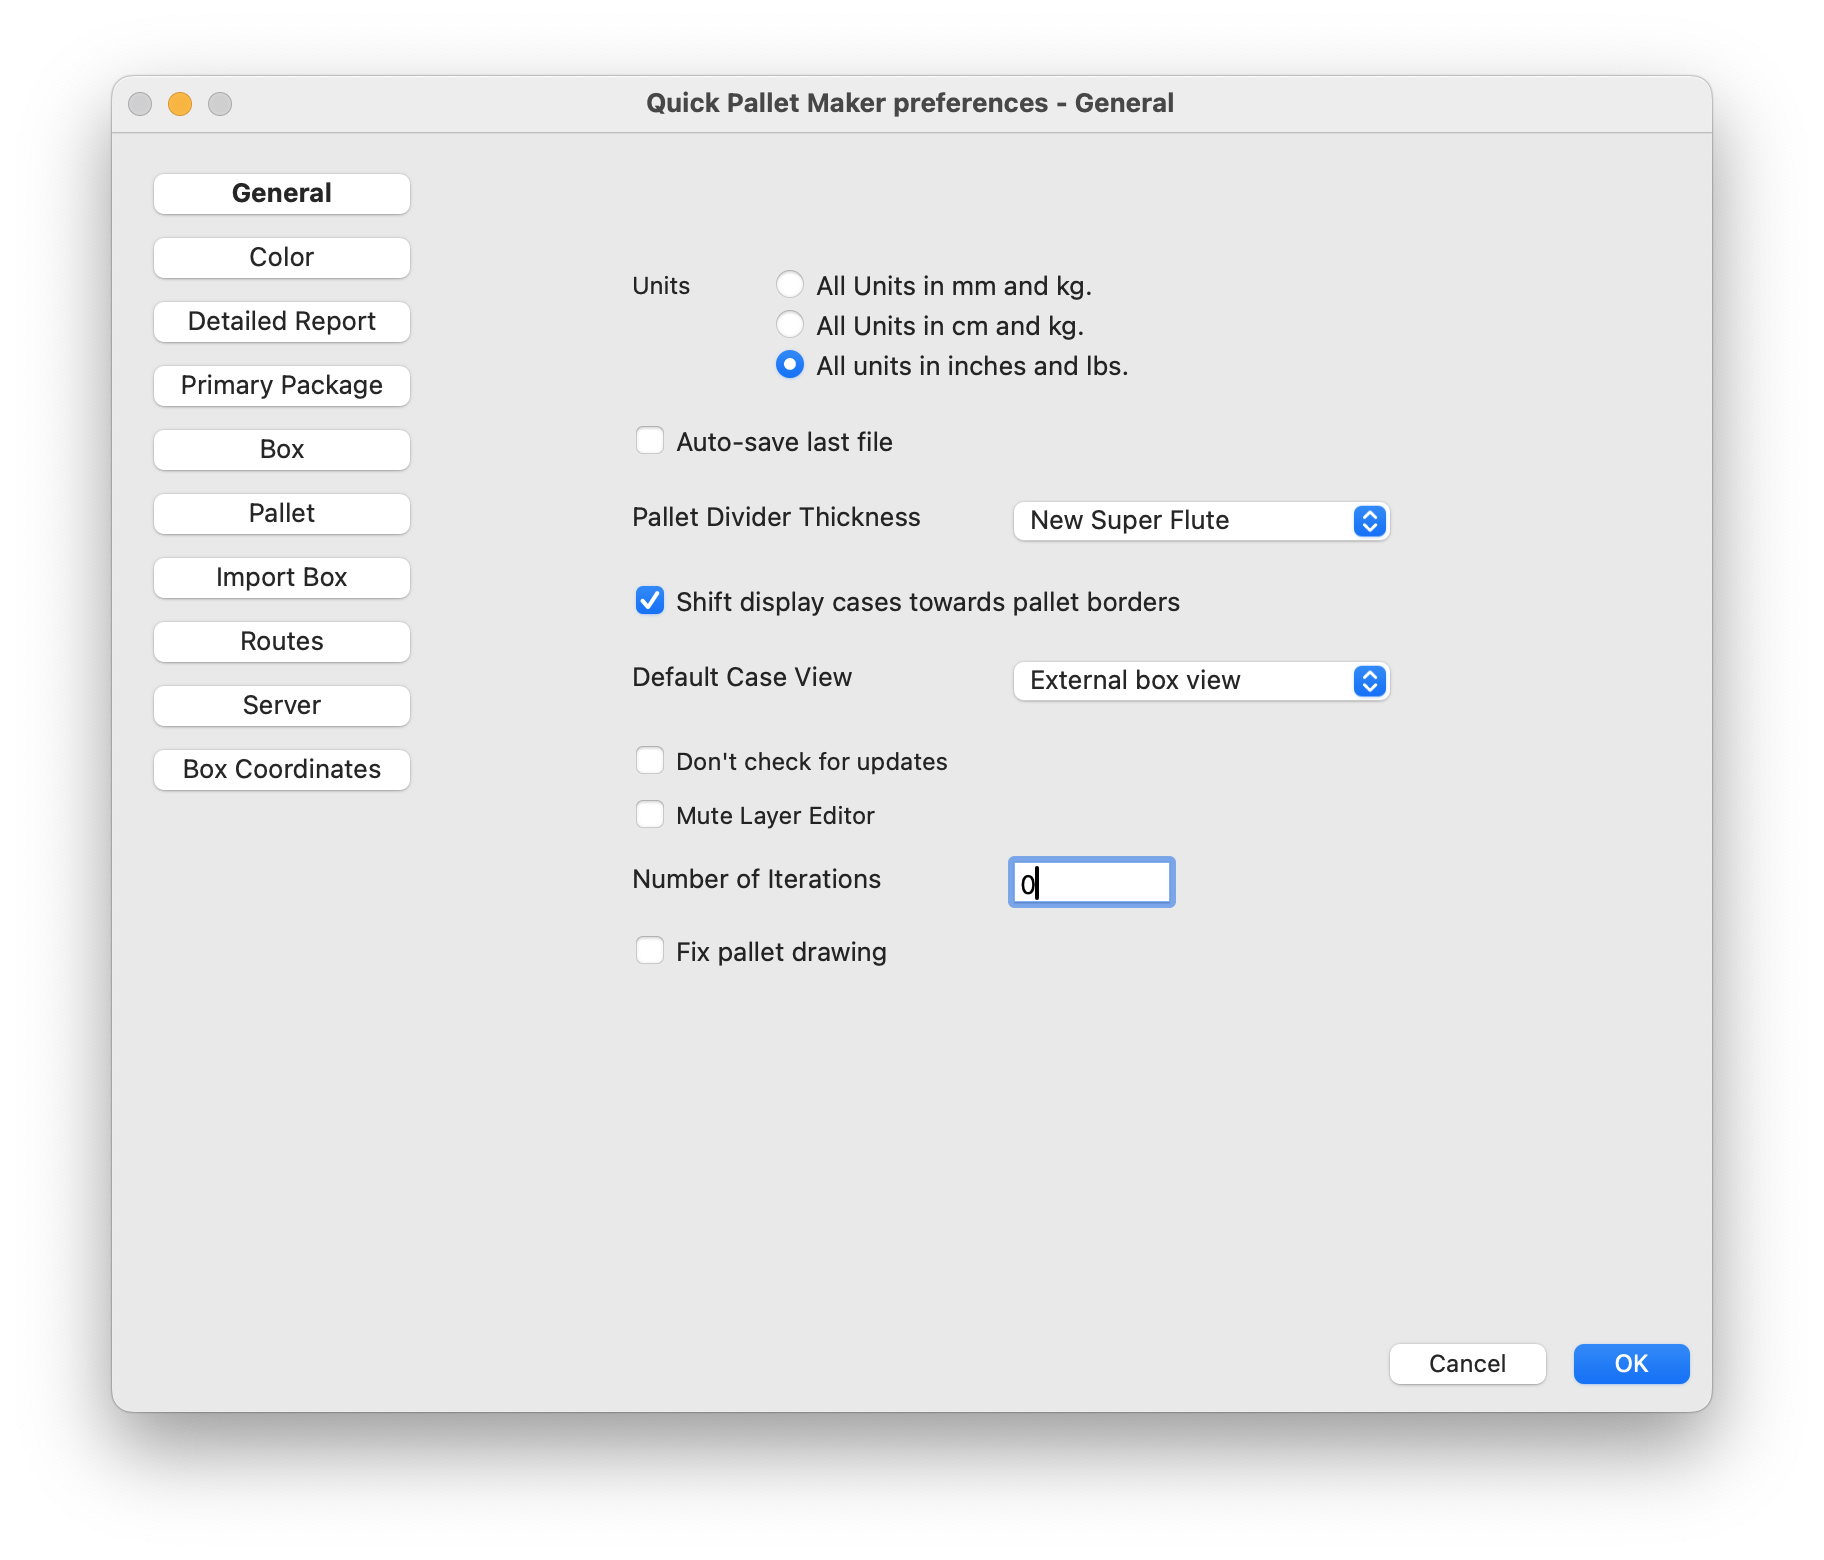
Selecting inches and pounds
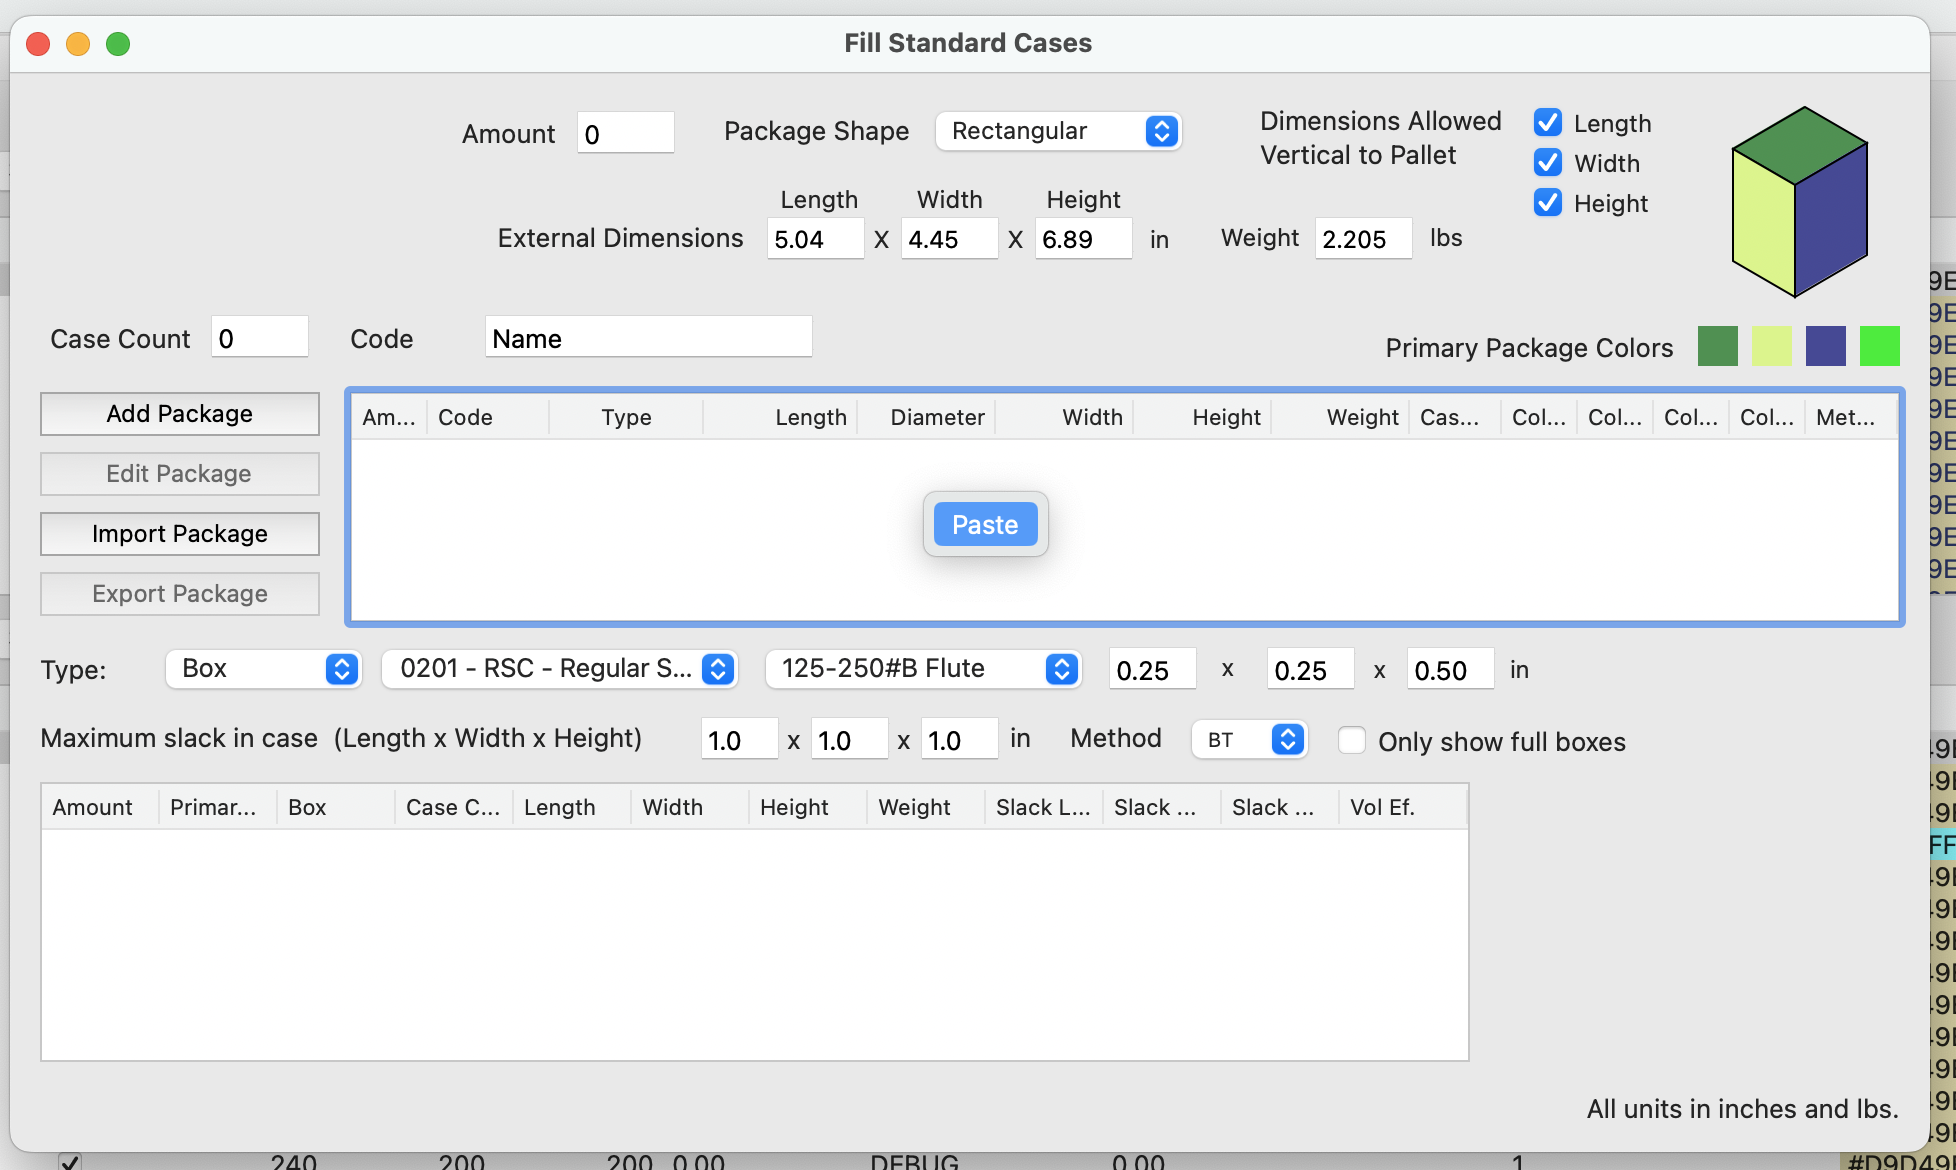
Now we will load these boxes onto the upper table of the second tab of the Standard Cases and Pallets window. We first click on the table, select the data in yellow in the spreadsheet, copy it and paste it onto the table. It should look like the image below.
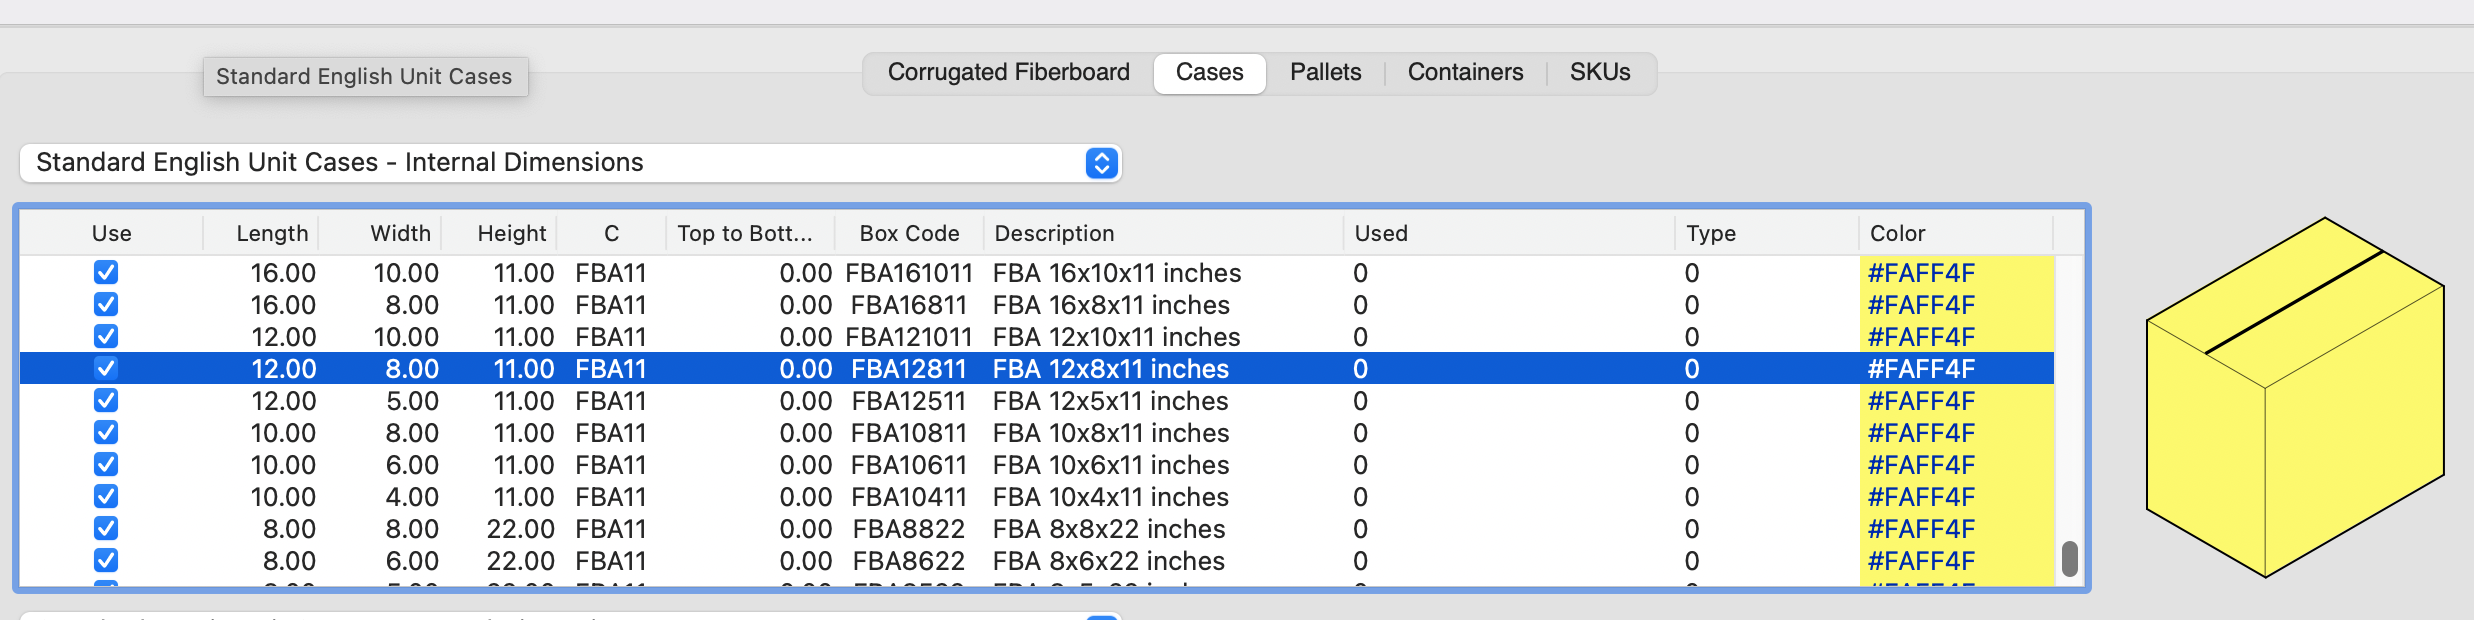
Pasting empty cartons
The next step of the setup process is to create the pallets on which we will load the boxes. We click on the third tab of the Standard Cases and Pallets window, that is marked Pallets. On that table, we select the CHEP 48x40 pallet and then use the Edit - Duplicate command twice. This will create two identical pallets.
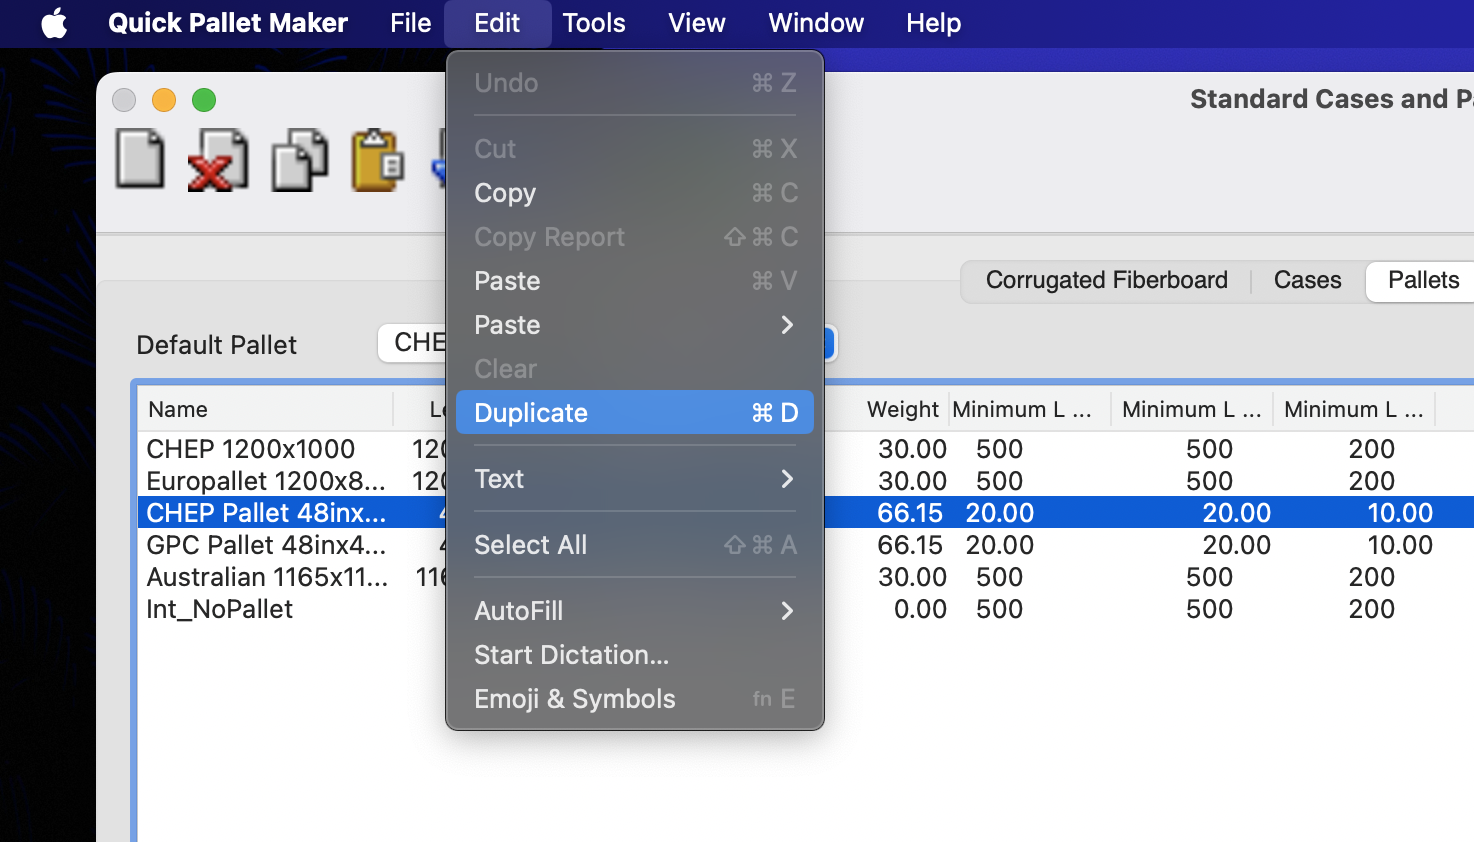
Edit - Duplicate
On these new pallets, we will make the following changes:
This concludes the initial settings. Now we will explain how to process regular shipments.
- We change the name to FBA Double and FBA Single, respectively
- The maximum load height is changed to 50 and 72 inches, respectively
- The maximum weight for both pallets is set at 1500 lb.
This concludes the initial settings. Now we will explain how to process regular shipments.
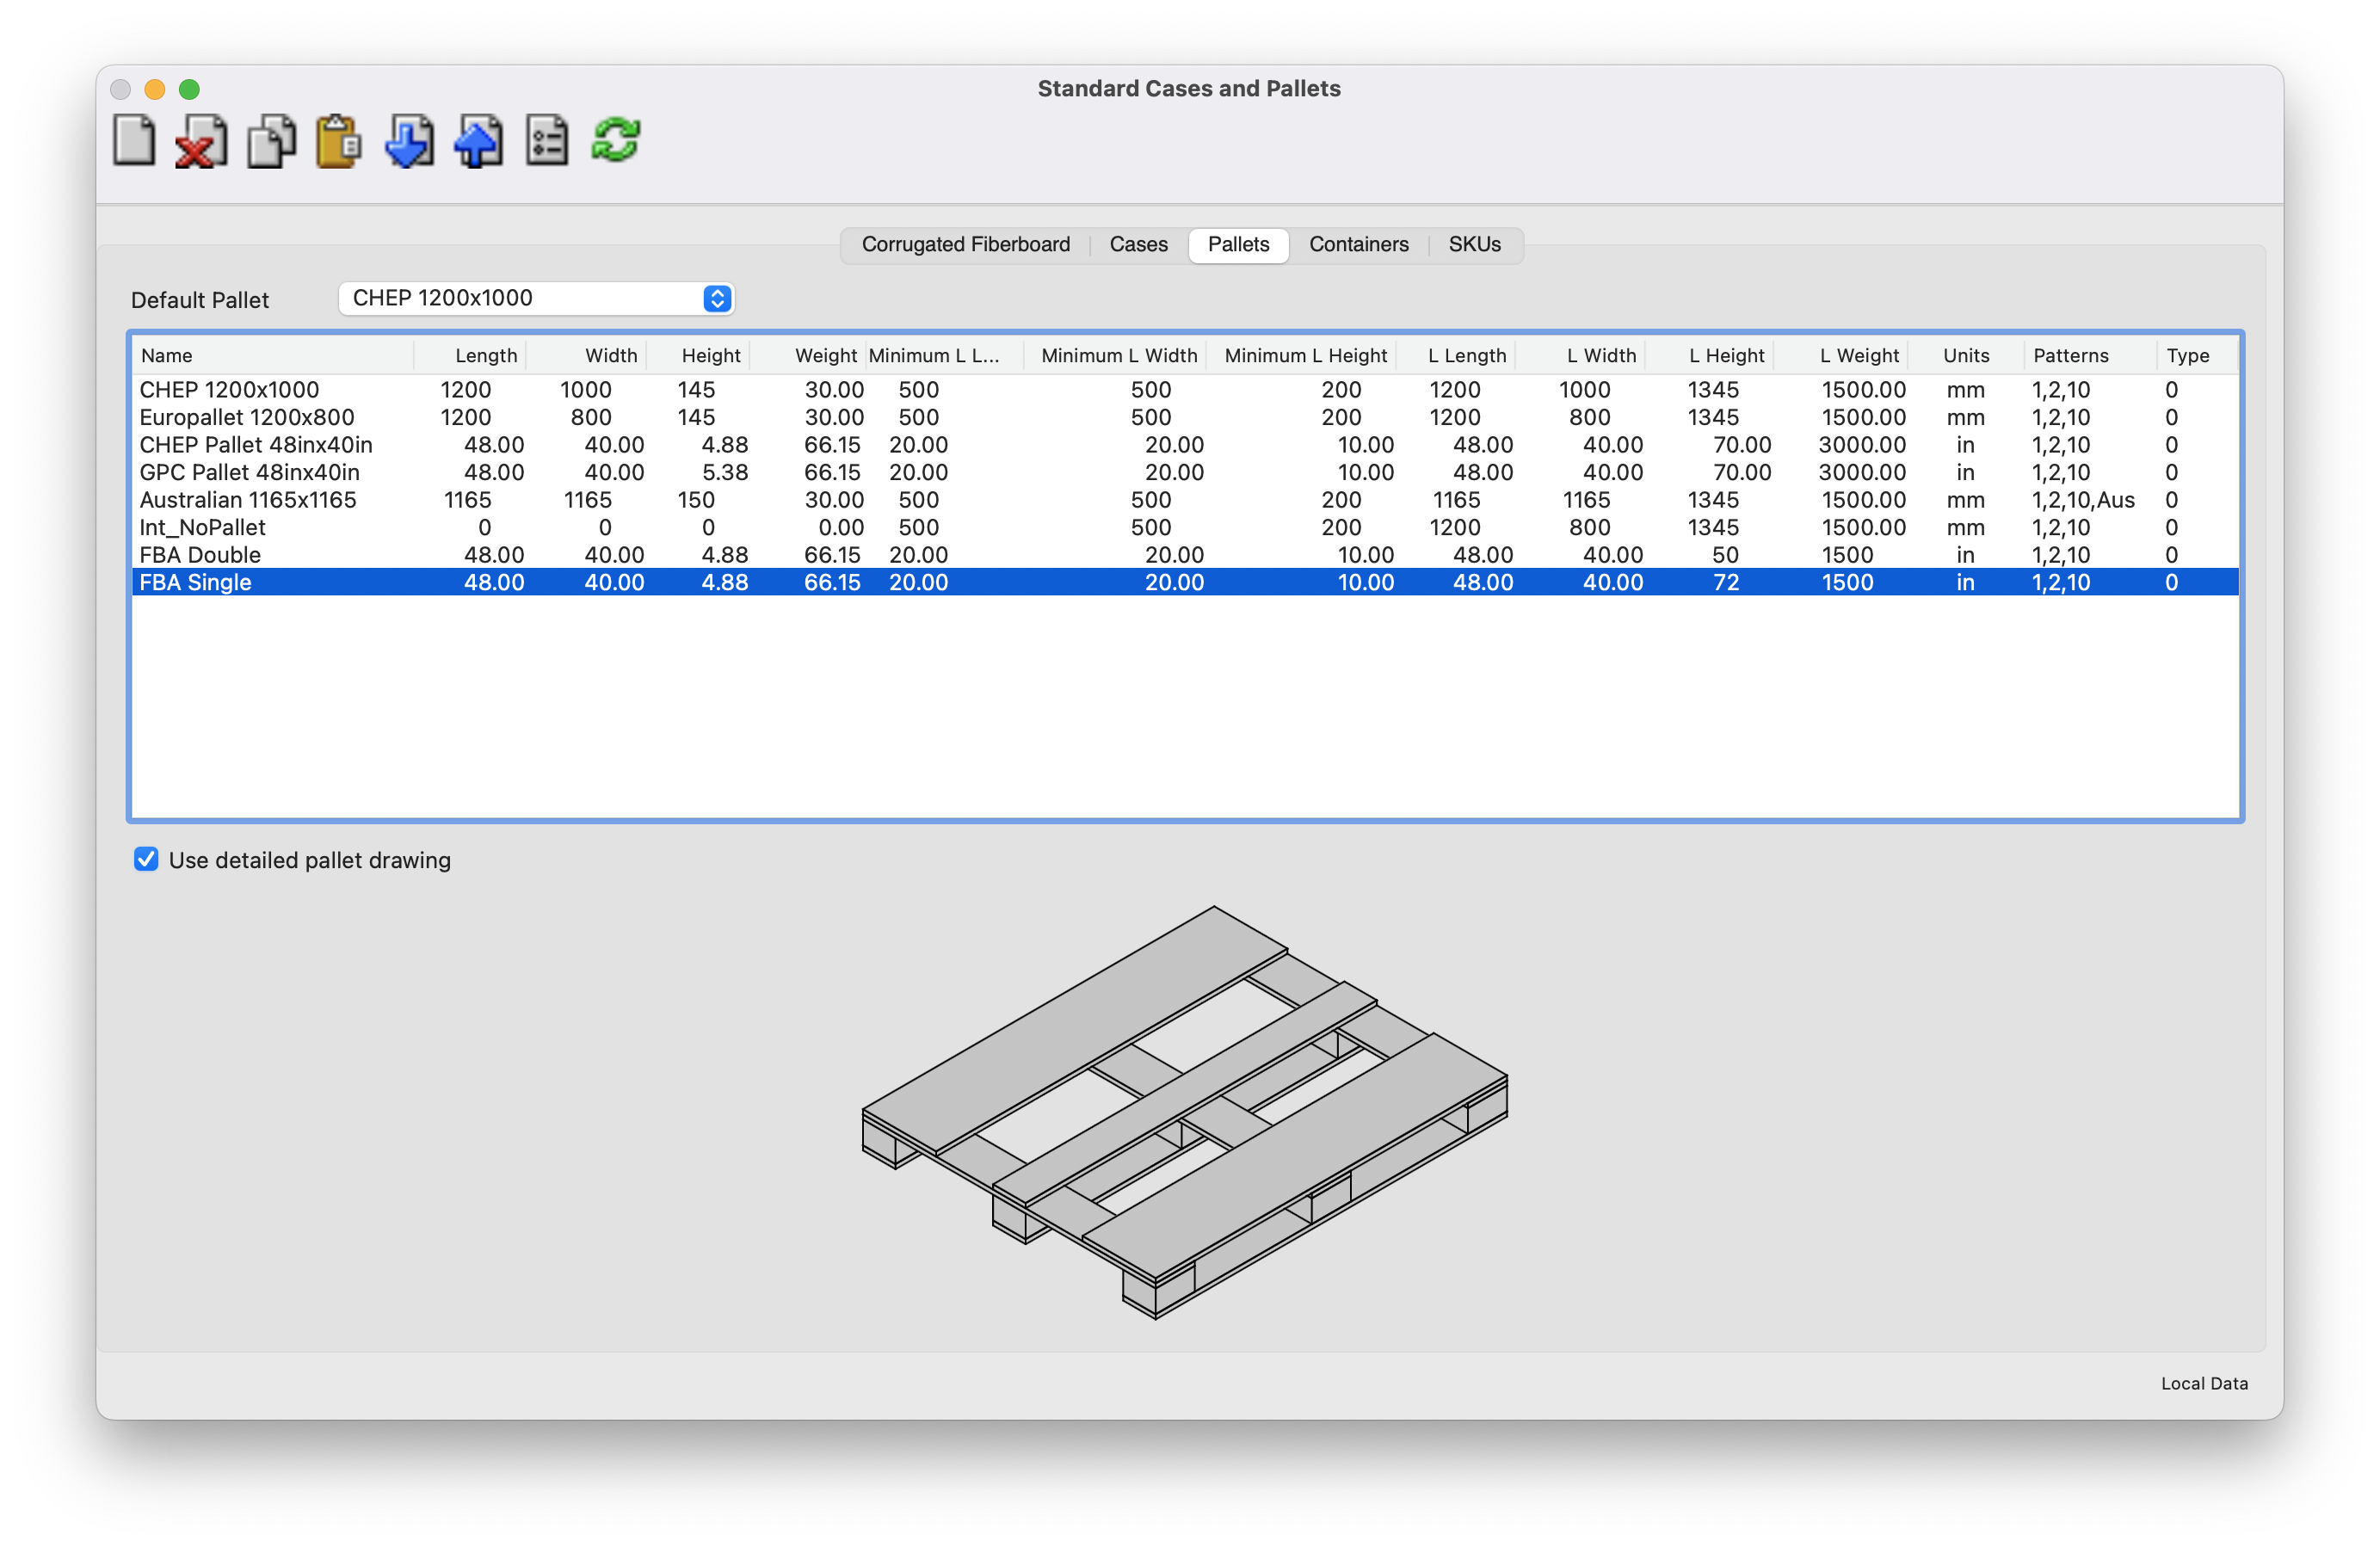
New FBA Pallets
Sample Shipment Calculation
In our example, a shipment is made of a group of packages that will be shipped in boxes to an Amazon warehouse. Our sample company has four gadget types that it sells with FBA. These are the following:- A sports watch, part number: W001
- USB headphones, part no HP02
- A digital outdoors camera, part no AC03
- A wifi router, number WF04
To work with the package data, we will create a spreadsheet, like the one that can be downloaded through this link. The columns in the spreadsheet are the following:
- Type: 0 for rectangular packages, 1 for cylinders, 2 for bottles
- Amount of packages in the shipment
- Length of the rectangular package
- Diameter (use zero if a rectangle)
- Width
- Height
- Weight
- Body: applies to bottles
- Cap: applies to bottles
- Length Allowed: use true if item can be flipped
- Width Allowed: use true if item can be flipped
- Height allowed: default
- c1: a color in hexadecimal format
- c2
- c3
- c4
- Code: the product number or SKU identifier
- Description: a description of the product
- Unit: 0 = mm/kg, 1 = cm/kg, 2 = inches/lbs

Spreadsheet with data
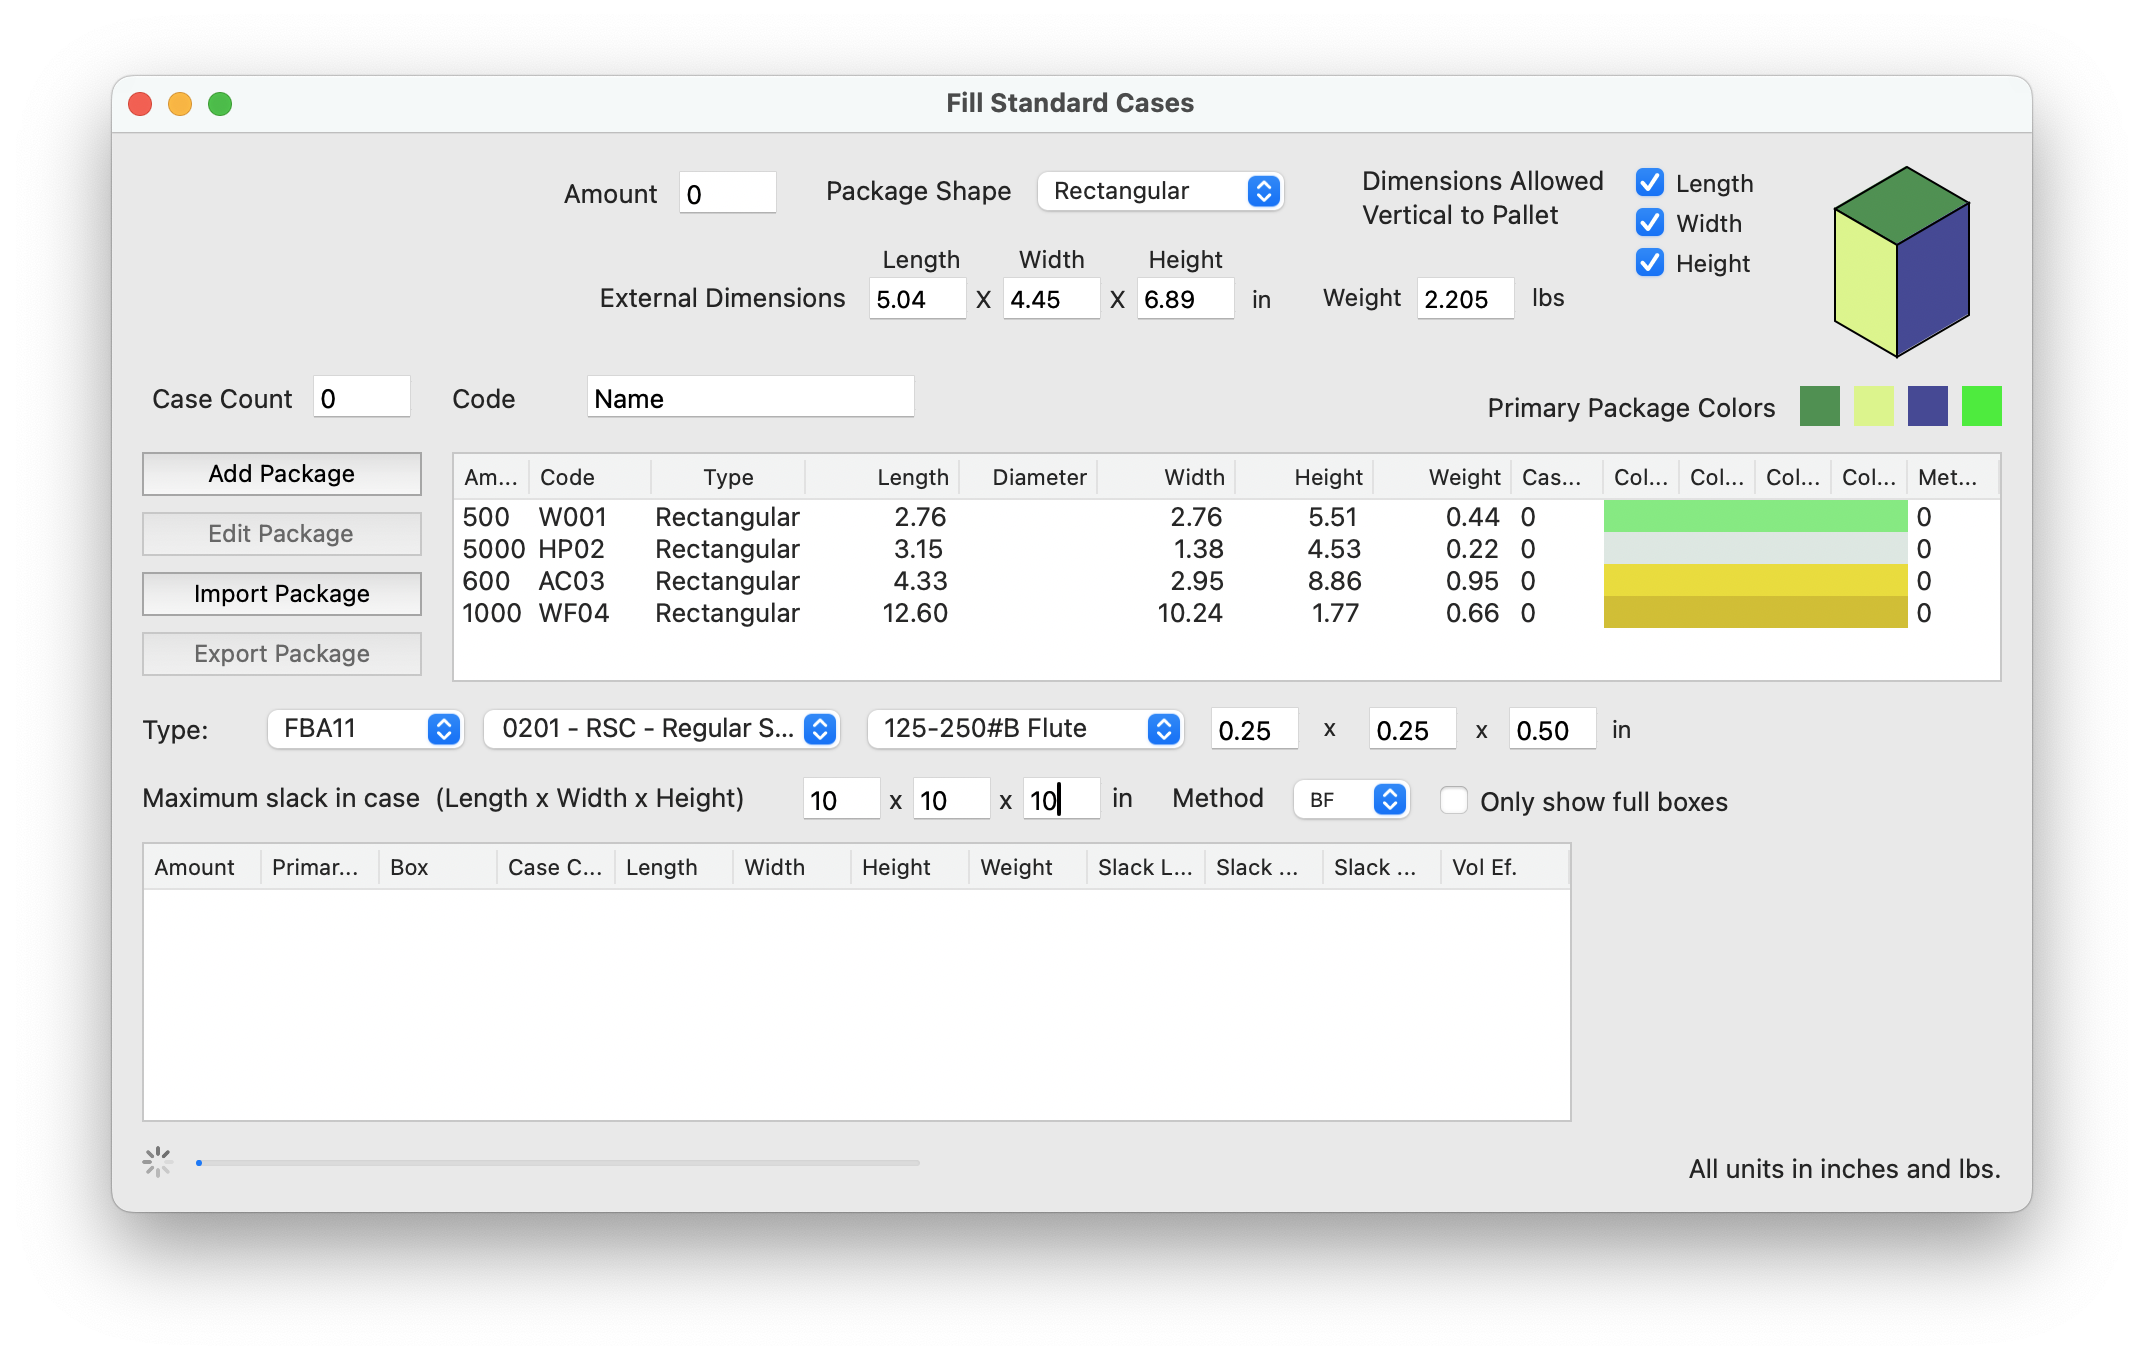
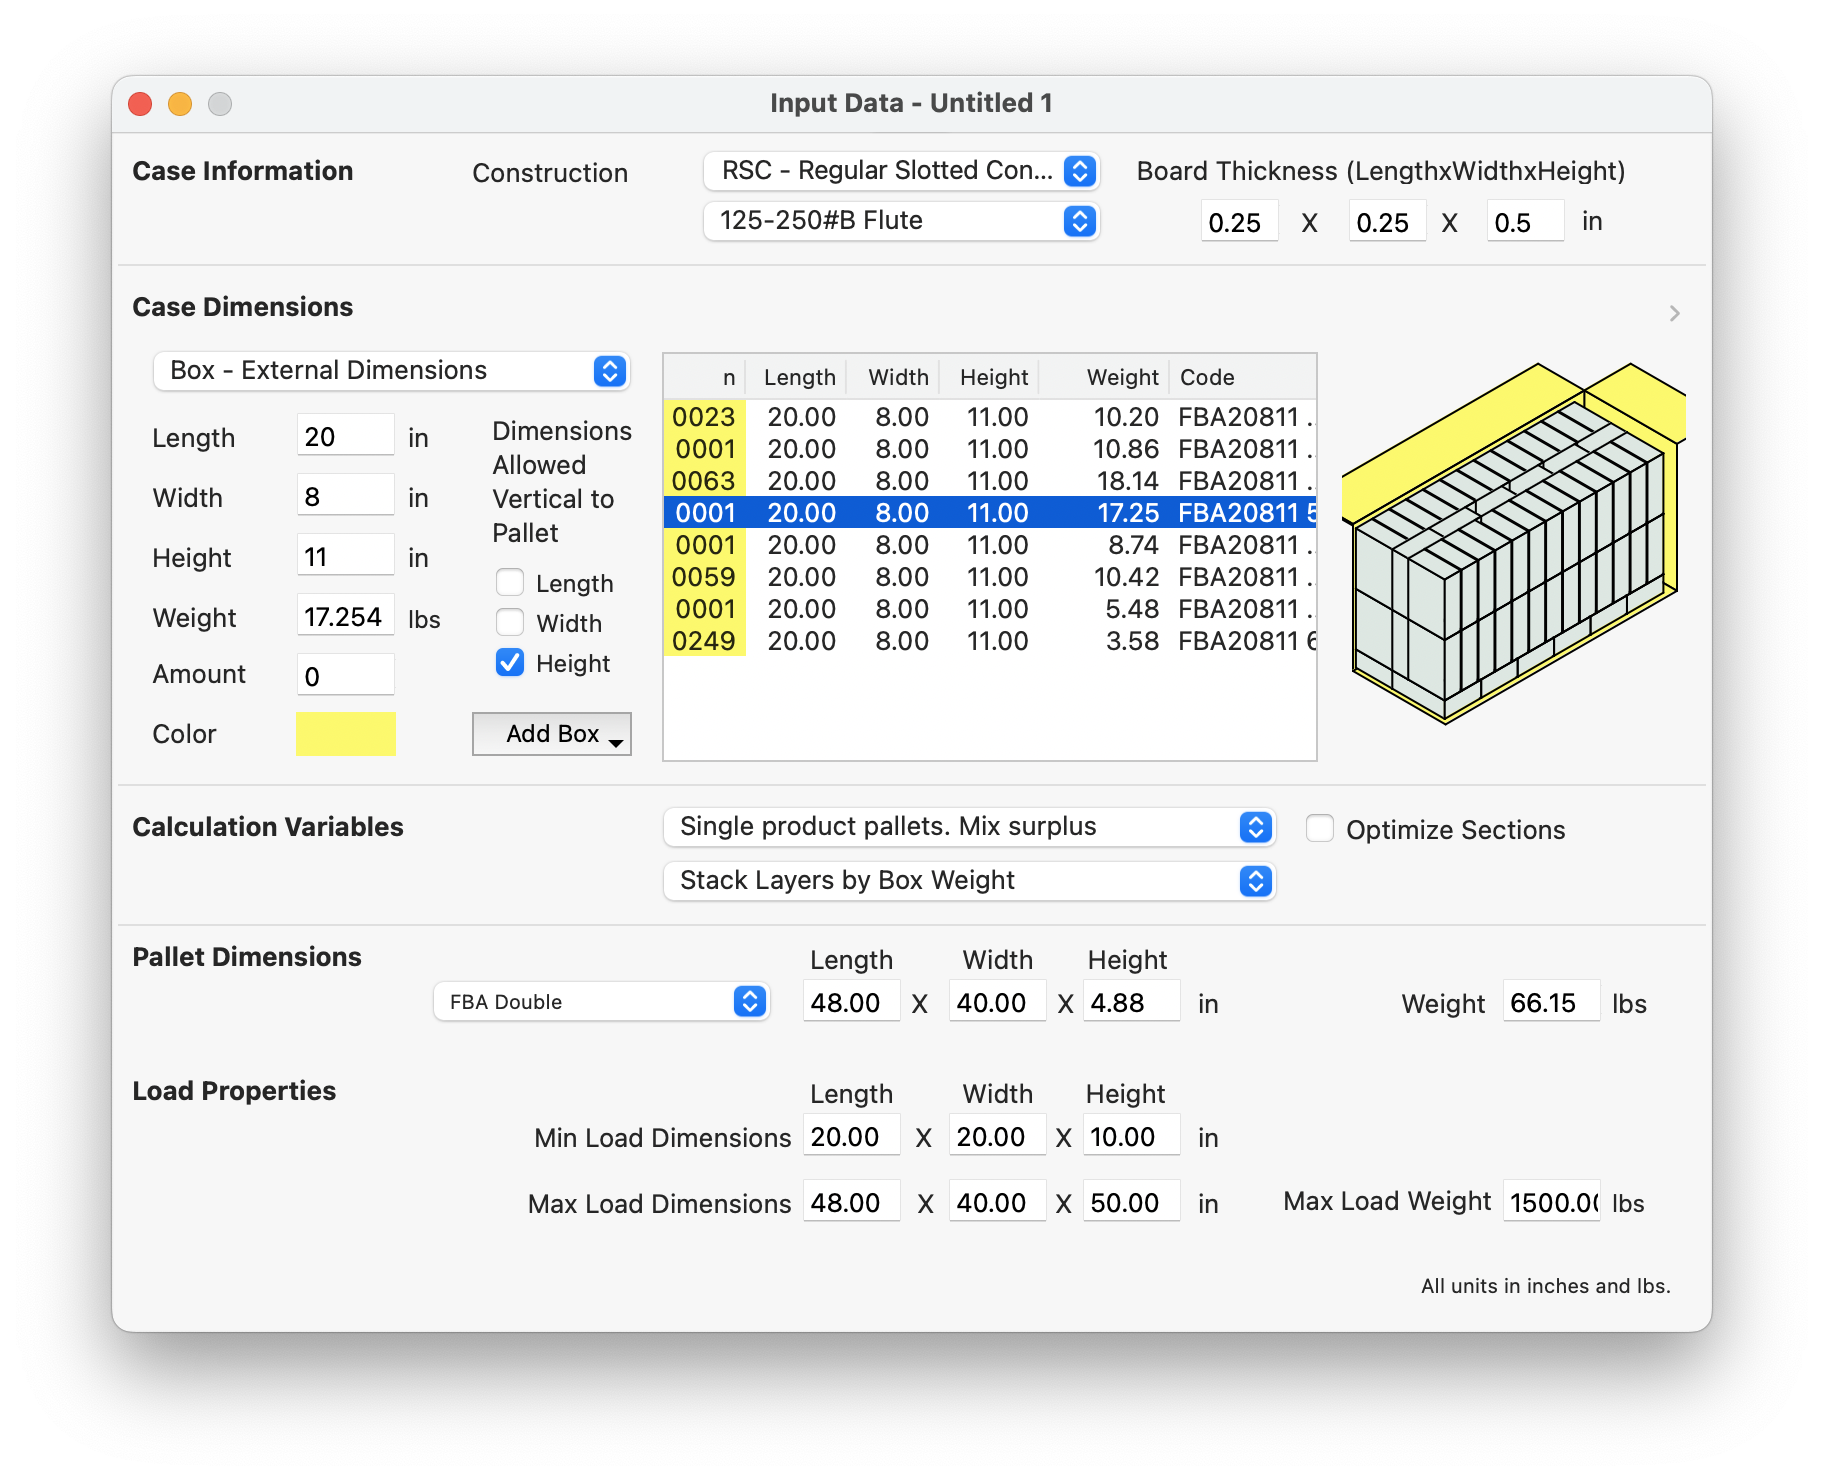
In Quick Pallet Maker, we will open the Fill Standard Cases window and paste the contents from the section of the spreadsheet that is in yellow. This is done by selecting and copying in the spreadsheet and then right-clicking on the table on top and choosing Paste.
Pasting primary packages
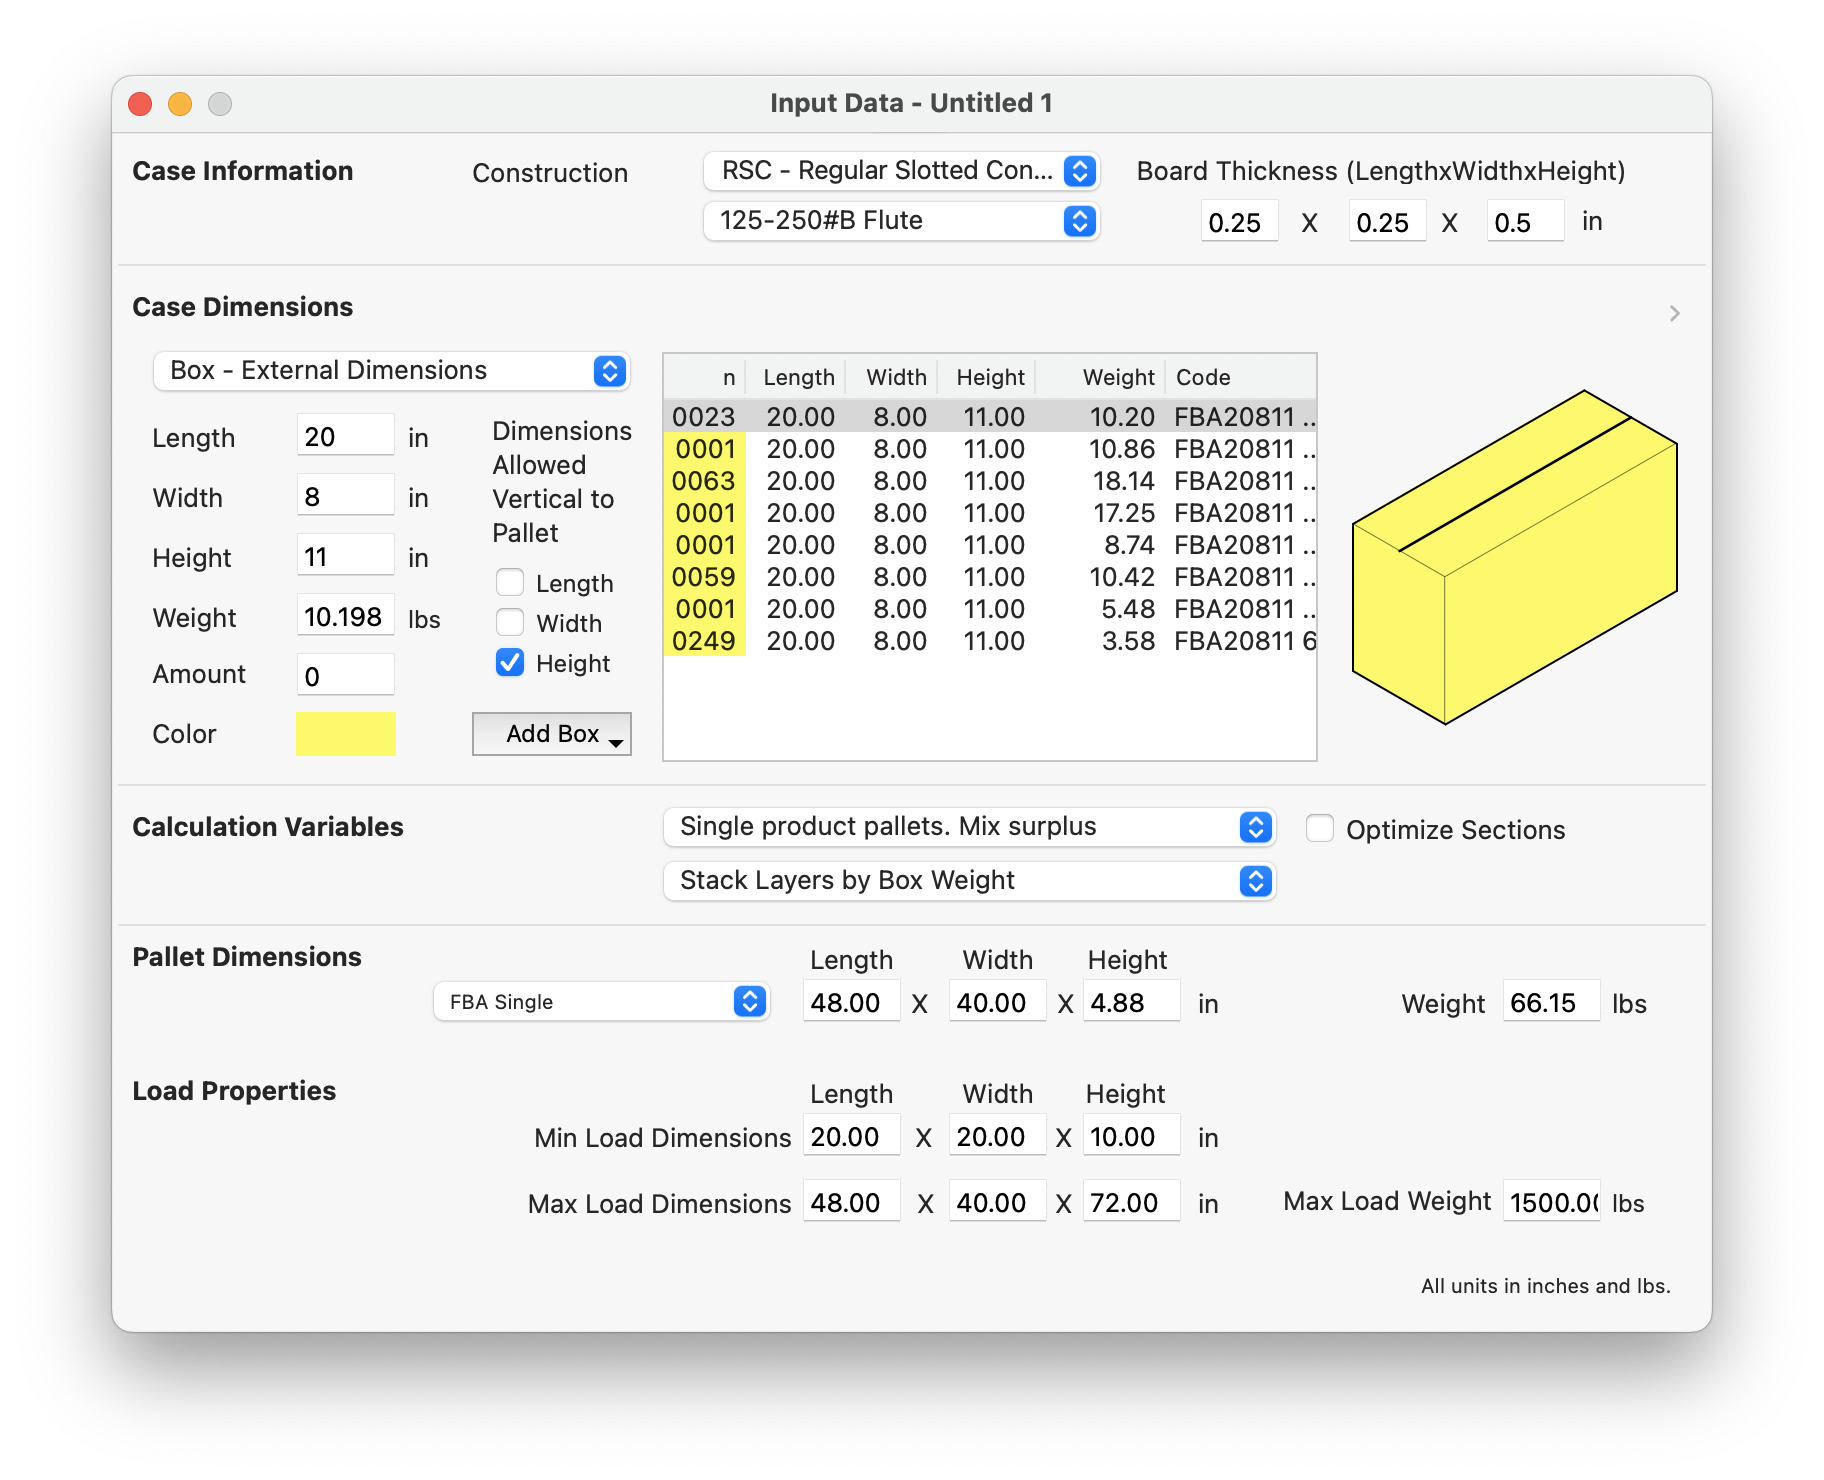
We will then select the box type. Since our items are relatively small, we will use the FBA 11" boxes (the shorter ones we loaded previously). We leave the box construction and flute as is. We increase the maximum slack in case to 10 inches per side. We select the Back to Front (BF) method since we are working with mixed boxes. We leave the Only show full boxes box unchecked.
Now we use the Tools - Recalculate command to calculate.

Tools - Recalculate
After a short while that depends on the number of available standard cartons and packages in the list, you should see a list of boxes in the bottom table. The first column in the table is the number of boxes of a specific type and the fourth column is the case count. In some instances, the case count reflects more than one product type. You can right-click on the box drawings to see the contents and scroll through the different ones.
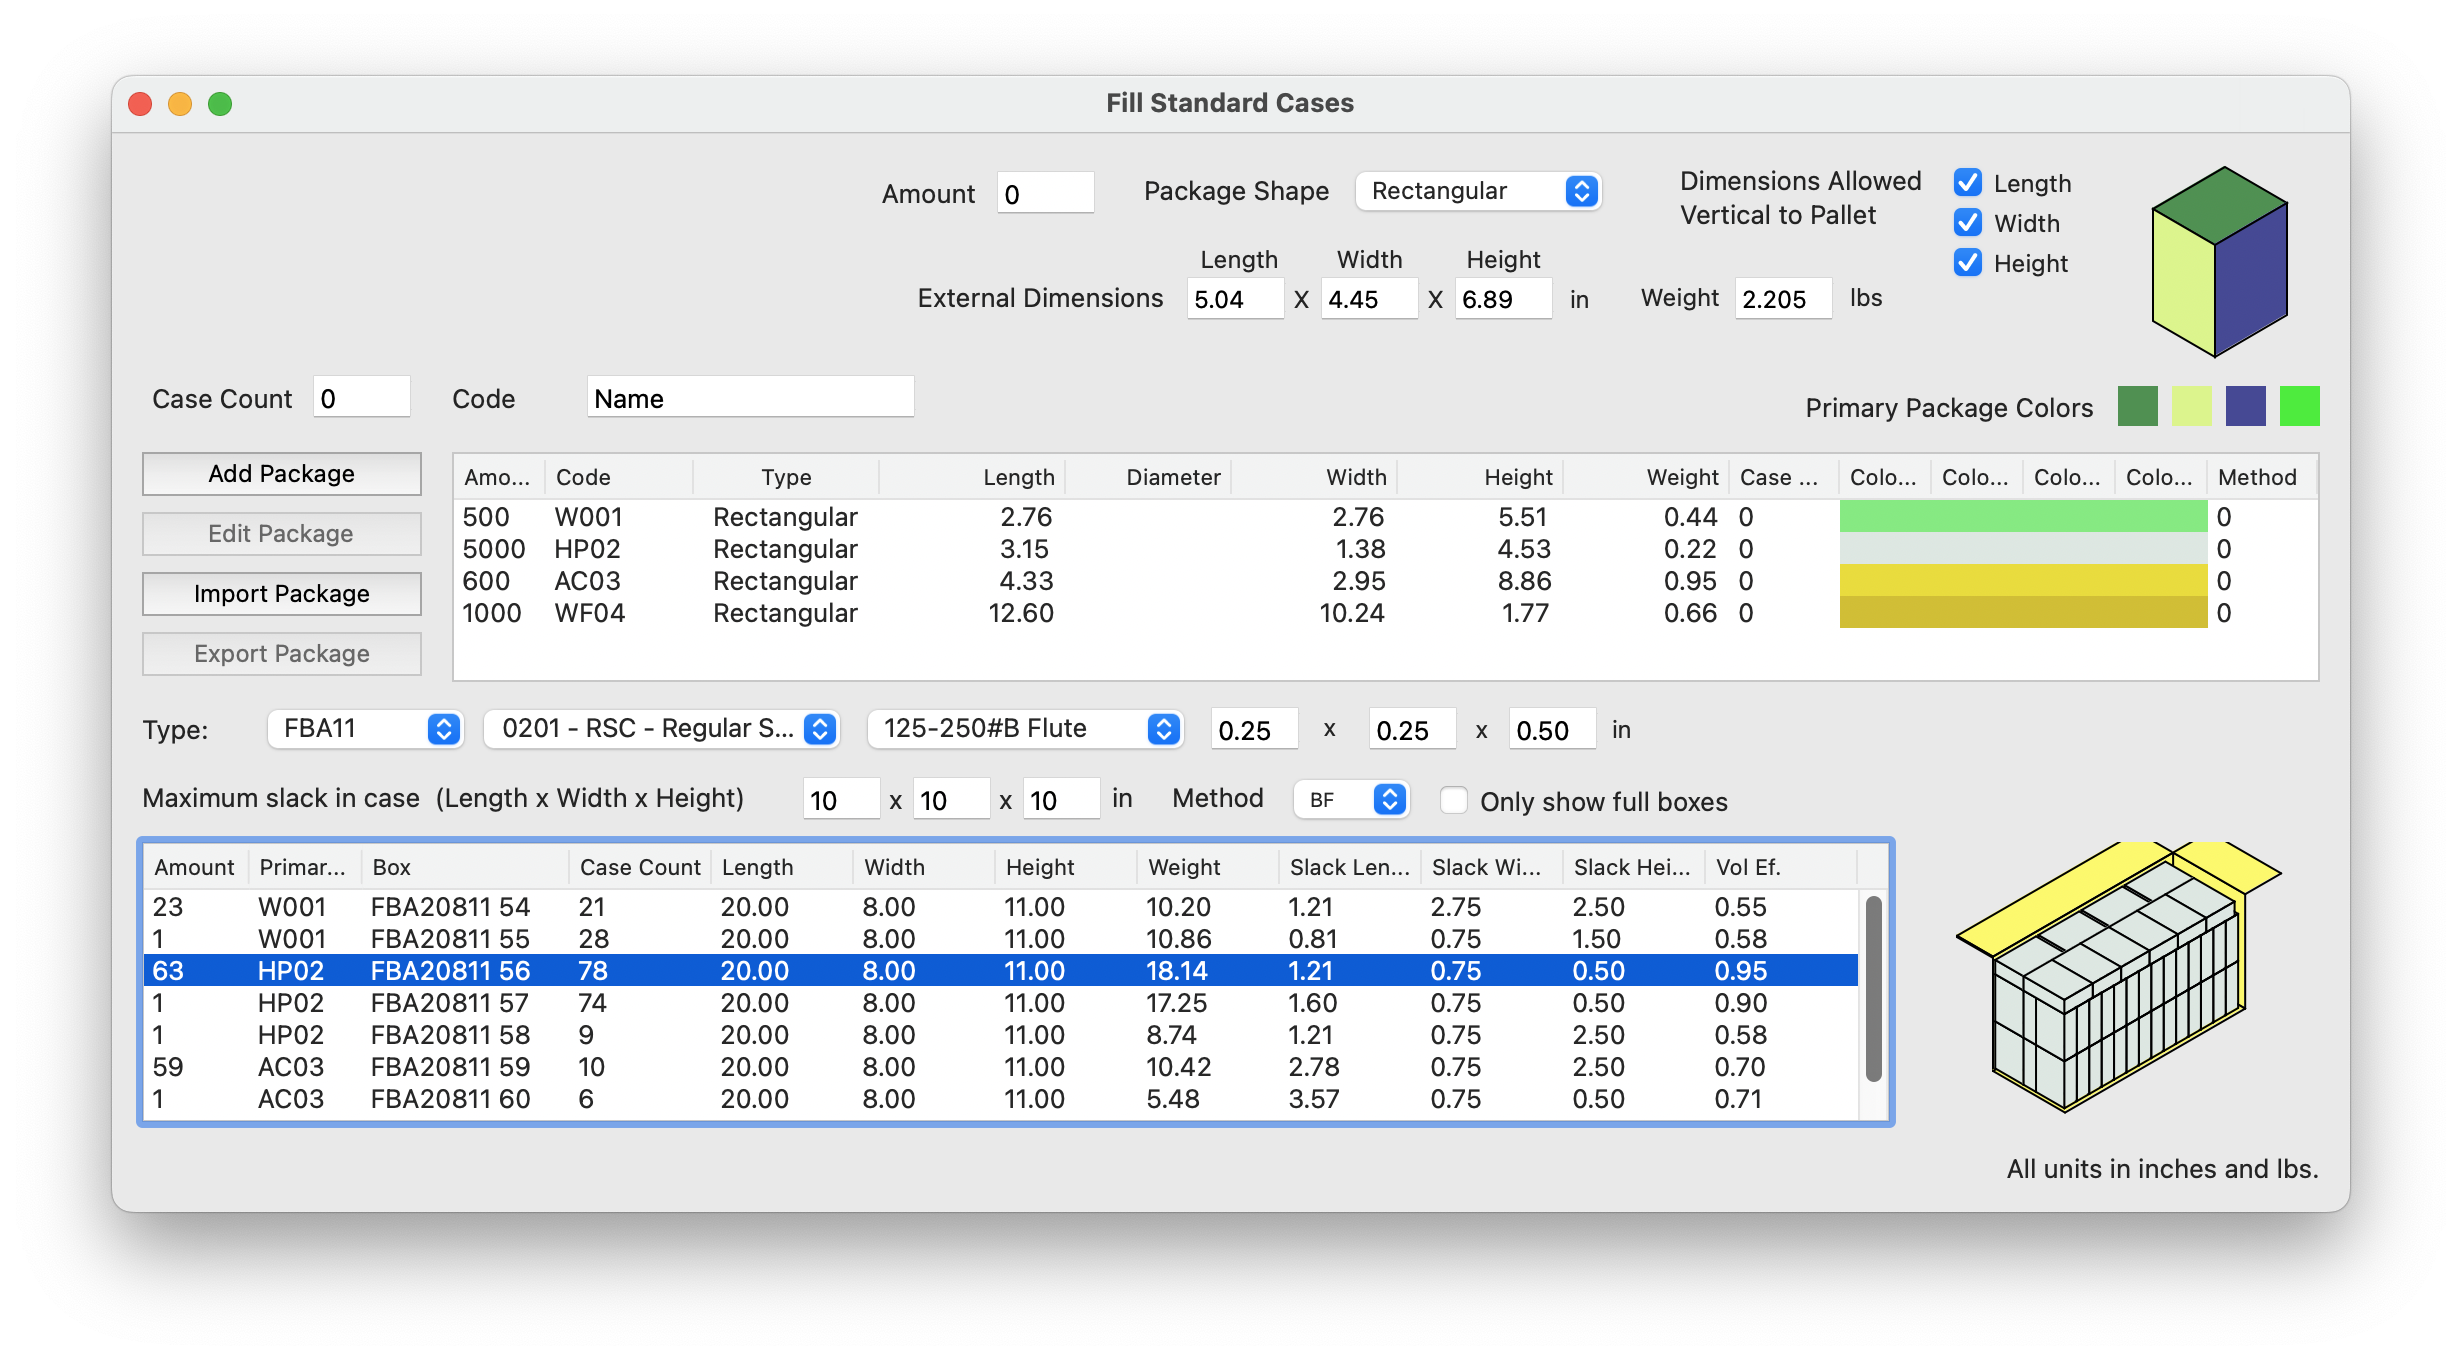
Box fill results
To create a report of the boxes that were generated, select them all in the bottom list and then choose File - Save Report.
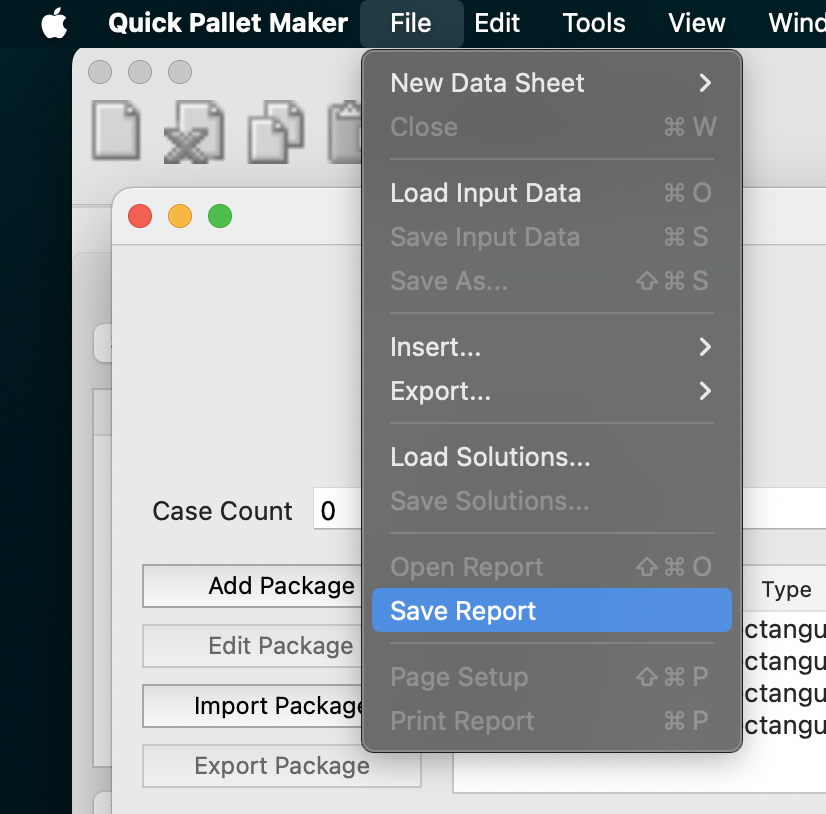
File - Save Report
This will create a HTML file that can be opened with any browser. It will contain a summary of the number of boxes and packages at the top and then the detail of each one, with a drawing of the contents.
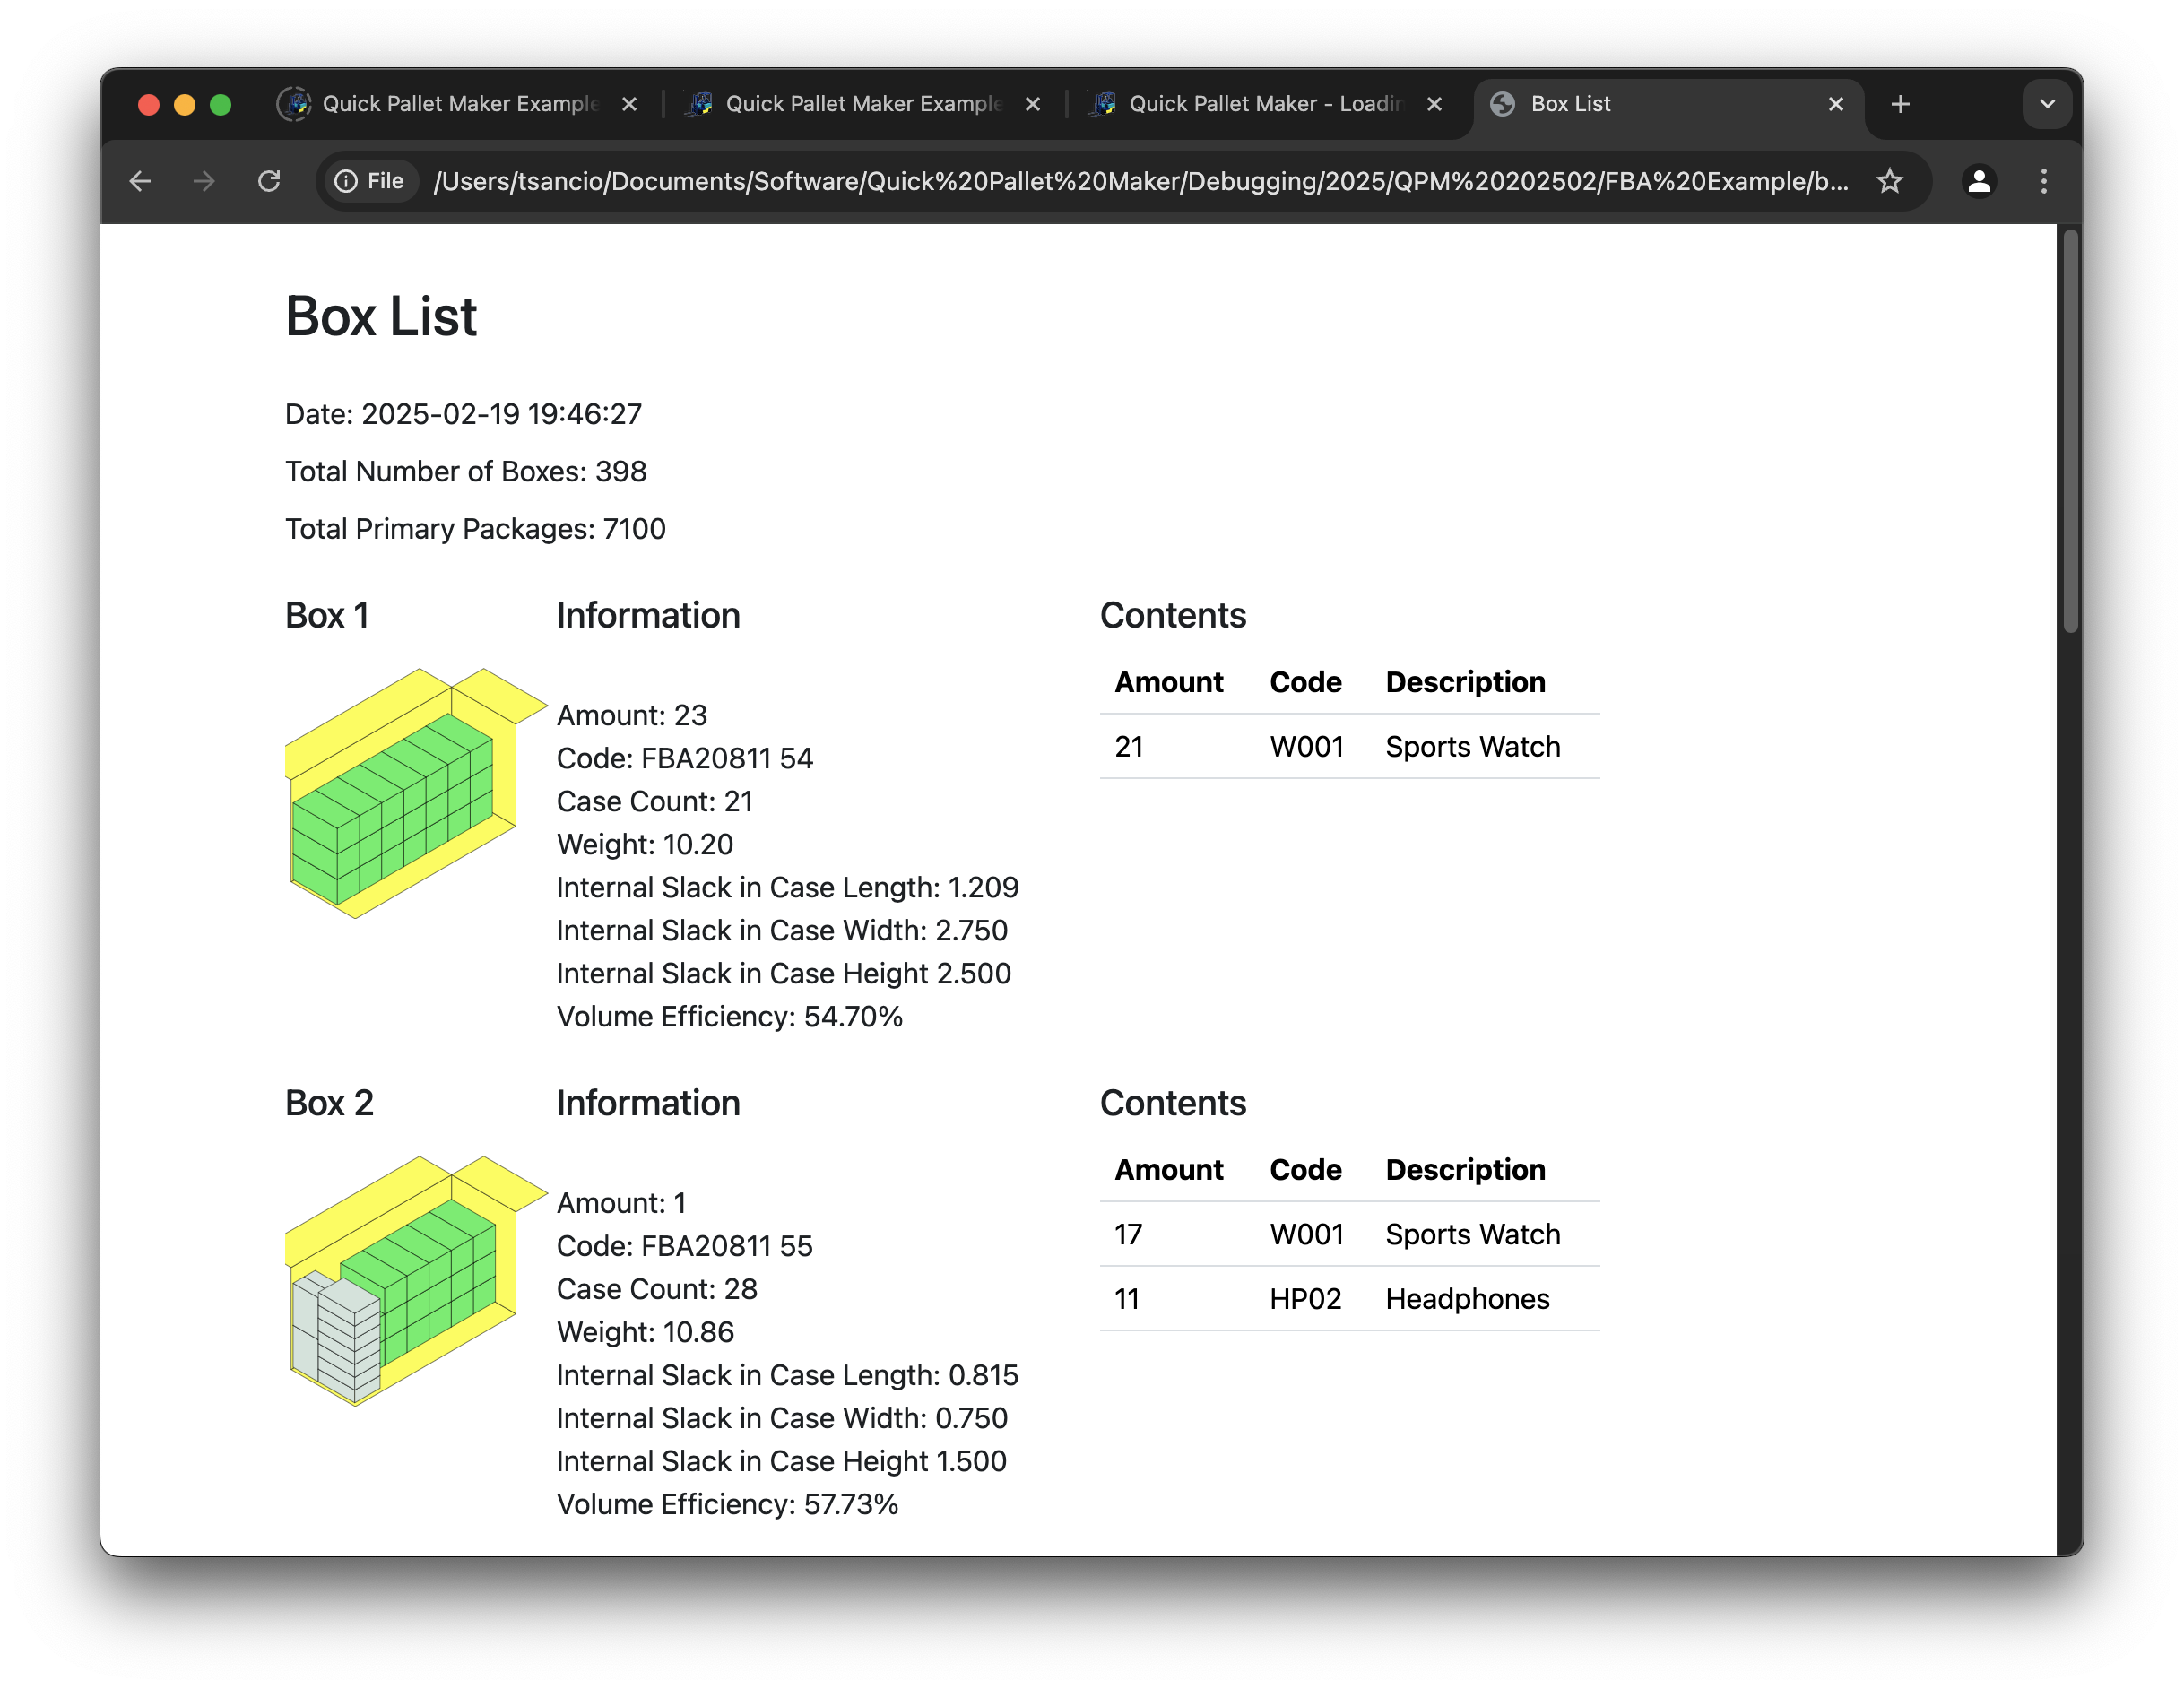
Box contents report
The next step is to calculate the pallet arrangements. Note that when we set up the Quick Pallet Maker data at the beginning of this exercise, we created cartons with round numbers that deliver pallet layouts with 100% area efficiency. Therefore, the inefficiency is concentrated in the box fill. To fill pallets, we will use the New Data Sheet - Box on Pallet menu command.
New Data Sheet - Box on Pallet
This will open a new window with a table in the middle. We select all the boxes in the previous box fill window and drag them to the table in the middle of the new window. Next, we select the double-stack FBA pallet. The result should look like the image below.
Box to Pallet window
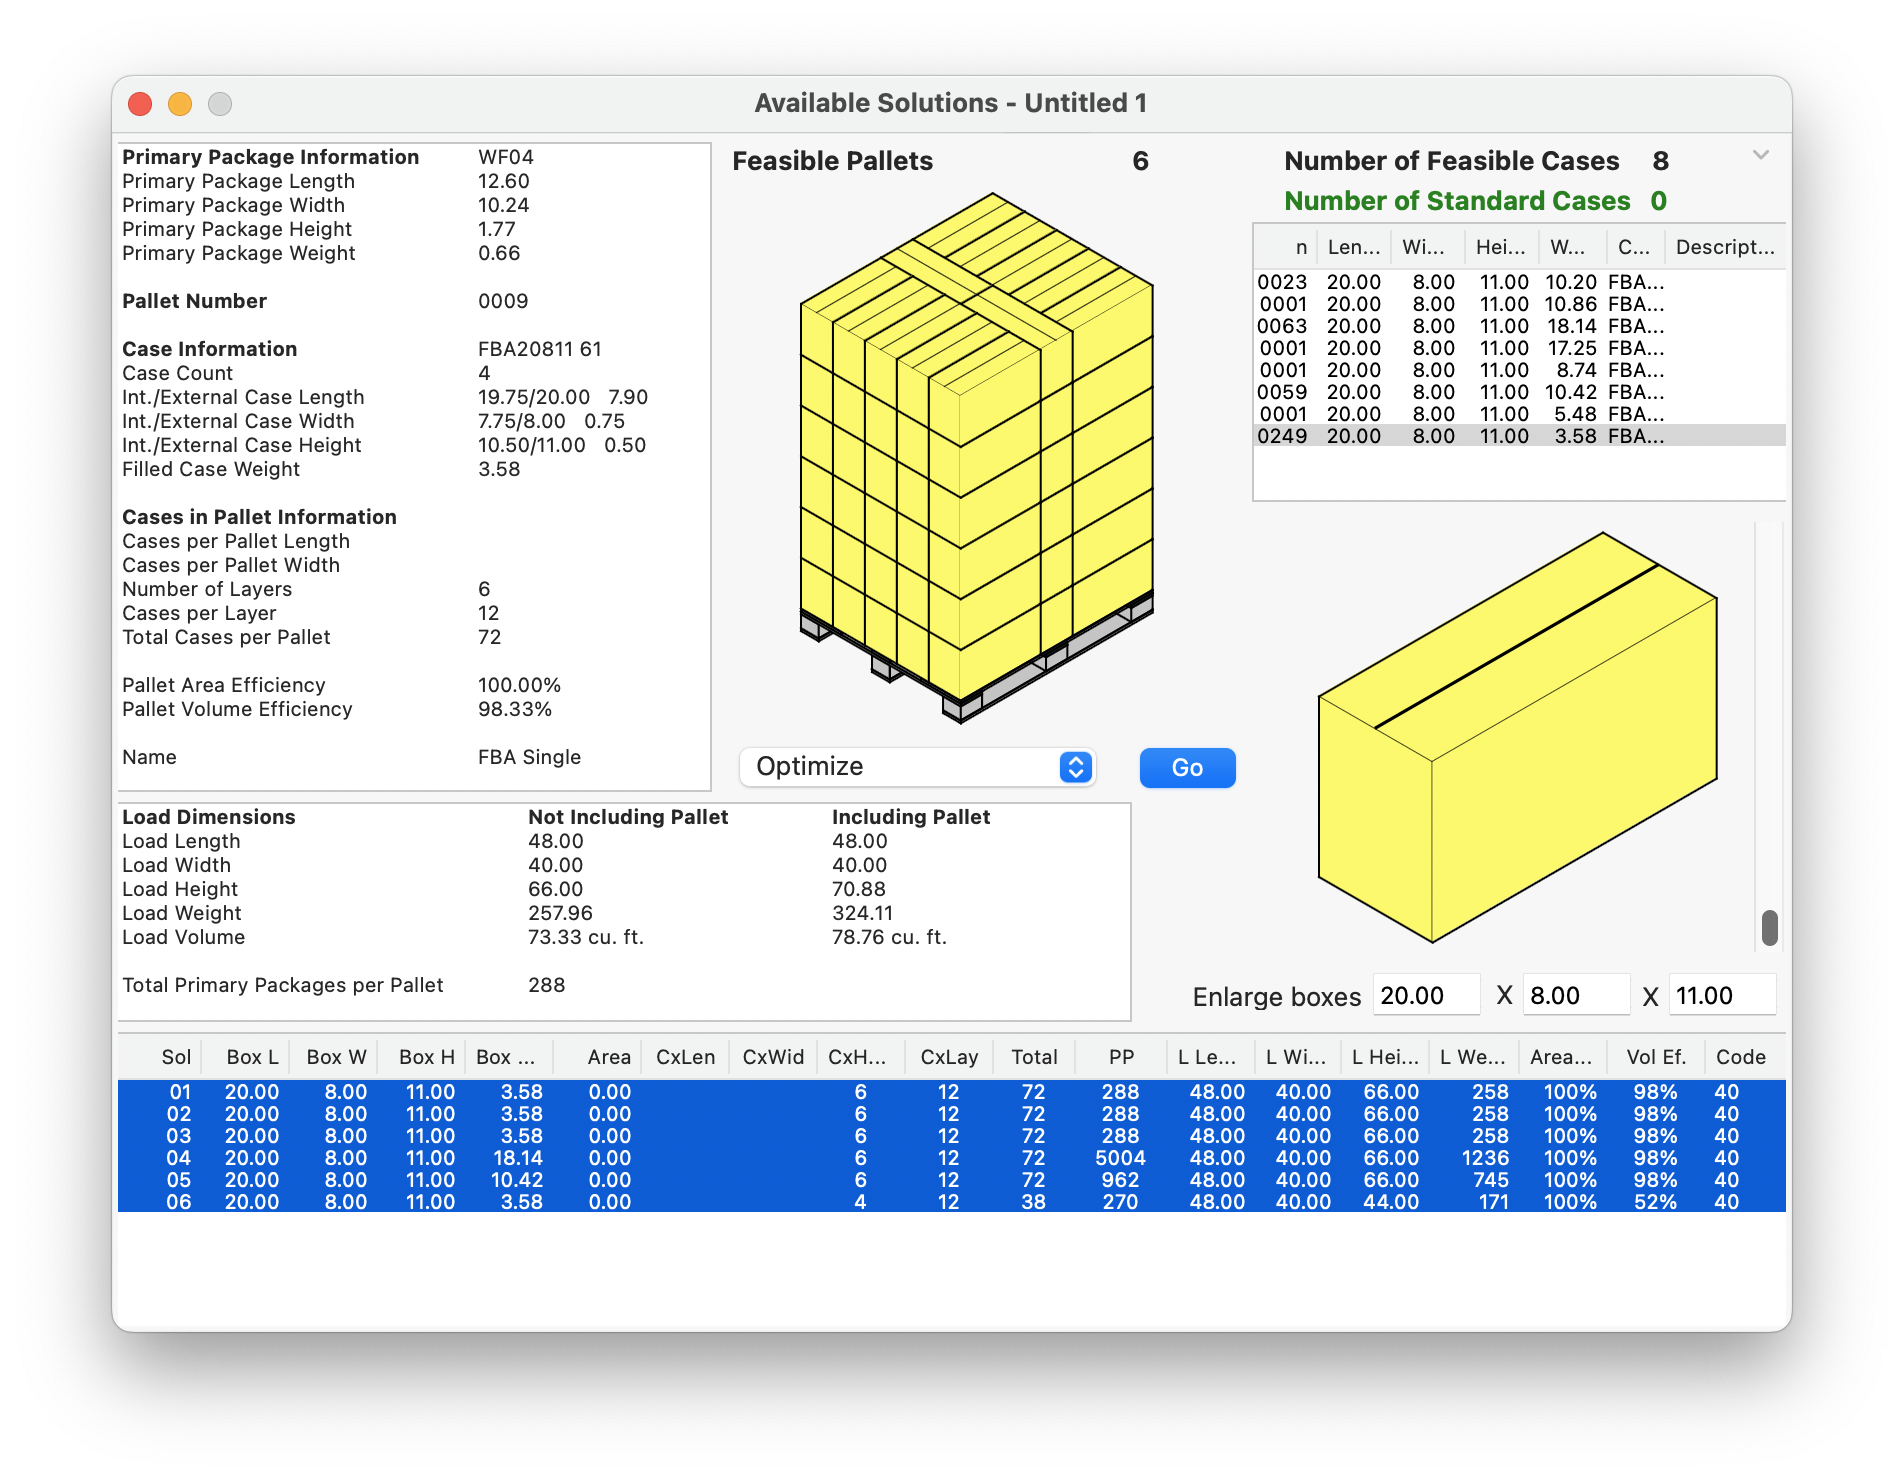
We use the Tools - Calculate Box Shipment command to produce the results. In this case, the number of nearly perfect pallets (area efficiency = 100%, volume efficiency = 98%) is 8 and the last pallet contains the leftover boxes, so the volume efficiency is lower.
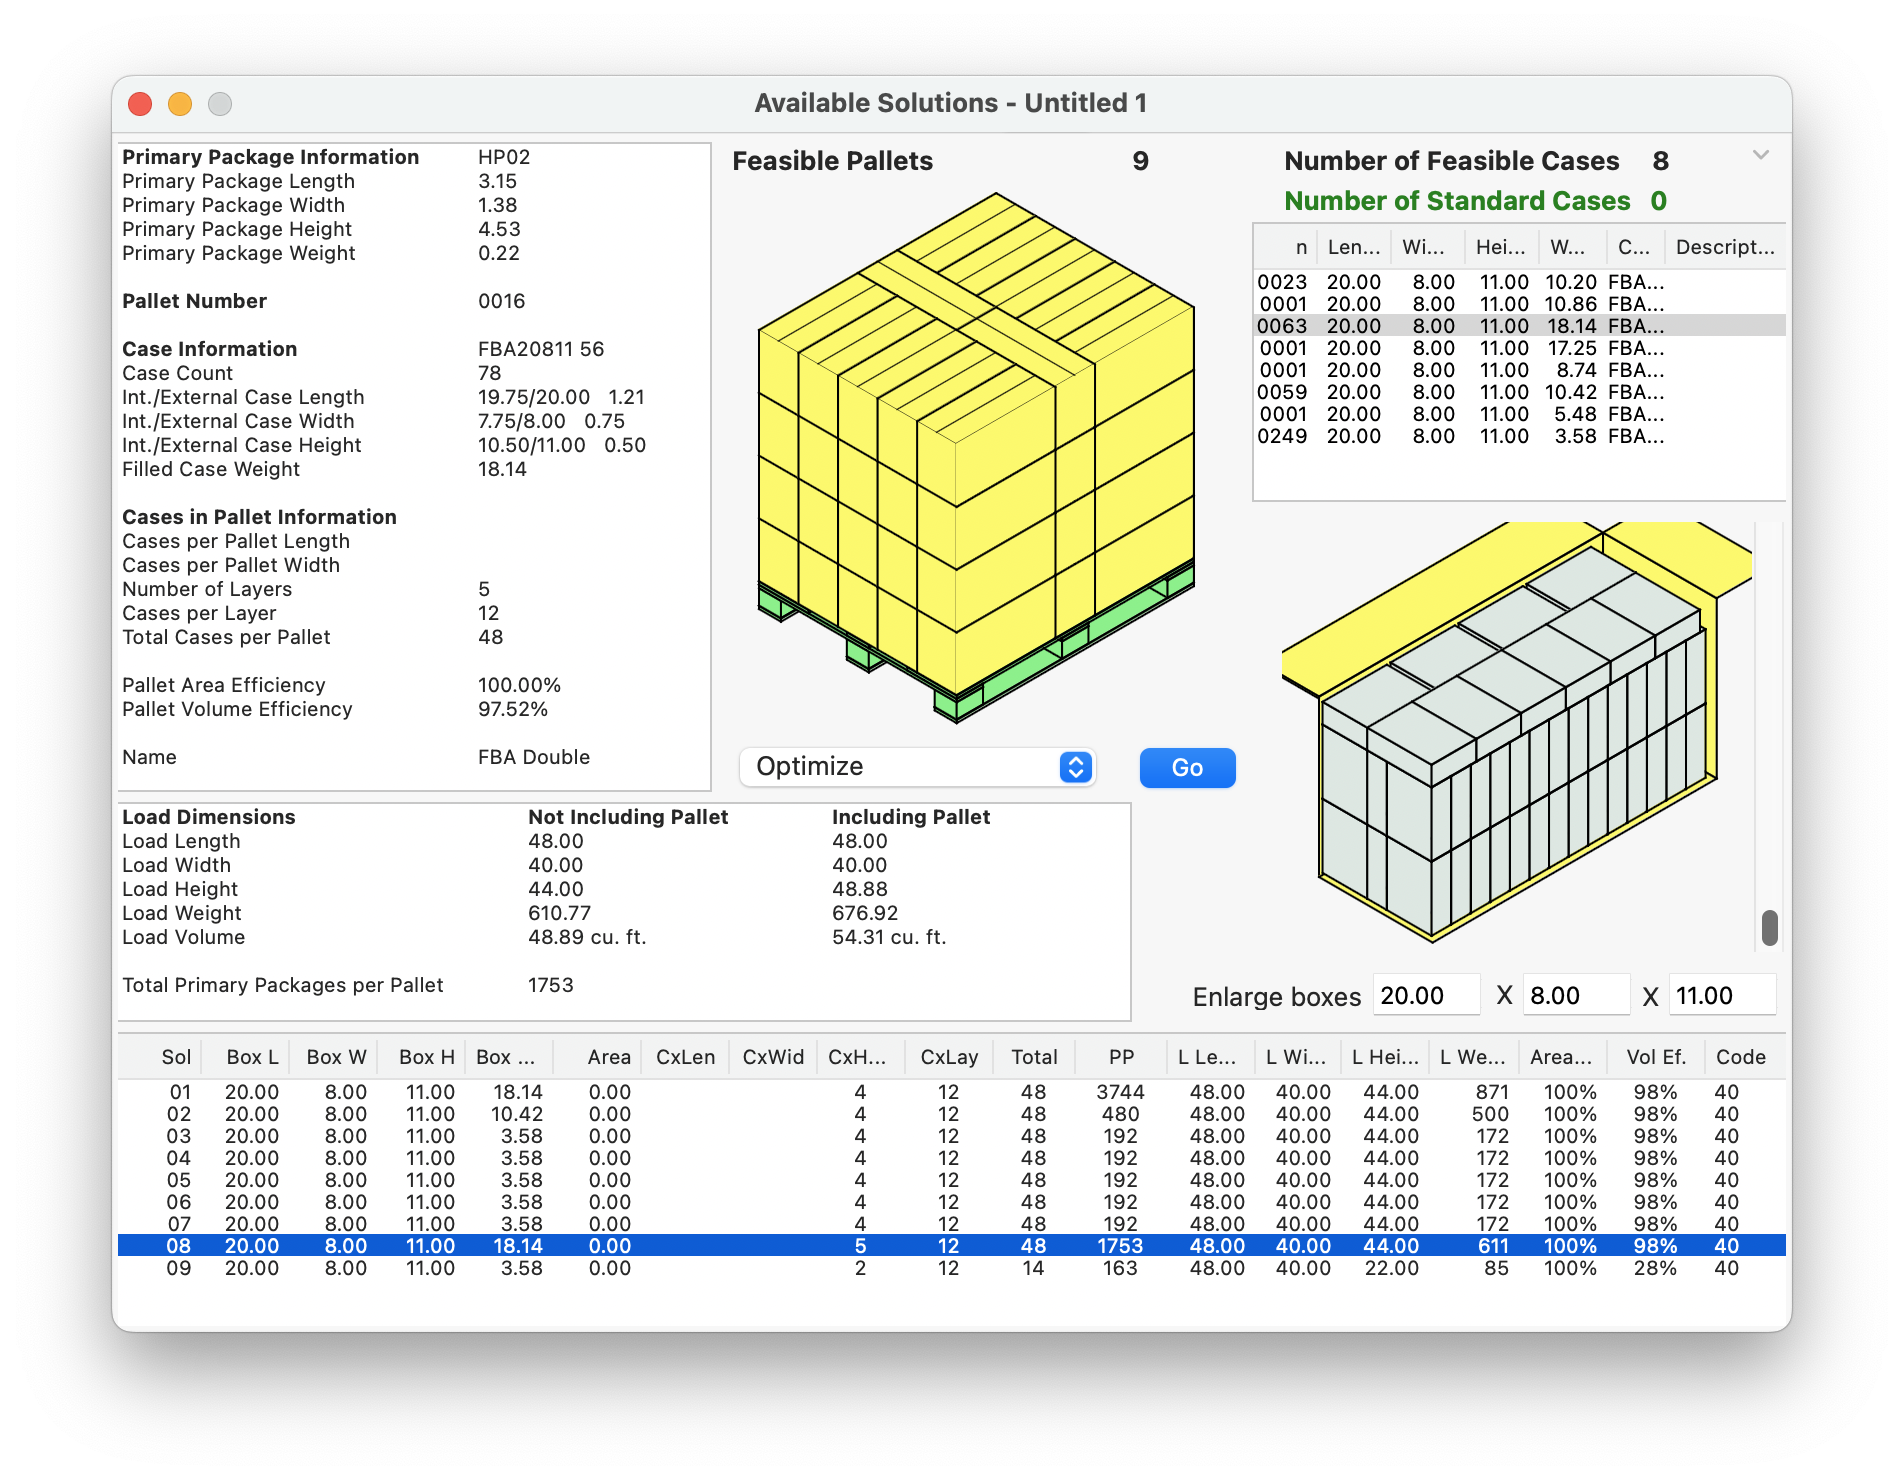
Available Solutions window with pallet list
We can also generate a report of all the pallets that were generated. This is done by selecting them all in the bottom list and then using the File - Print Report menu command.
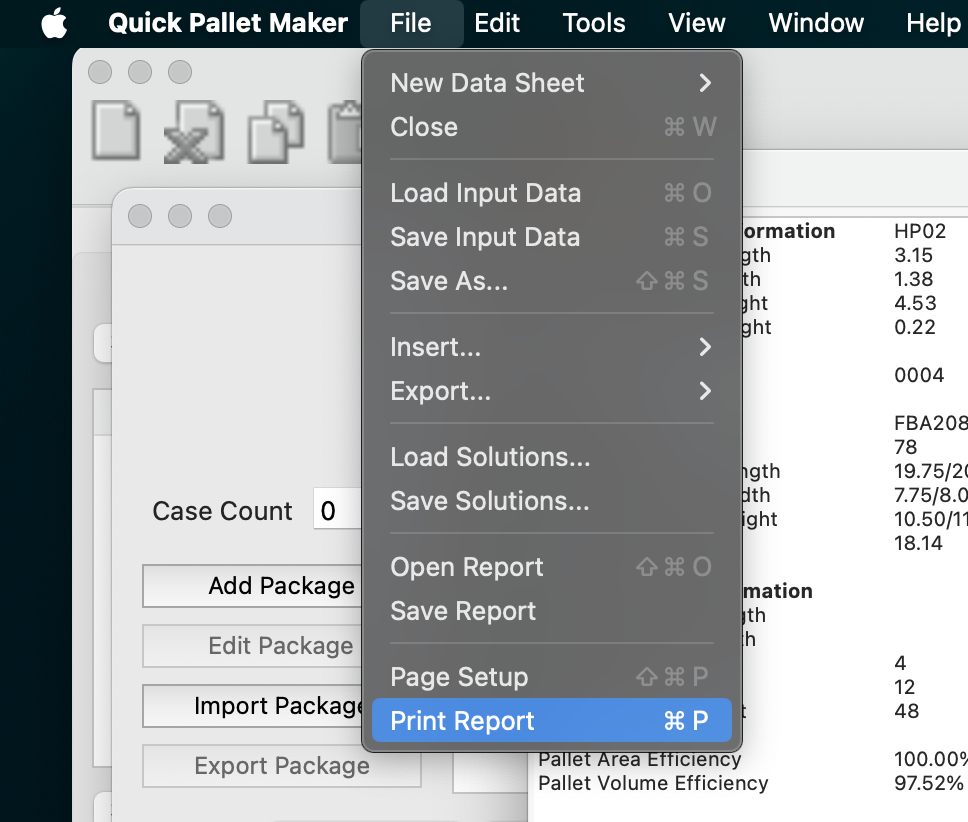
File - Print Report
The pallet report window will appear. It's similar to the box report window, but includes the drawing and details of each pallet. Note that the box codes are generated automatically with the application and can be cross-referenced with the box report. The report title can be edited by clicking on the Edit button. The number of pallets per page in the printout can also be changed.
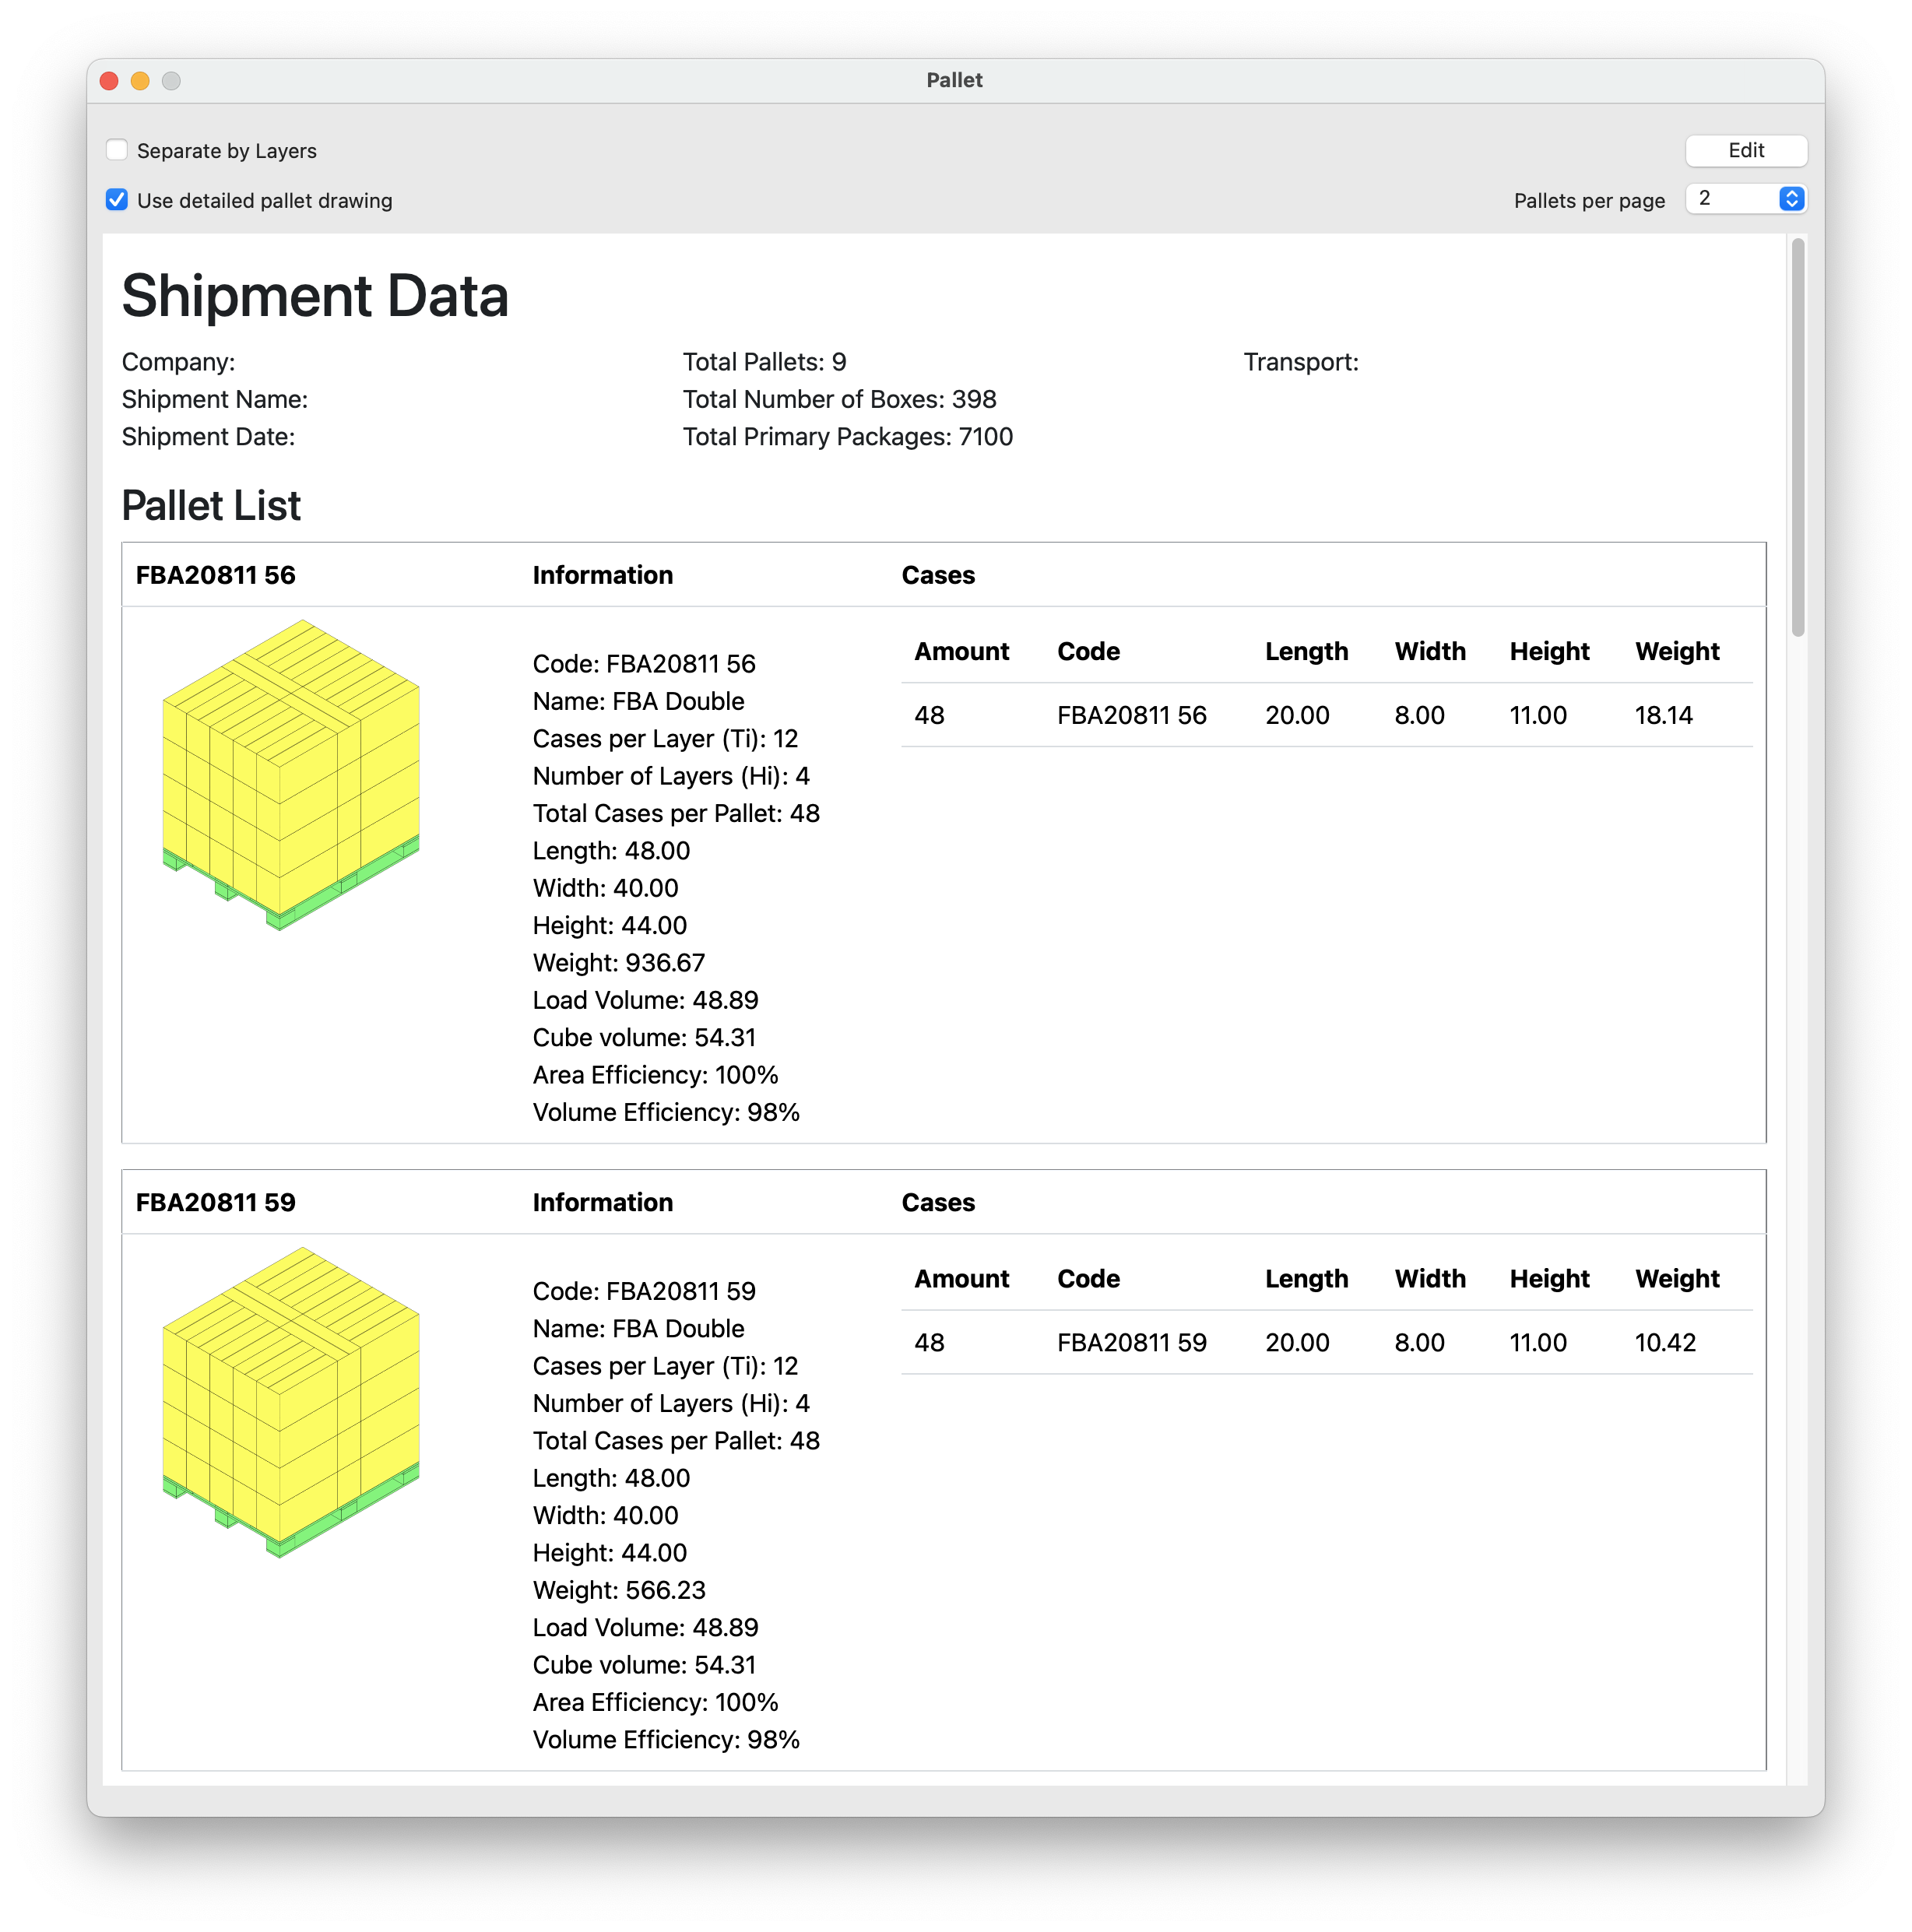
Pallet report top
If we scroll down to the bottom, we will see that the final pallets contain a mix of boxes with different contents.
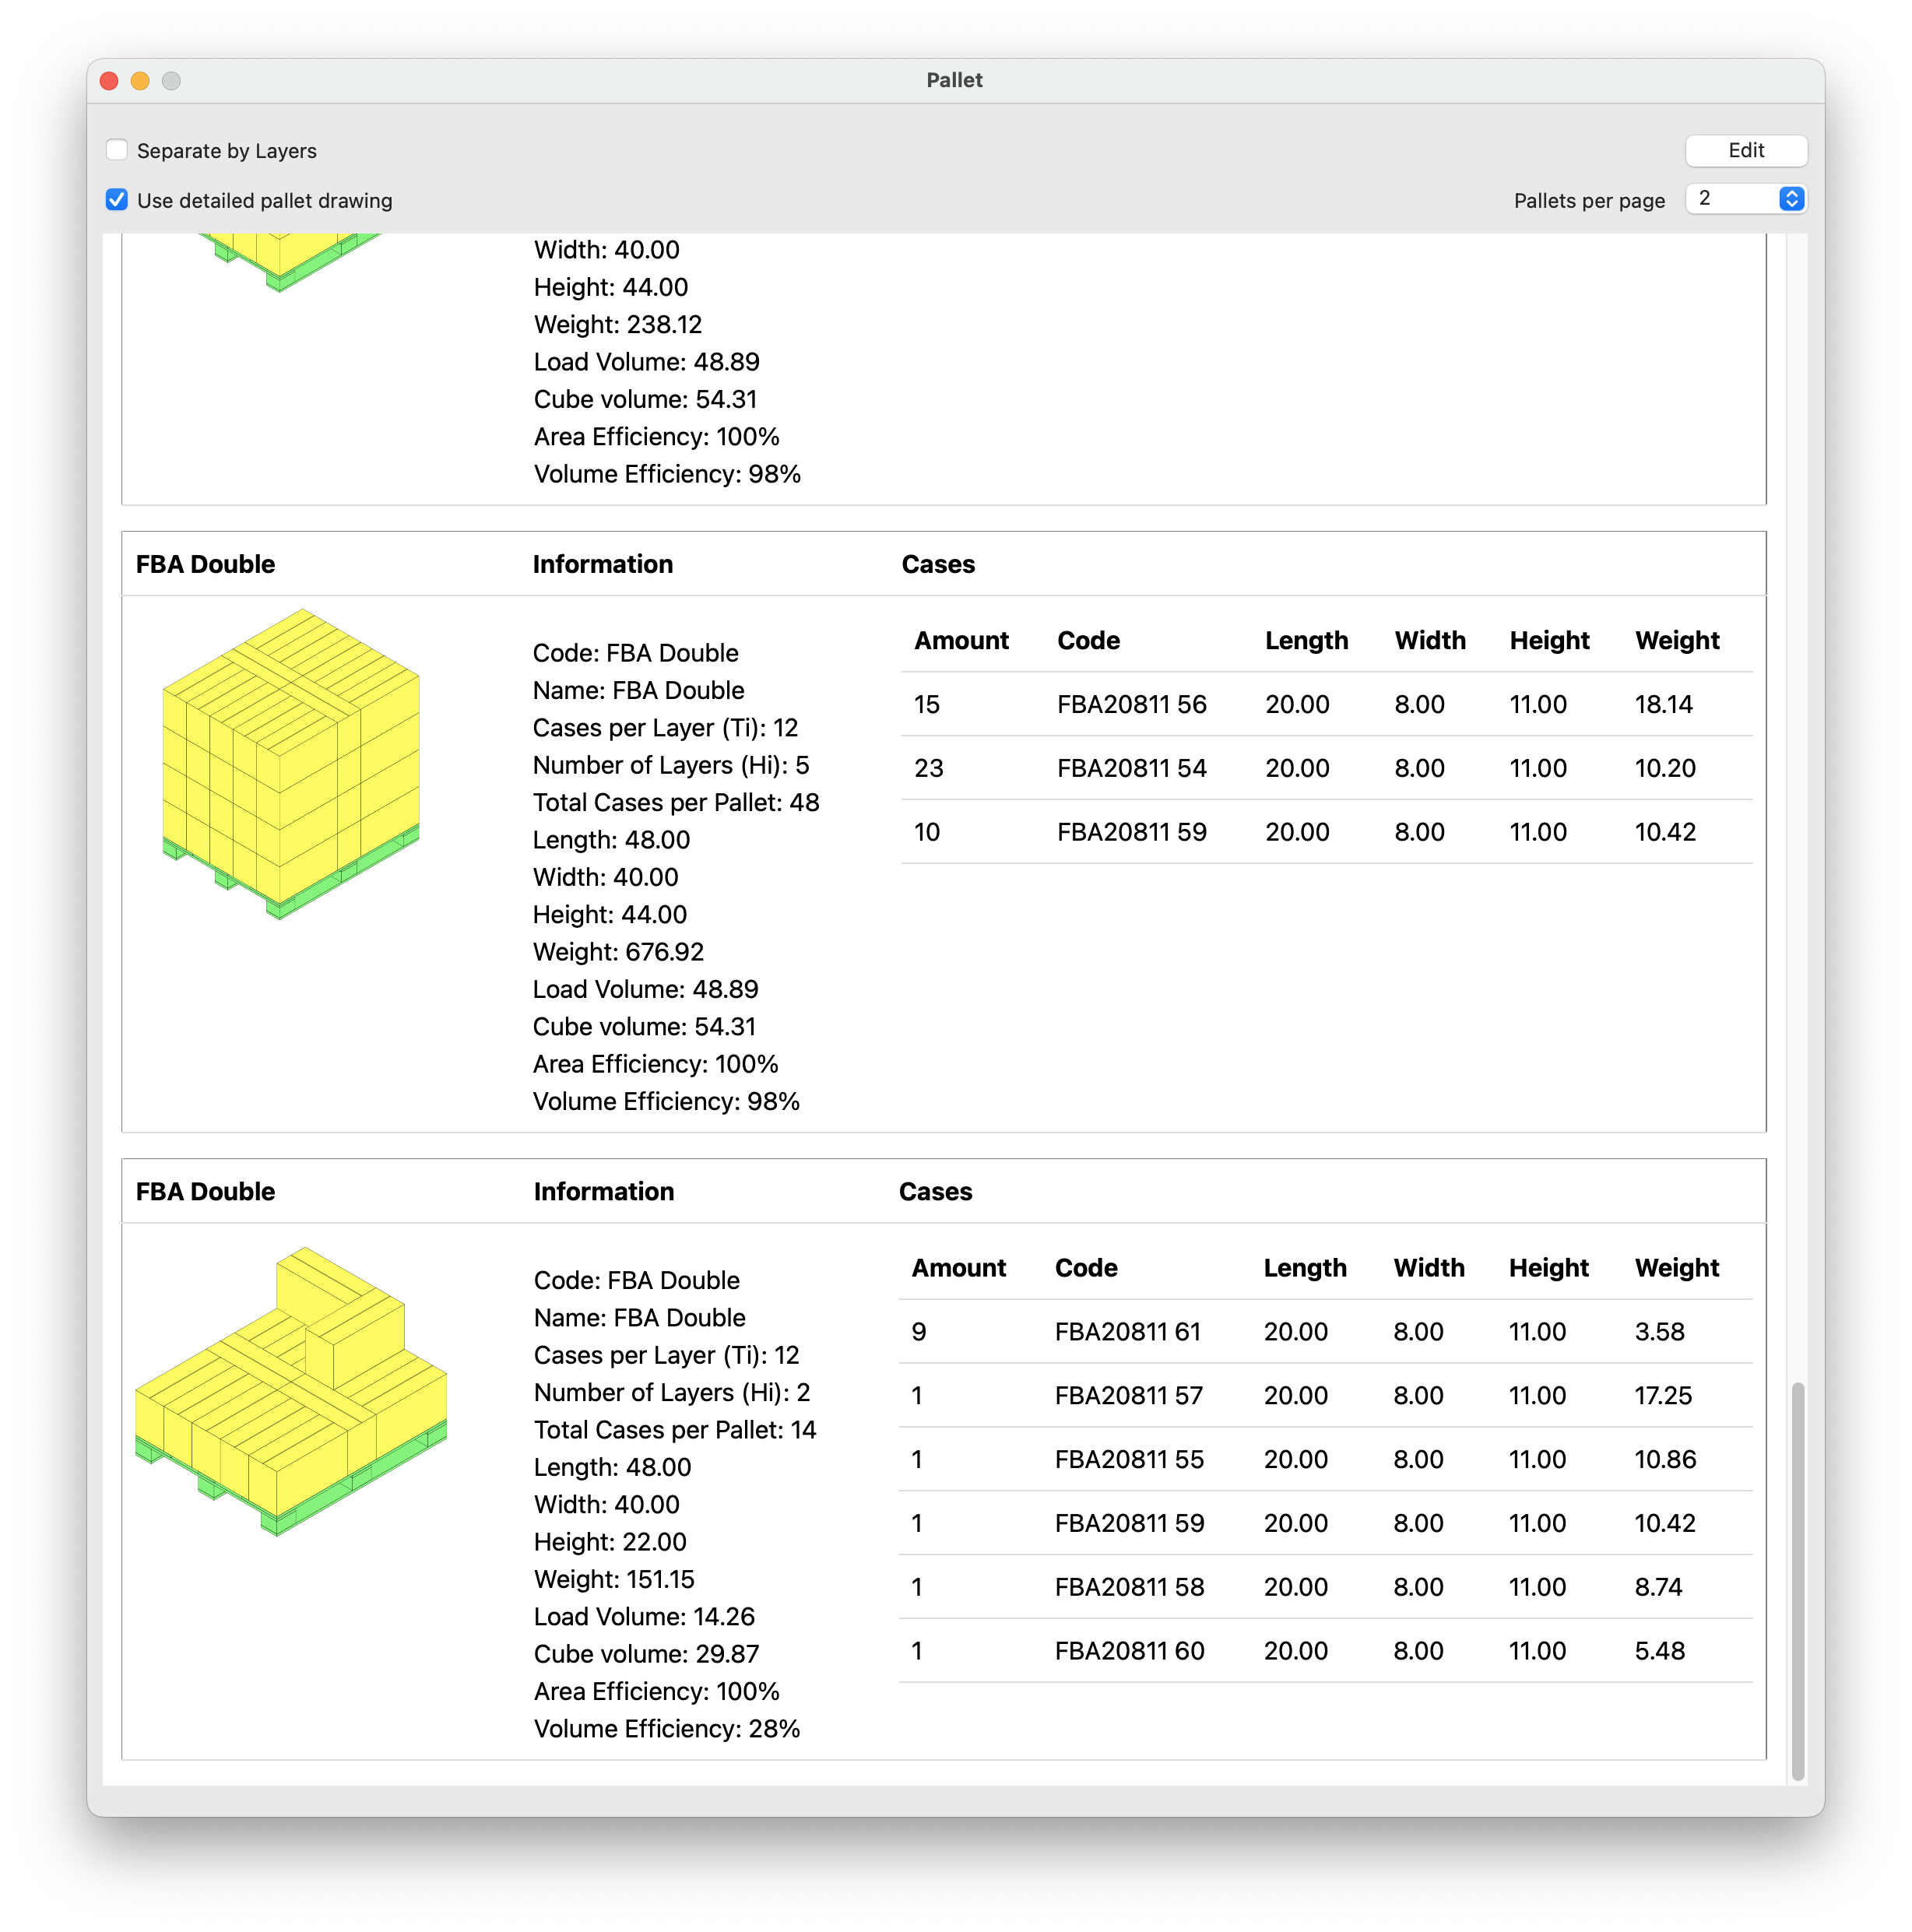
Pallet report bottom
The HTML version of the report can be saved by using the File - Save Report command.
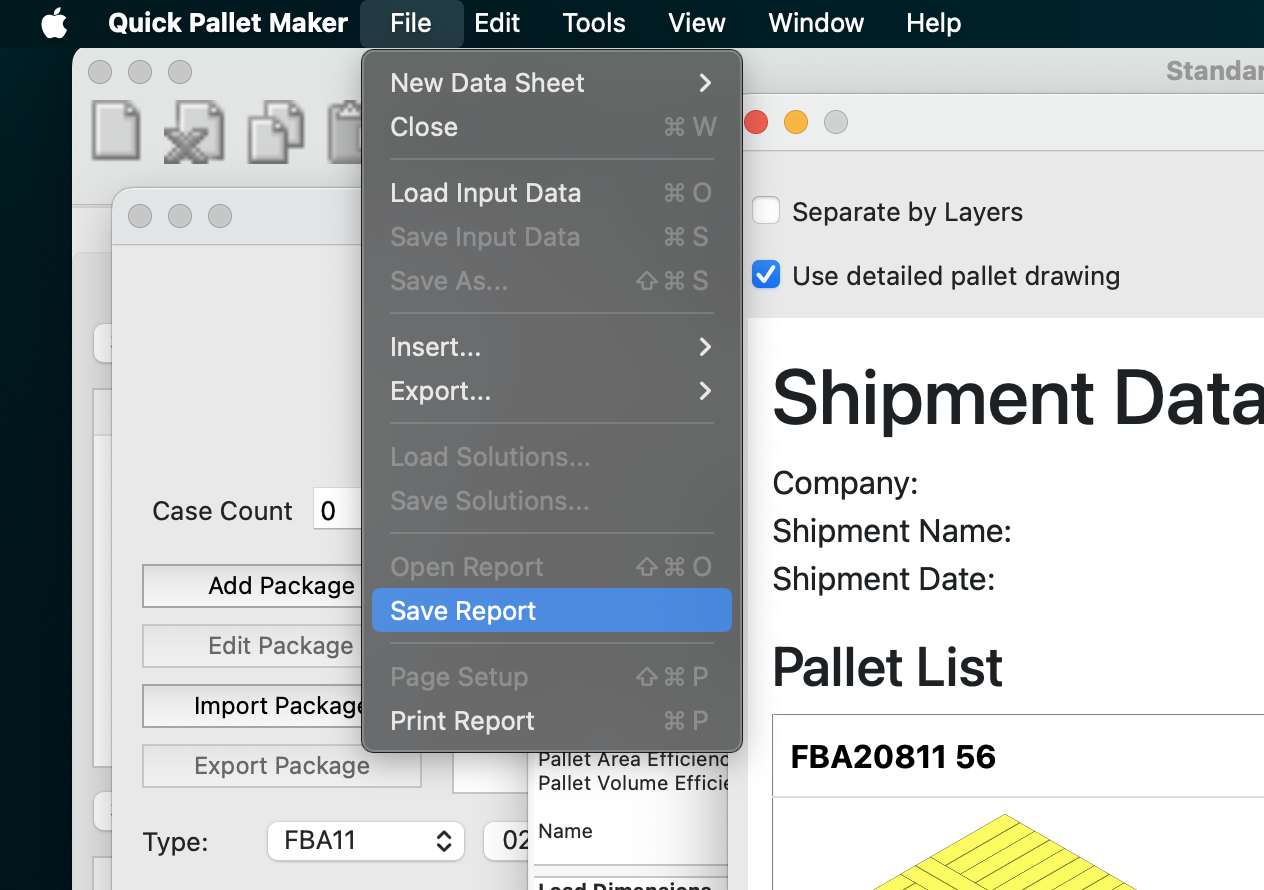
File - Save Report
The next step is to see how these double-stack pallets will look in a container. For this, we select all the pallets in the list, and then choose Tools - Fill Container
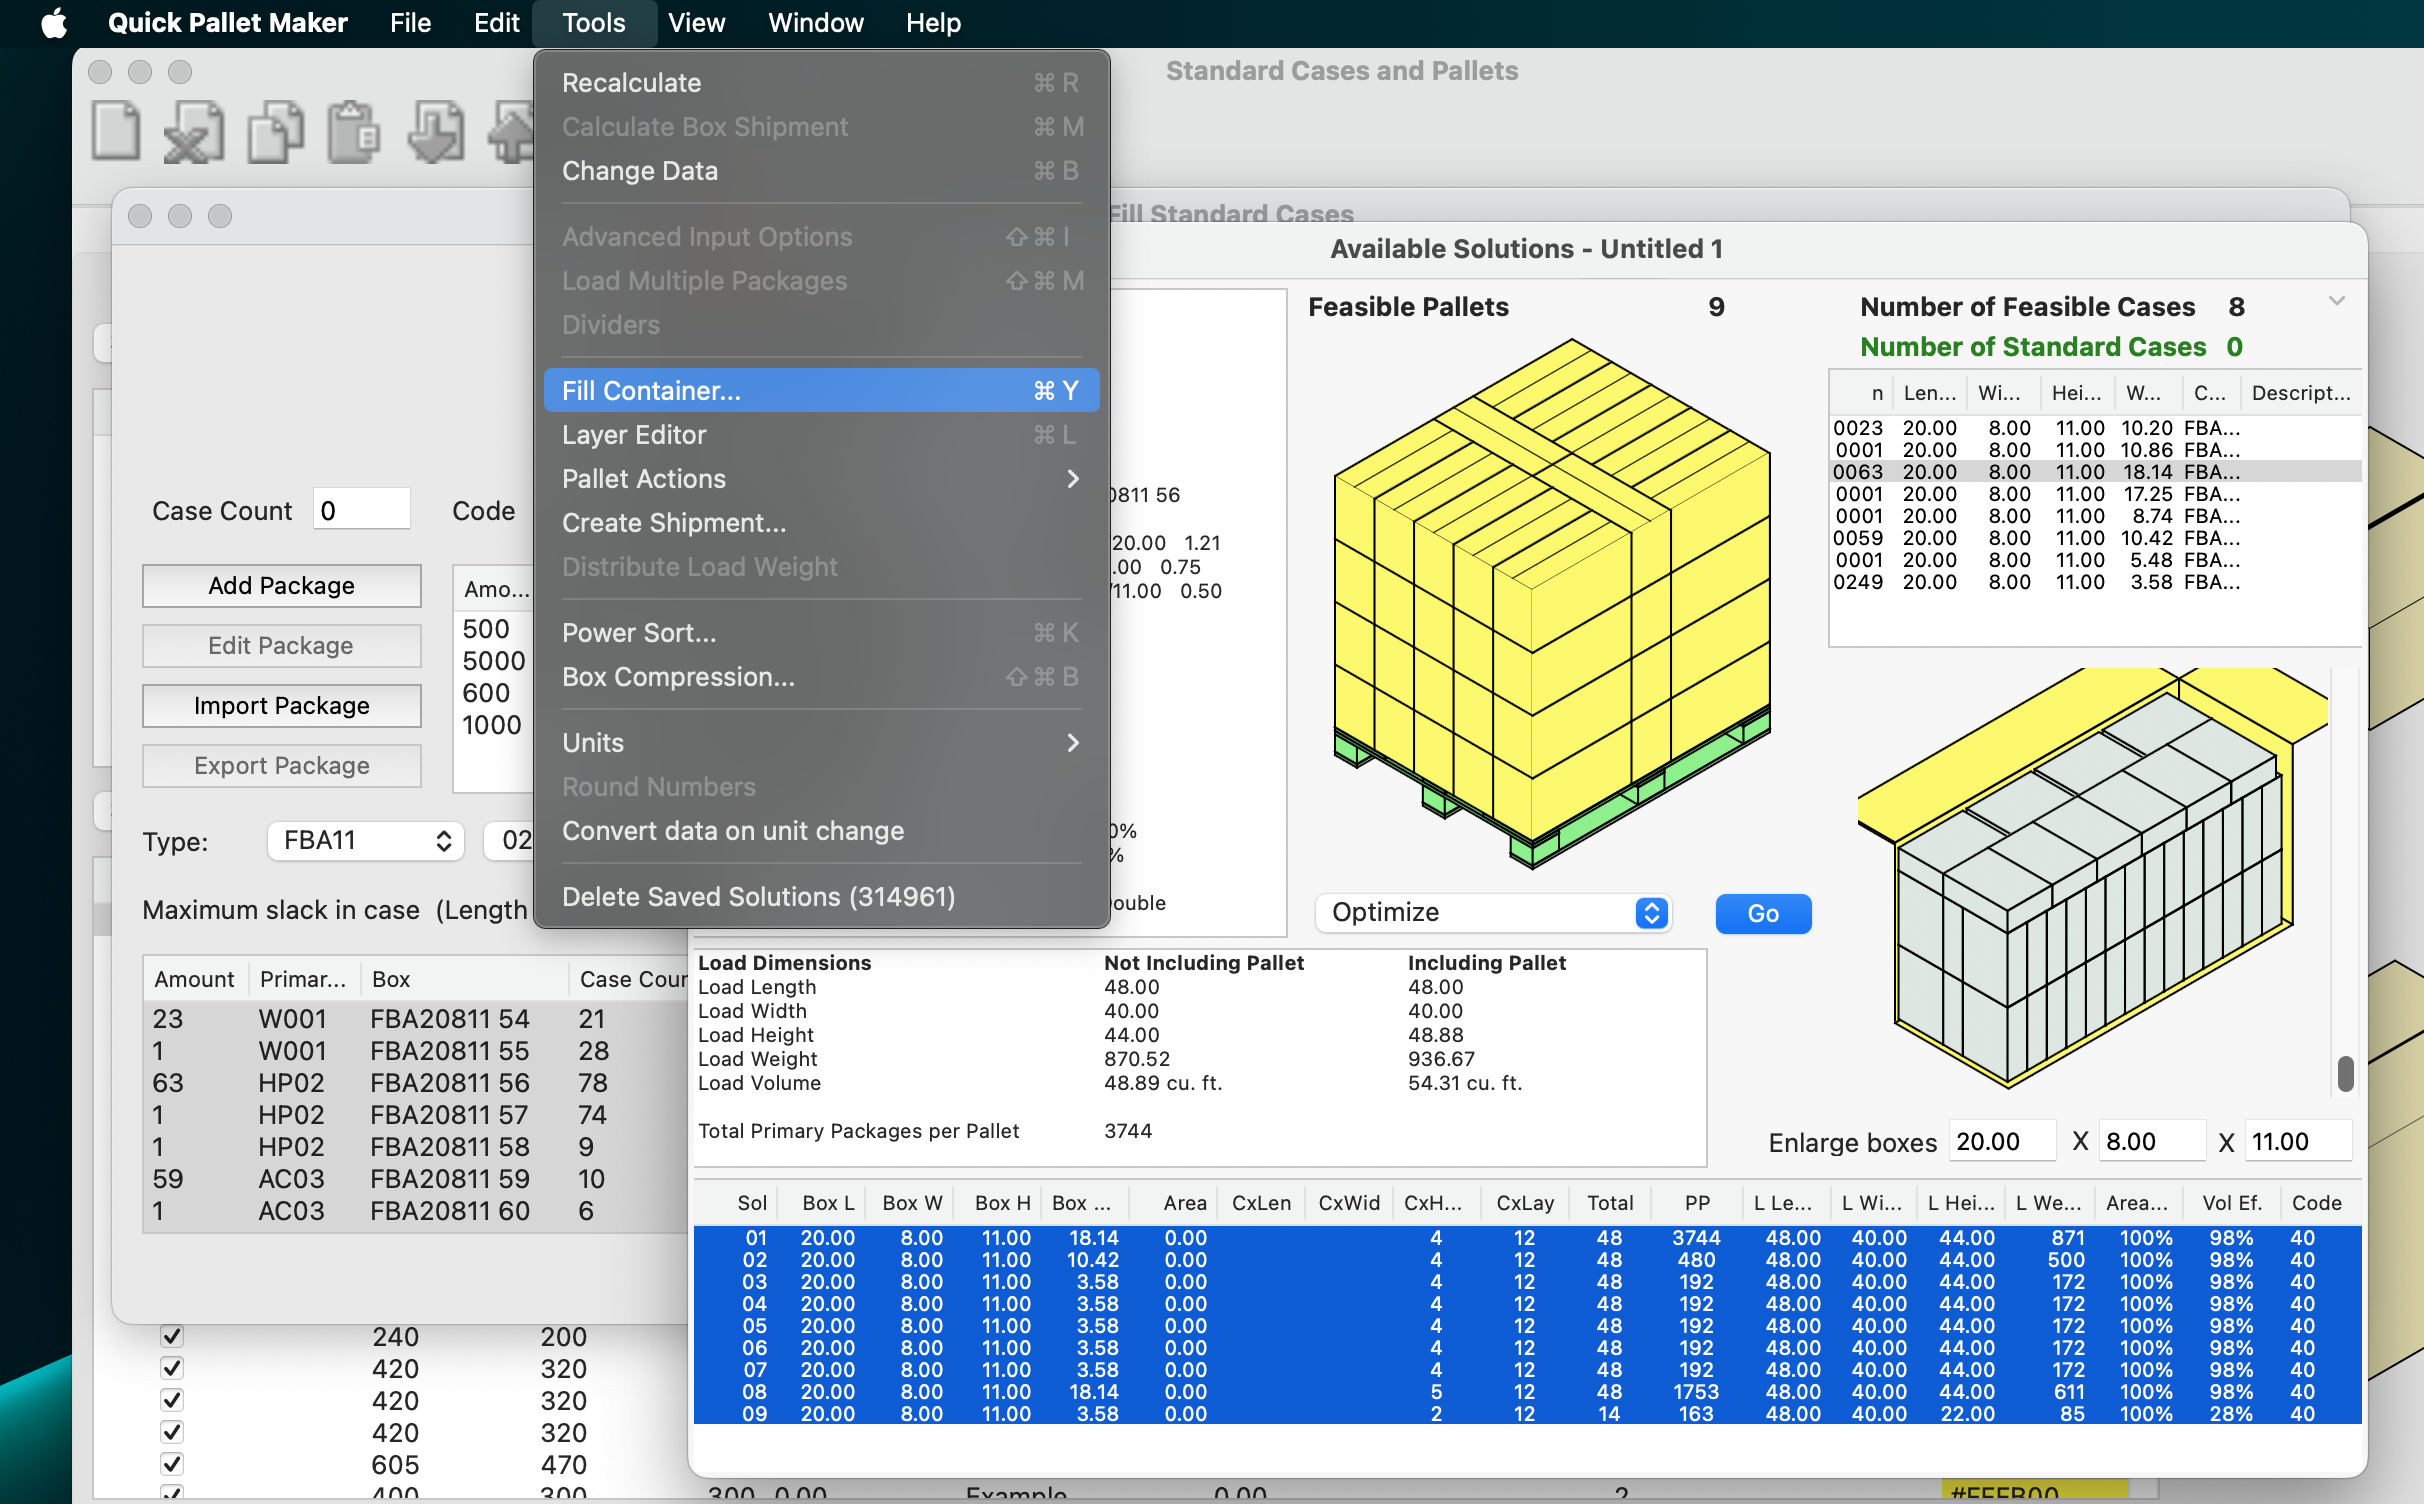
Tools - Fill Container
This will open a new window where each pallet type is listed, along with the number of pallets per type. We will select the High Cube 40 container and make sure that the Pallet Stack option is checked.
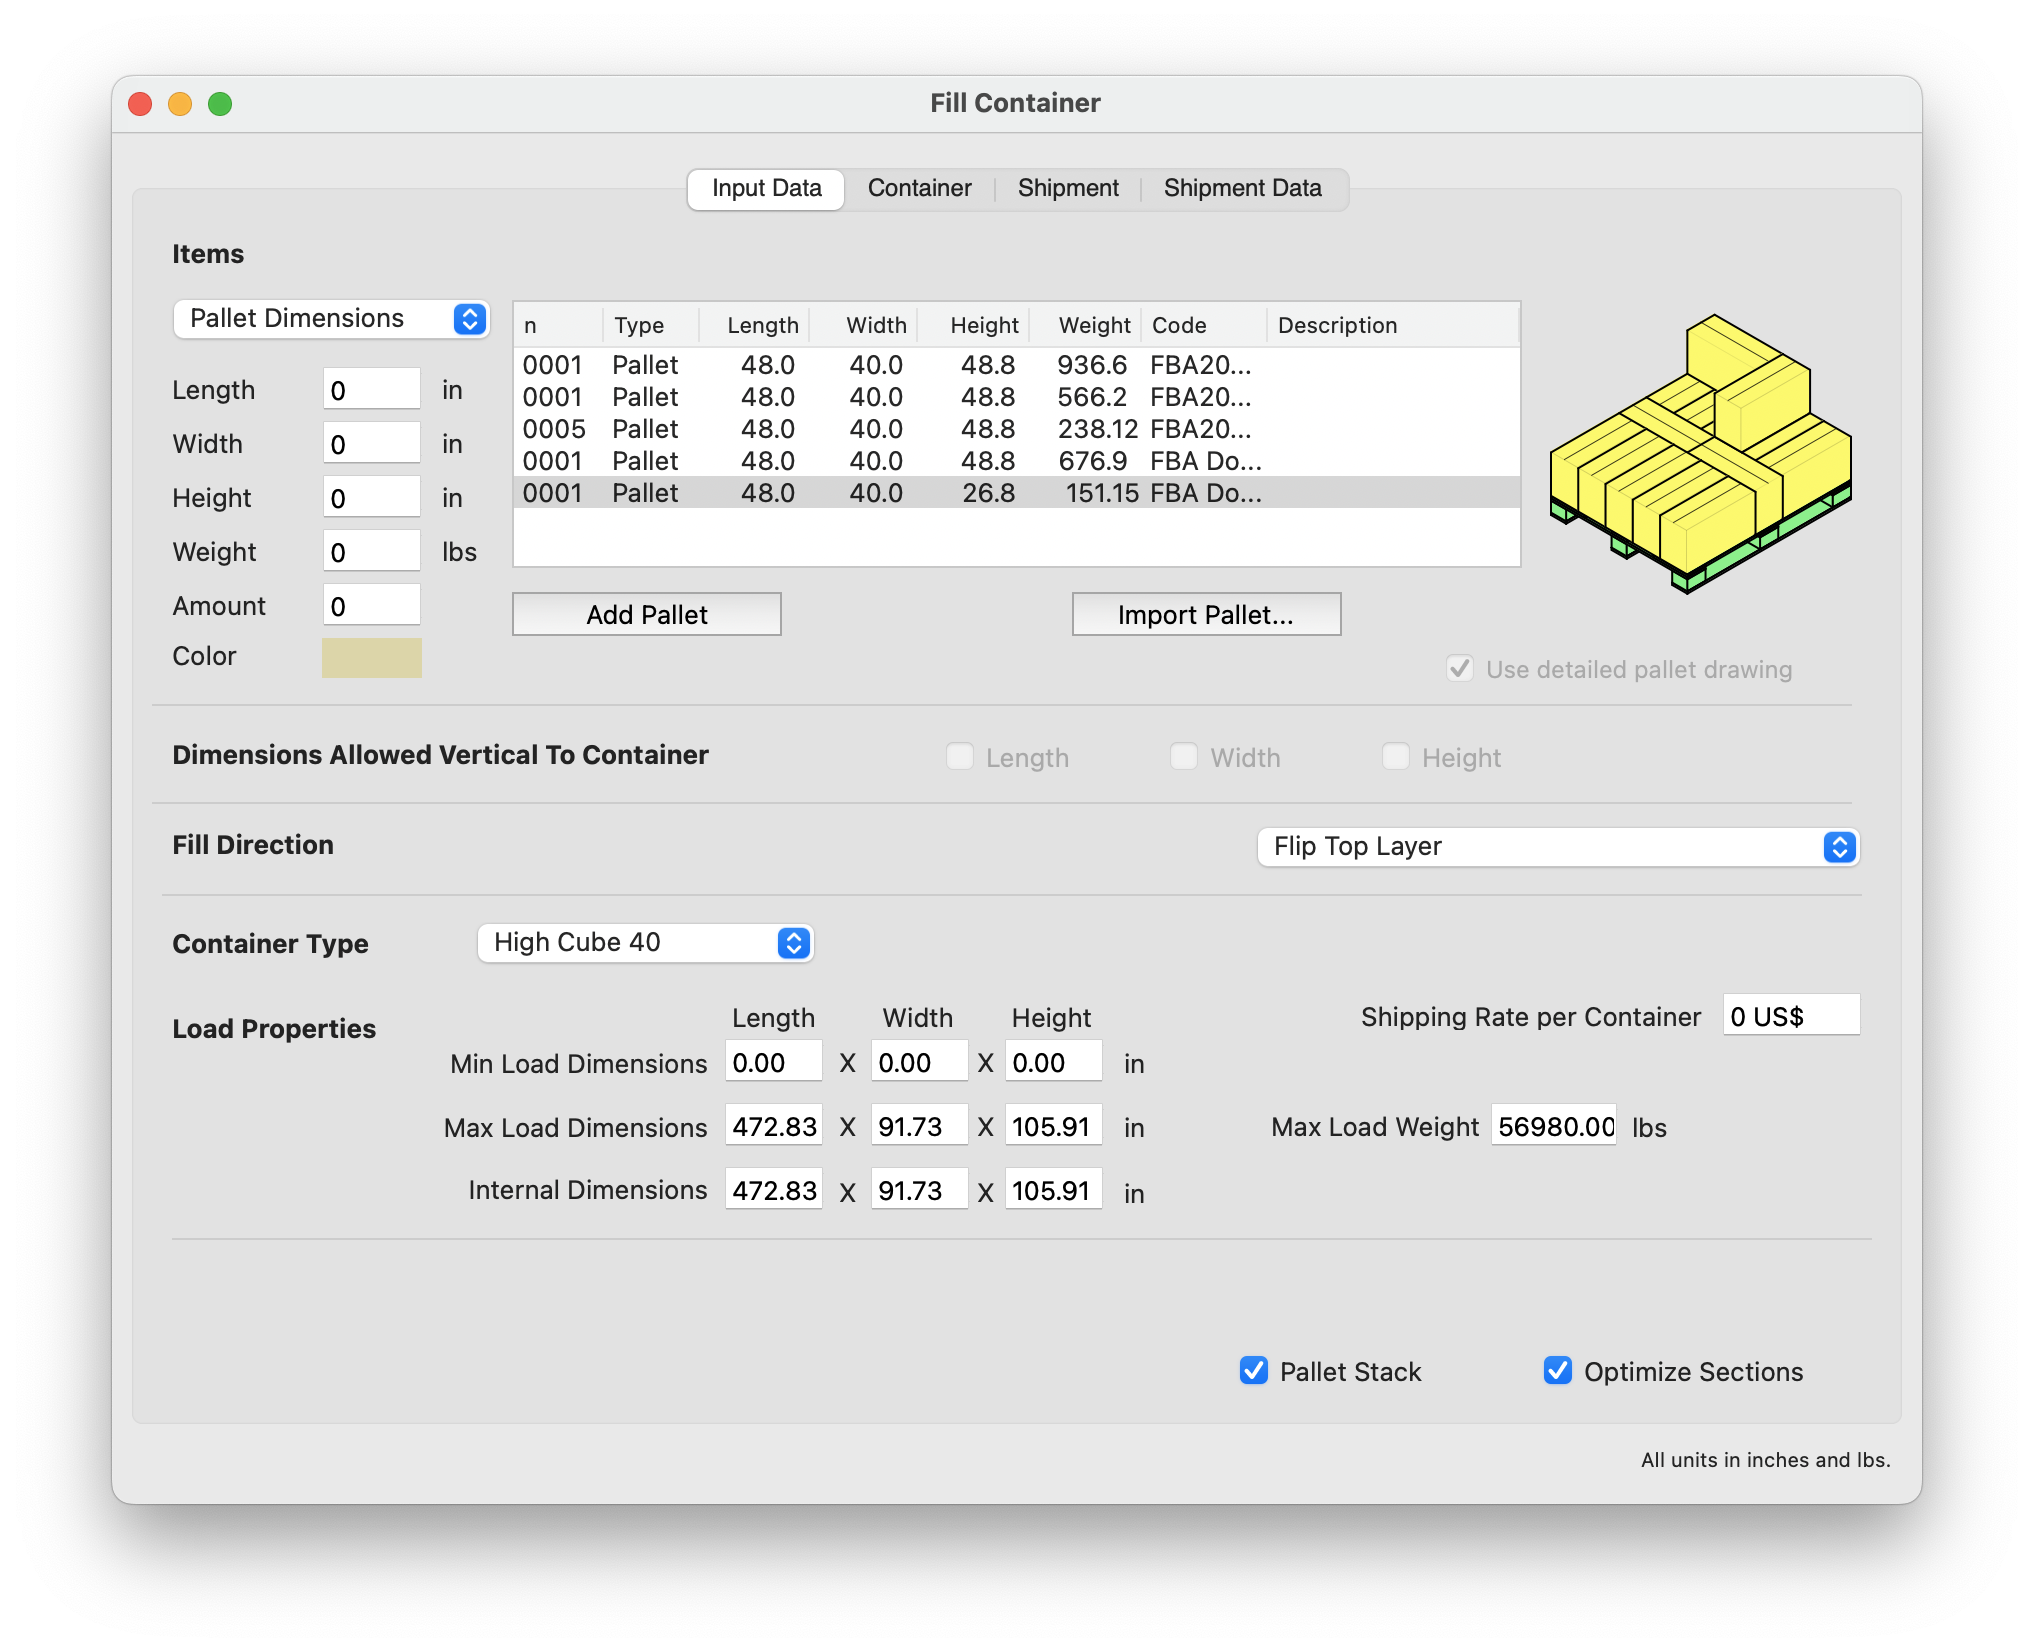
Container Fill window
We click on the Container tab to see the container that was calculated. Basically, the result is 4 perfect double stacks and one pallet of extra boxes.
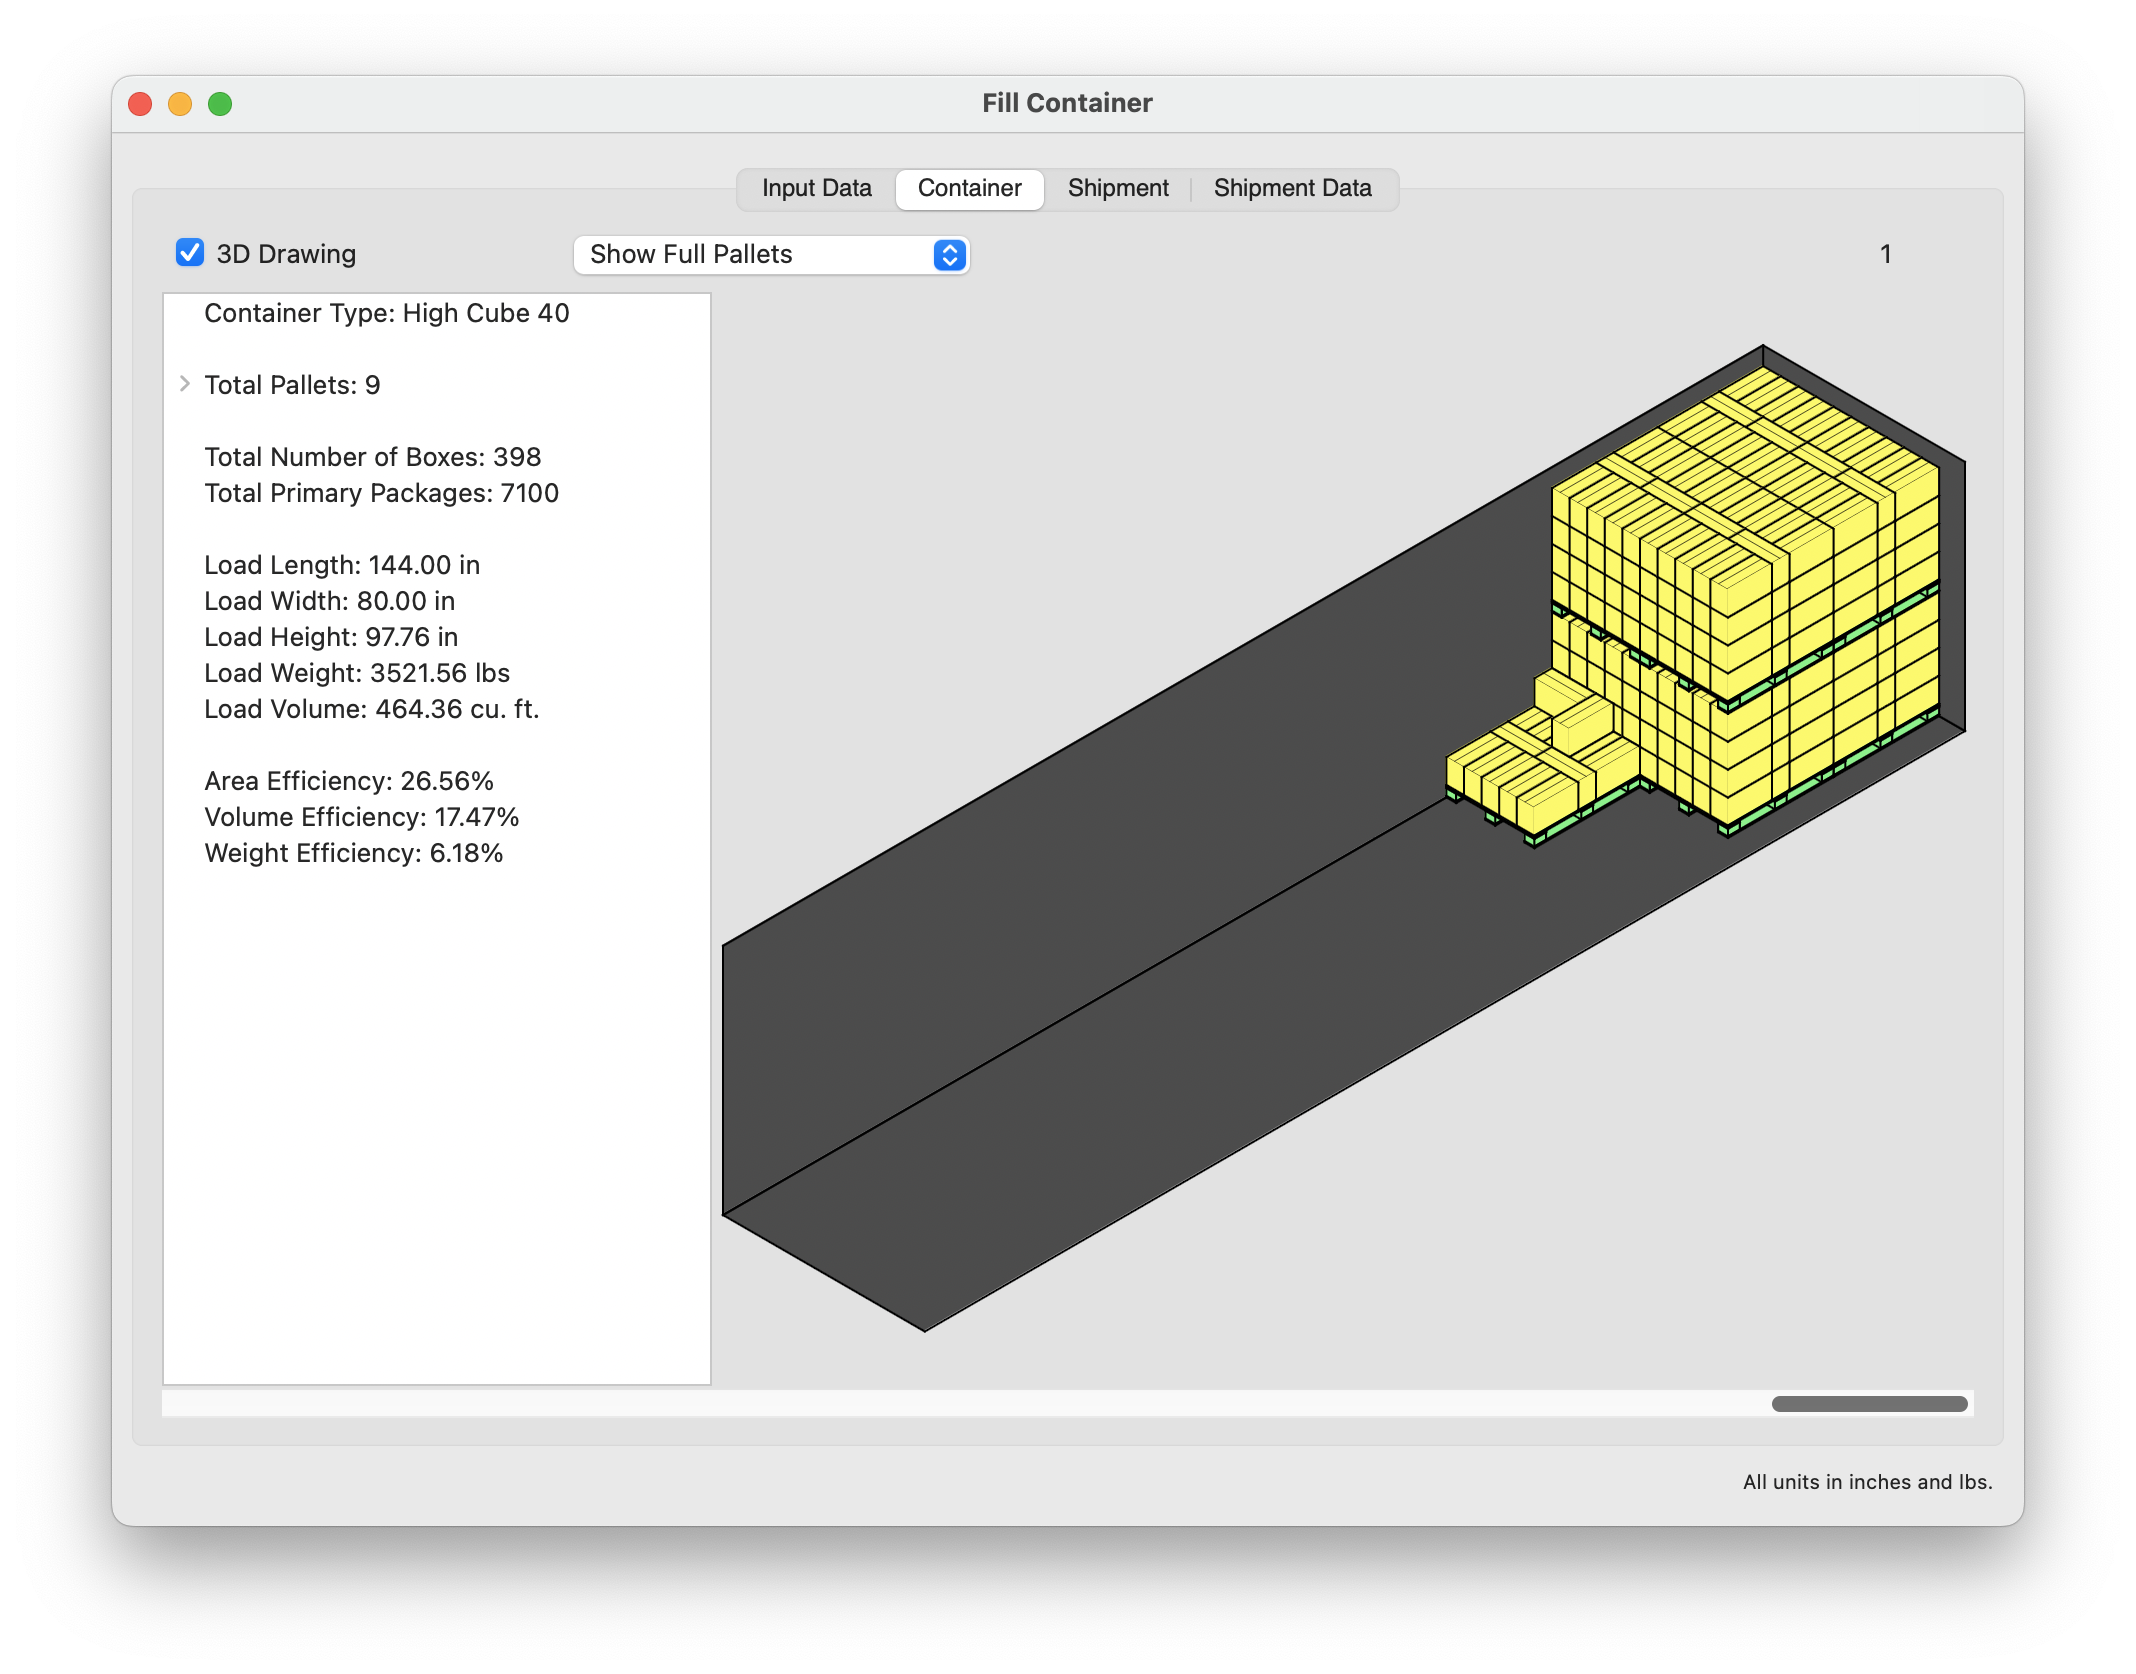
Container with pallets
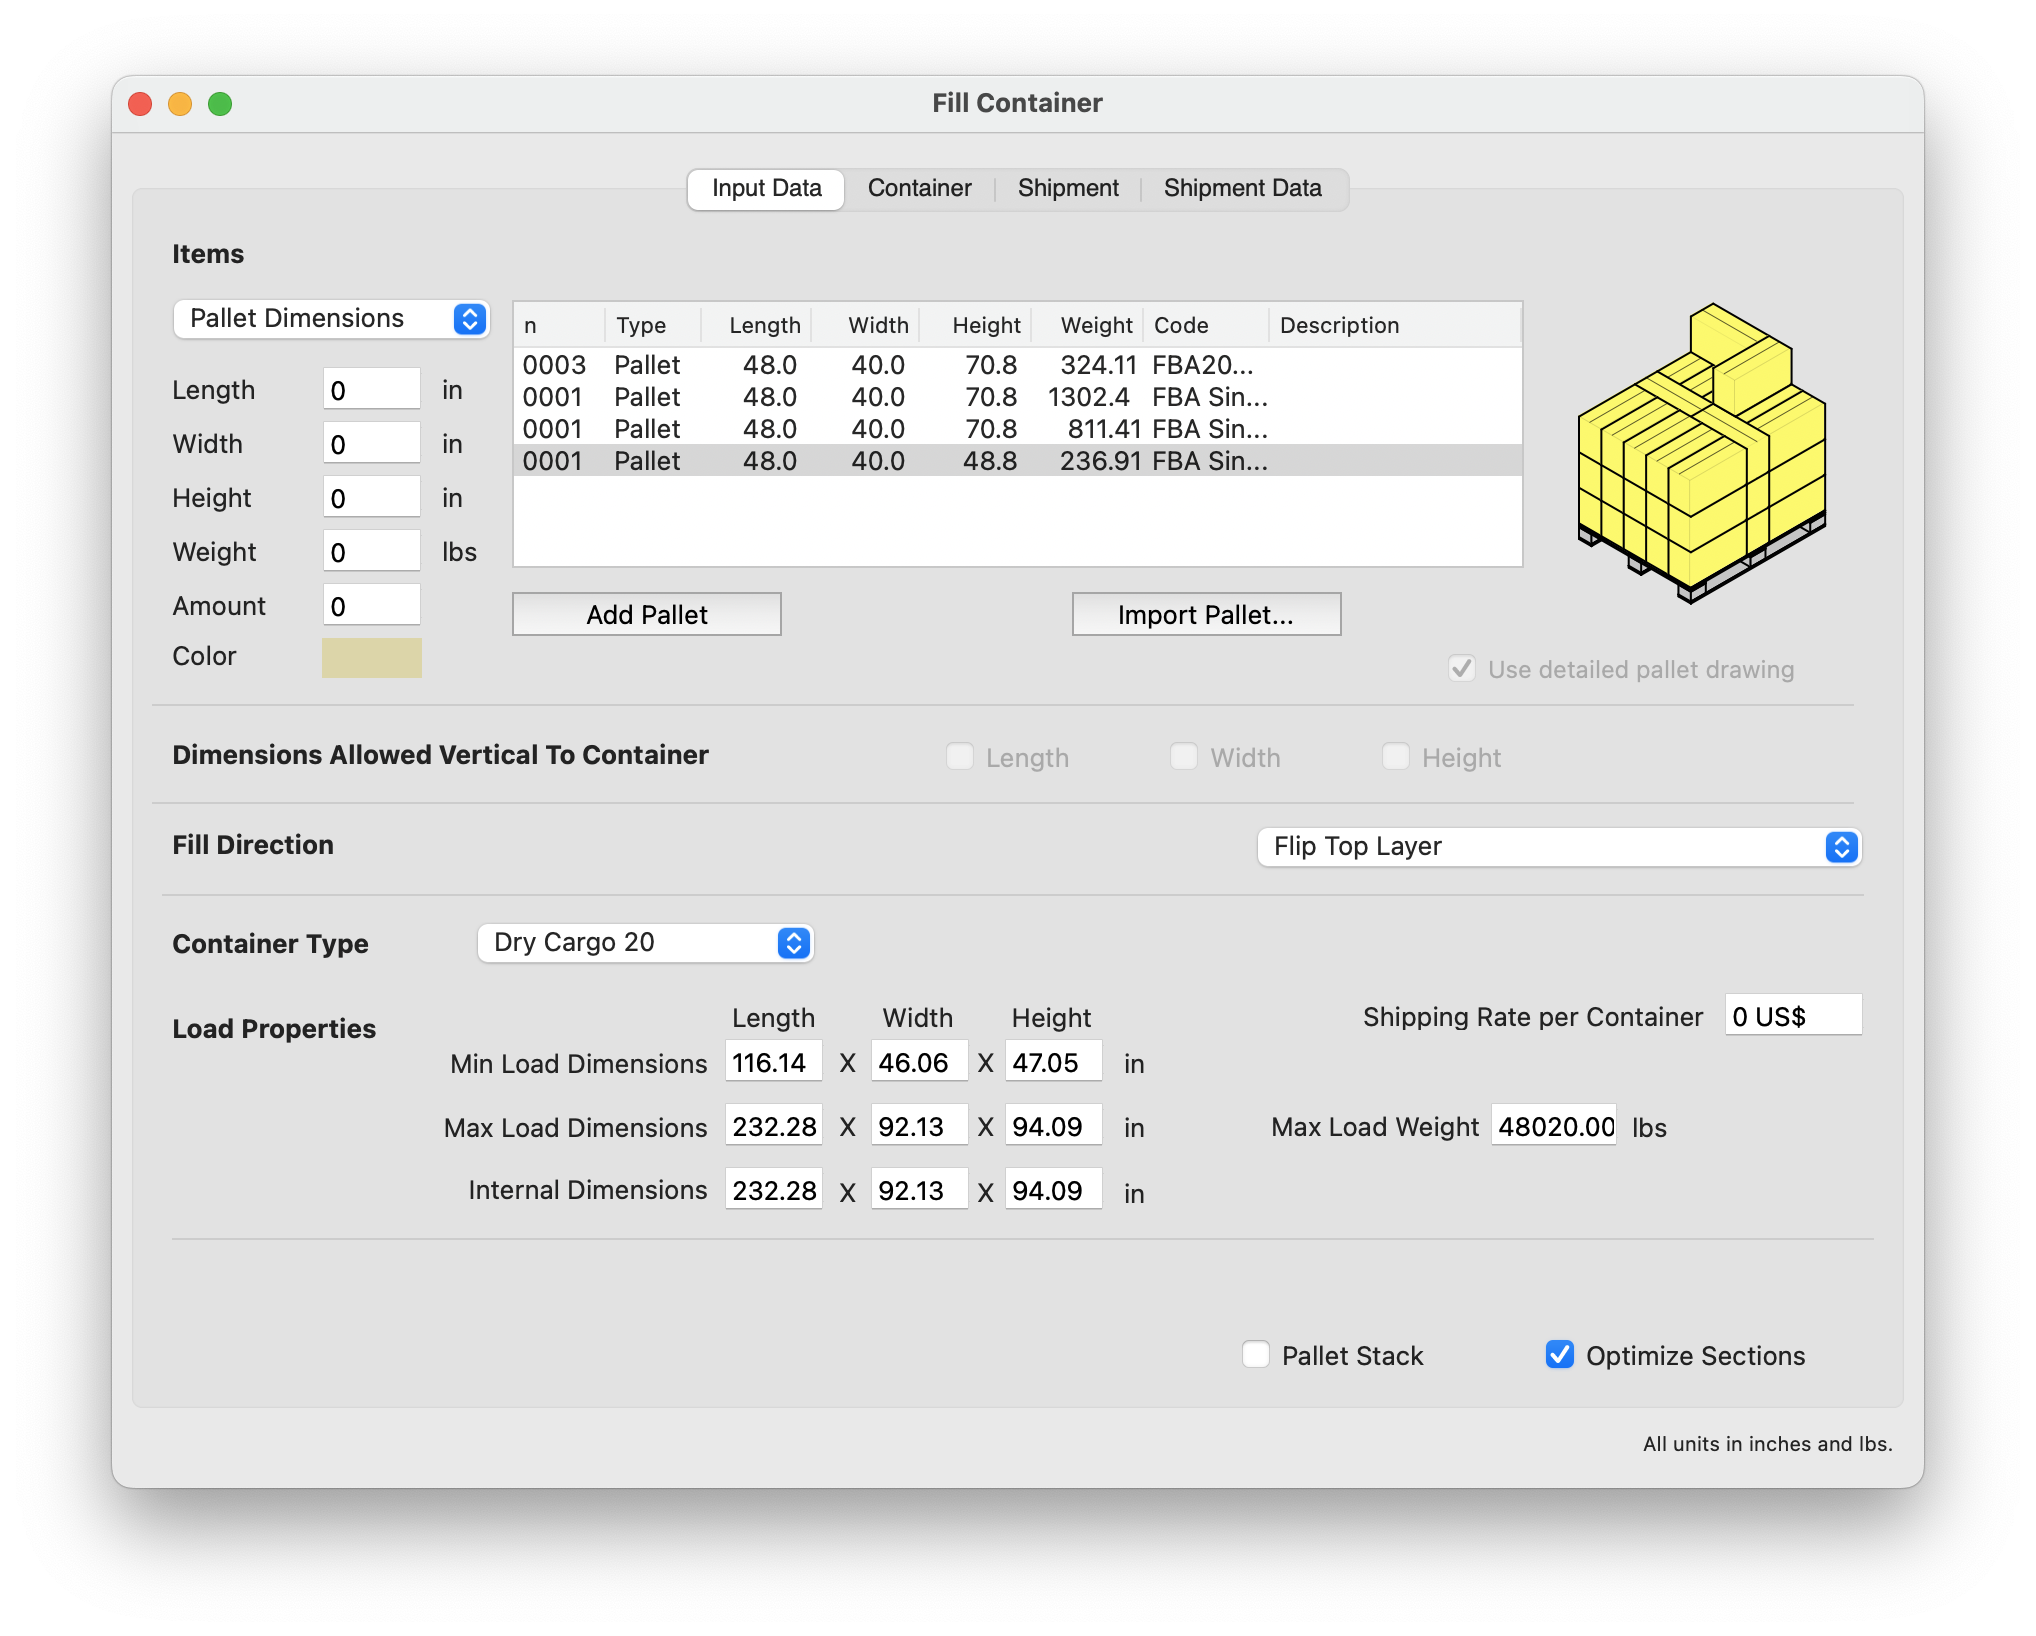
If we wish, we can go back to the box on pallet window and calculate the number of pallets and container fill using the single-stack pallet. For this, we close the Container Fill window and select Tools - Change Data. In the input window, we just change the pallet selection and the information is updated.
Single-stack input data
After calculating with Tools - Calculate Box Shipment, we see that we're generating now only 6 pallets.
Available Solutions window
If we select them all and then choose Tools - Fill Container, we will obtain again the Container Fill window. But this time, we will choose the 20' container and uncheck the Pallet Stack, since they are single stack (maximum height = 72") pallets.
Container Fill window
Clicking on the Container tab or using Tools - Recalculate will calculate the container fill and display how the six pallets would look in a 20' container. Custom containers or truck sizes can be added to Quick Pallet Maker in the standard container section for use in filling.
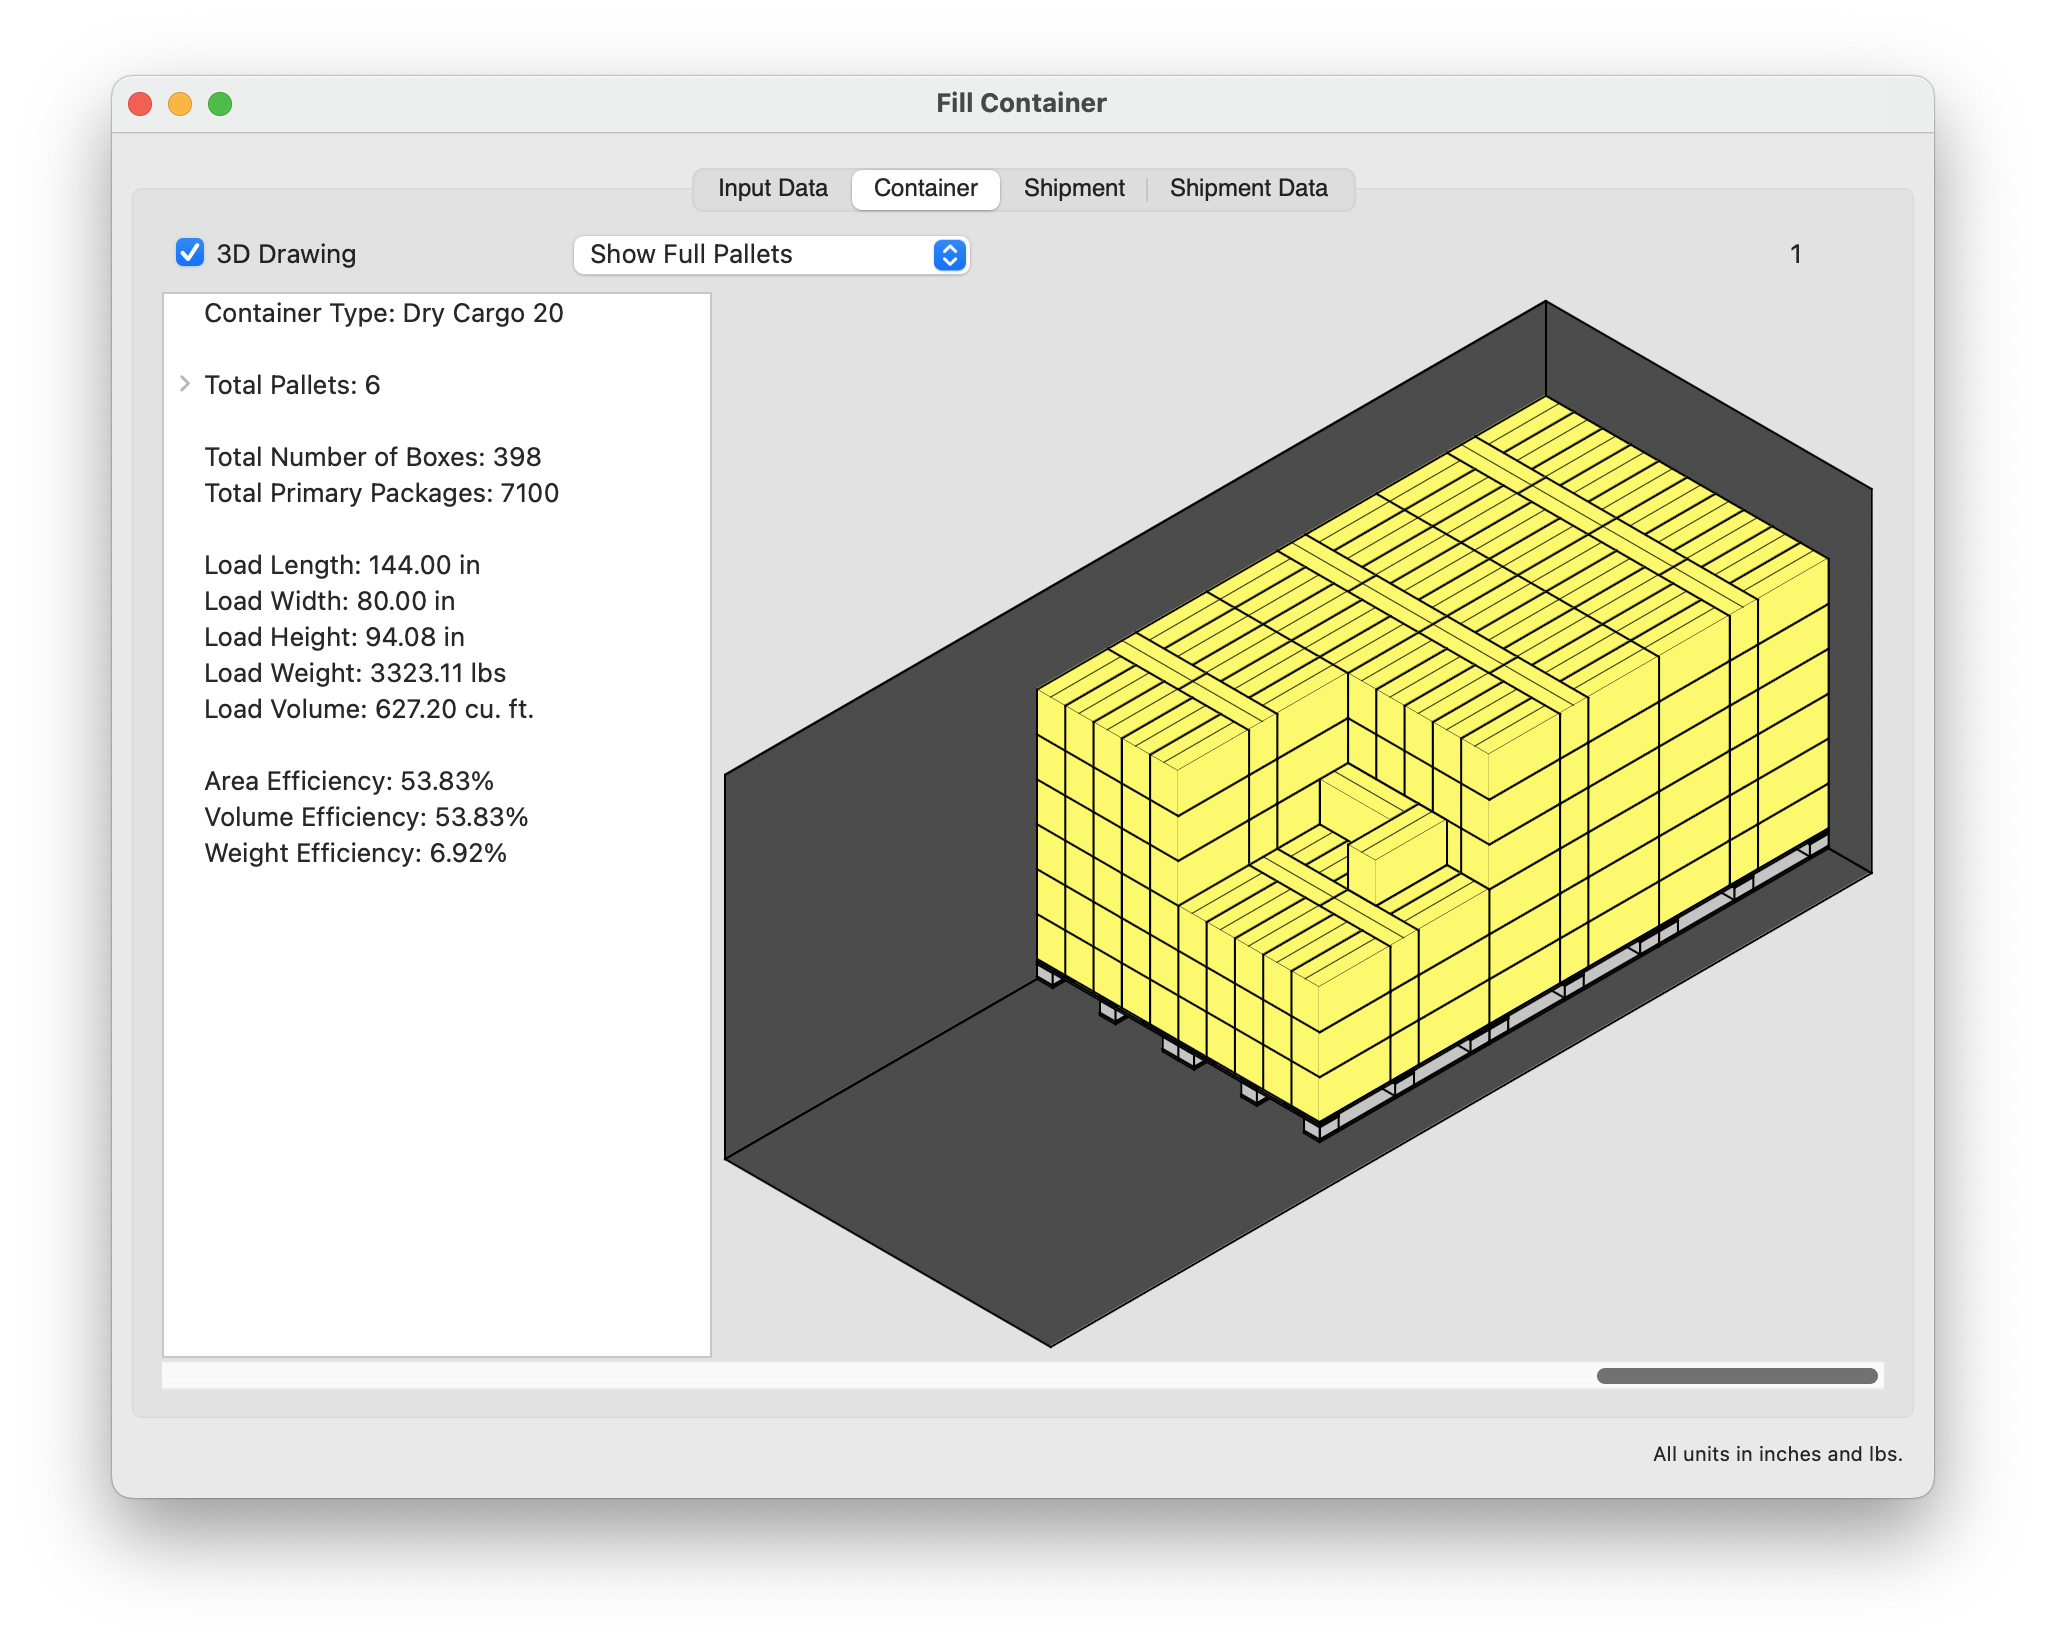
20-foot container with pallets
When in the Available Solutions window, individual pallet reports can be created by using the View - Detailed Report command. This report contains four different tabs.
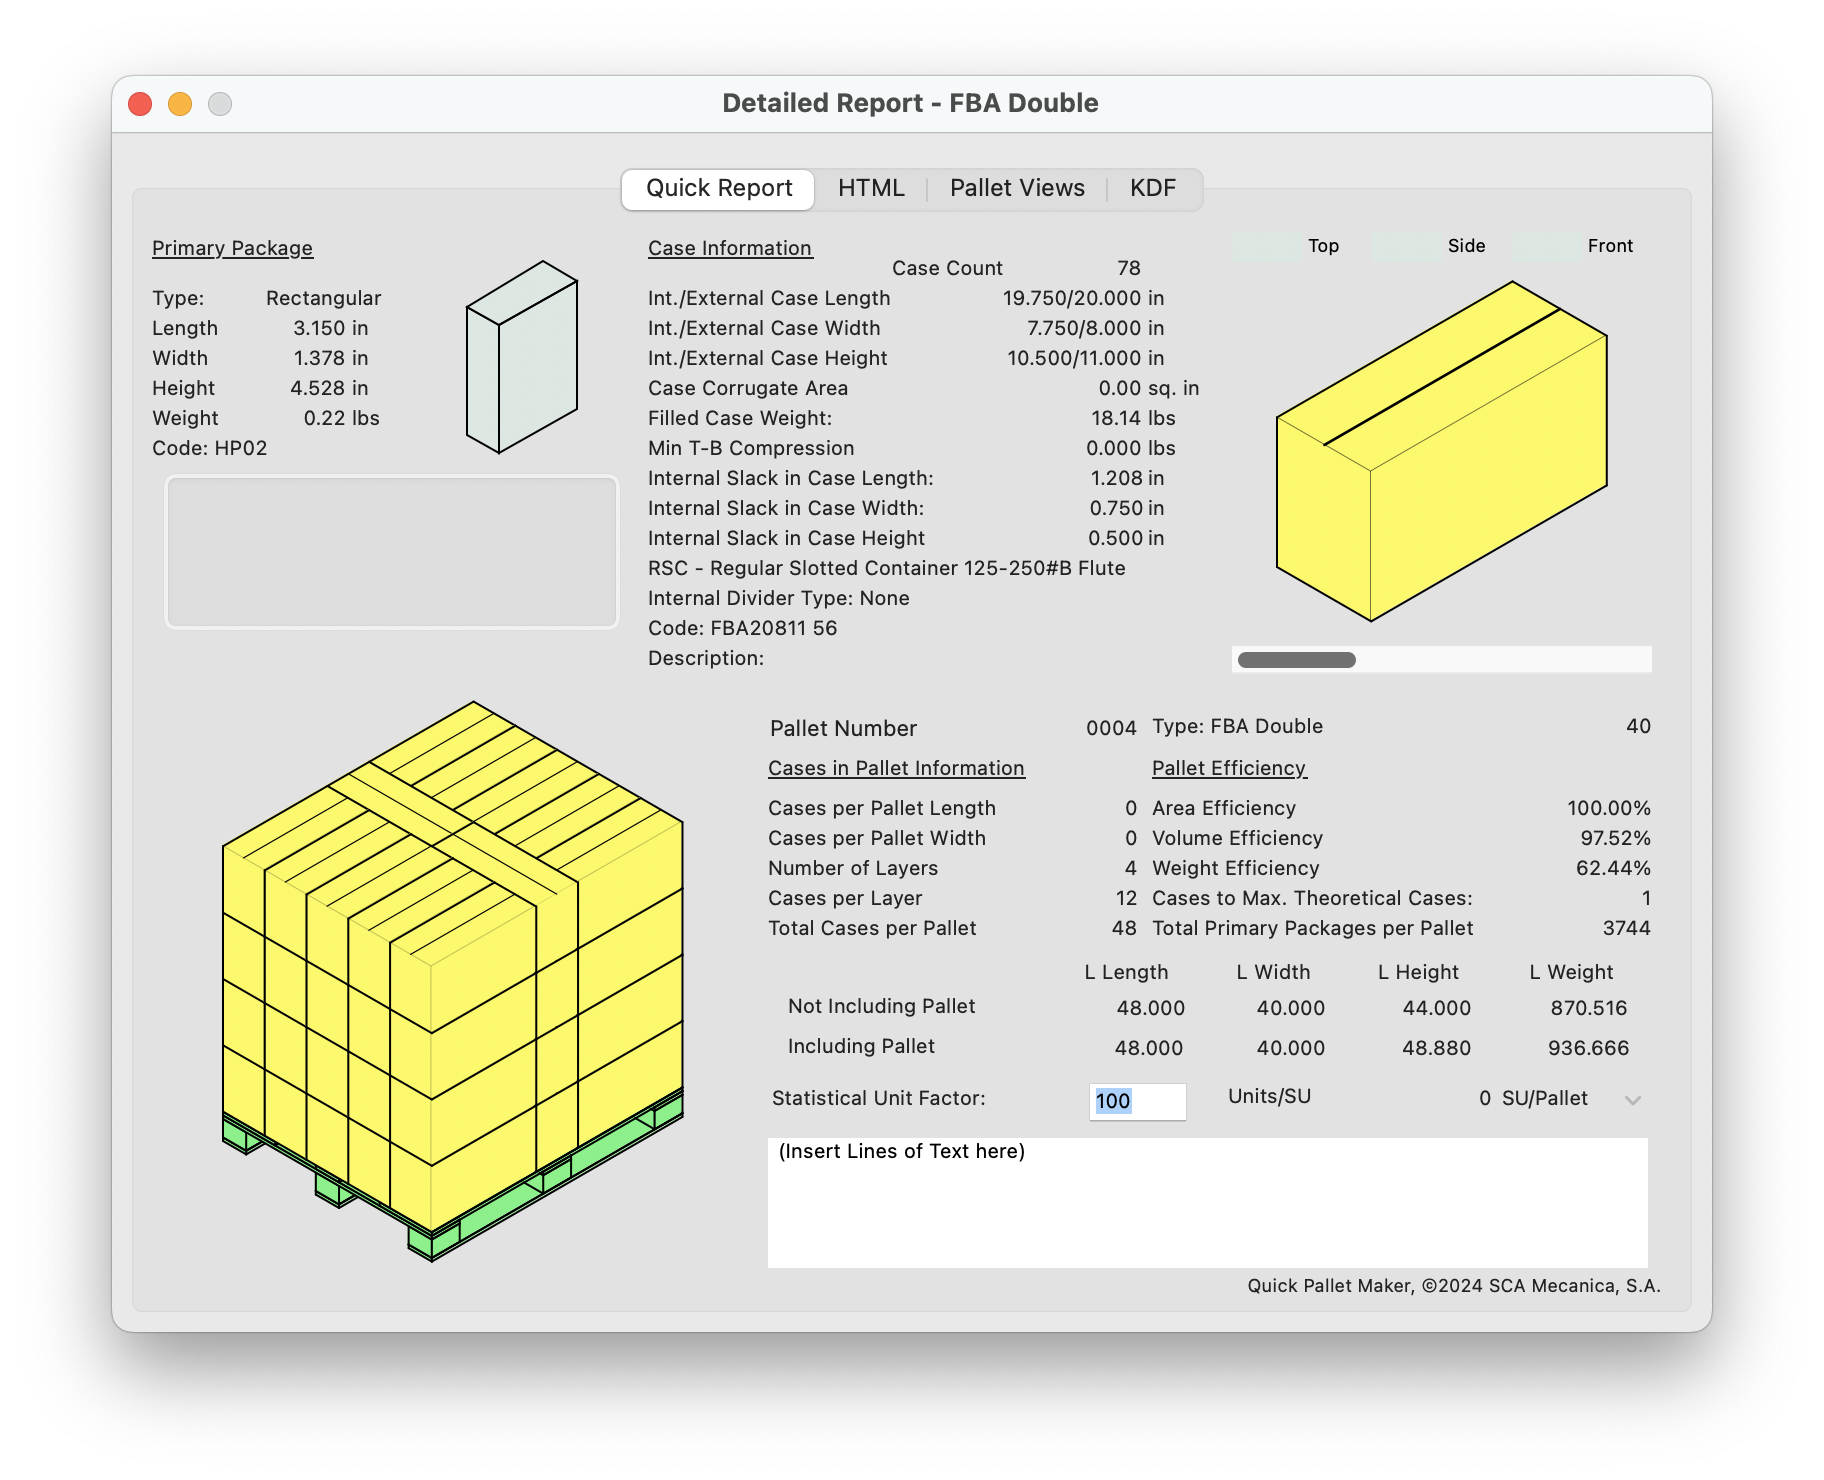
Detailed pallet report
The third tab contains pallet views,
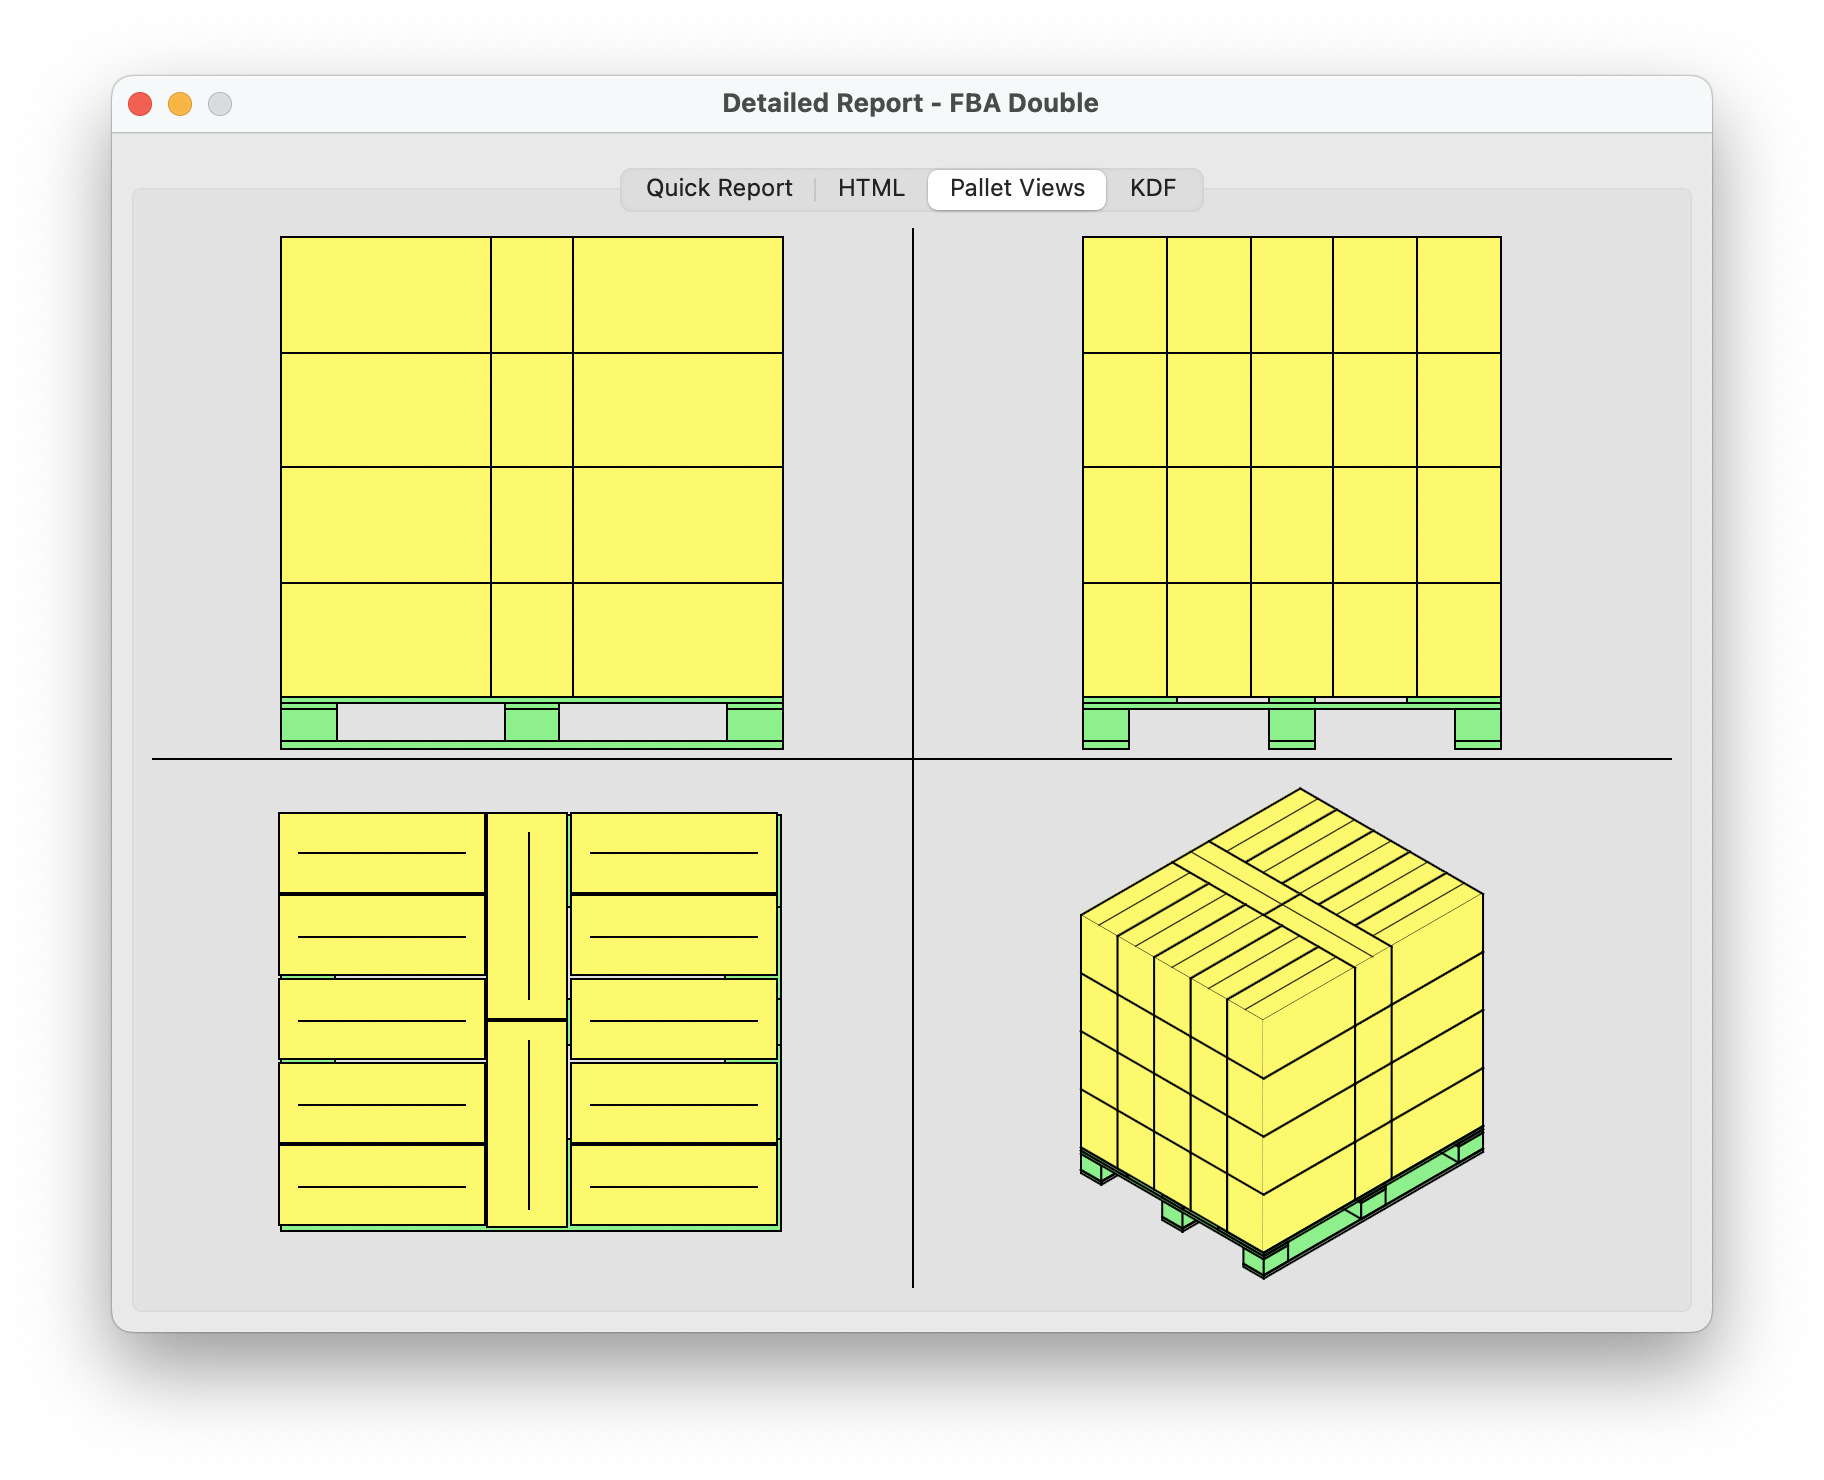
Pallet Views
and the fourth tab contains a KDF (Knocked-Down Flat) box drawing that always serves as a die template for the carton manufacturer.

Knocked-Down Flat
Watch the video
This example is also available as a YouTube video.YouTube Video